• The Ultimate 2026 Checklist for Housekeeping in Hotels: 8 Critical Protocols

    In the competitive hospitality industry, cleanliness isn't just a requirement; it's the cornerstone of guest satisfaction, safety, and brand reputation. A pristine room can be the difference between a one-star review and a five-star recommendation, directly impacting revenue and repeat business. For business owners and facility managers in any commercial setting—from hotels and gyms to offices and retail stores—achieving consistent, high-level sanitation requires more than just effort. It demands a systematic, documented approach that leaves no detail to chance.

    This comprehensive guide provides an actionable checklist for housekeeping in hotels, broken down into eight critical protocols that are applicable to any public-facing facility. We move beyond basic tidying to deliver a strategic framework for operational excellence. You will learn specific, repeatable processes for everything from disinfecting high-touch surfaces and preventing bathroom mold to managing allergens and optimizing staff efficiency.

    The goal is to equip your team with a clear, structured system that builds customer confidence and protects your bottom line. We will explore how integrating simple yet powerful tools, like disinfectant wipes, can dramatically improve hygiene outcomes and streamline daily tasks. By implementing these detailed protocols, you can ensure every guest or customer enjoys a safe, comfortable, and impeccably clean environment, solidifying your facility's reputation as a premier destination. This listicle offers a ready-to-use blueprint for transforming your cleaning operations from a cost center into a powerful driver of customer loyalty and positive reviews.

    1. High-Touch Surface Sanitization Protocol

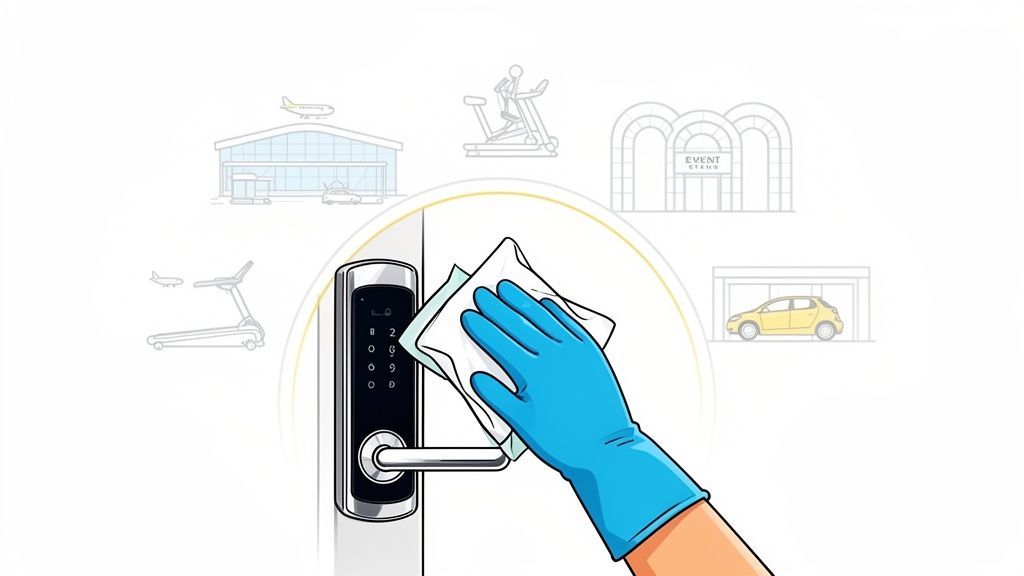
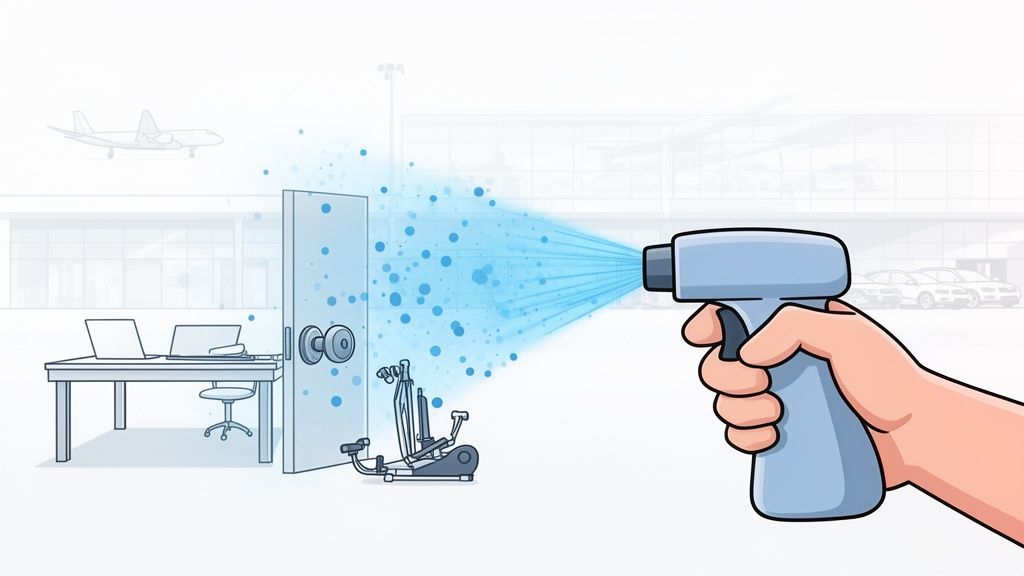
    A High-Touch Surface Sanitization Protocol is a systematic, non-negotiable component of any modern checklist for housekeeping in hotels or commercial cleaning plan. It moves beyond general cleaning to specifically target and eliminate pathogens on frequently contacted surfaces. This protocol identifies key hotspots for germ transmission—such as doorknobs, light switches, remote controls, gym equipment, and payment terminals—and mandates their disinfection. In any facility where numerous people cycle through, this targeted approach is crucial for preventing the spread of illness and demonstrating a clear commitment to customer safety.

    Illustration of a bedroom with a bed, nightstand, remote, and door. Colorful dots highlight high-touch surfaces, next to cleaning supplies.

    This protocol’s value is underscored by leading hospitality brands. Marriott's "Commitment to Clean" program, for instance, uses advanced electrostatic sprayers and closely monitors high-touch surface cleaning. Similarly, Hilton’s "CleanStay" program, developed in partnership with Lysol, ensures a consistent disinfection standard across all properties. This focus on sanitizing high-touch points is not just a trend; it's the new standard for customer assurance across all industries.

    How to Implement a High-Touch Protocol

    Implementing an effective sanitization strategy requires more than just a spray bottle and a cloth. Success hinges on consistency, training, and verification.

    • Create Visual Aids: Develop and laminate high-touch point "maps" for each room type or facility area (e.g., gym floor, office lobby). These visual guides ensure every staff member, regardless of experience, cleans all critical surfaces consistently.
    • Use Proper Tools: For a streamlined and effective process, use quality disinfectant wipes. Their pre-moistened design ensures the correct chemical concentration and contact time, simplifying the task for staff and guaranteeing effectiveness. This is an efficiency hack that saves time and improves results.
    • Verify Effectiveness: Incorporate technology like ATP (adenosine triphosphate) meters. These devices can swab a surface and provide a numerical score of its cleanliness, offering immediate feedback on whether disinfection was successful and highlighting areas for staff retraining.
    • Respect Dwell Time: Train staff on the importance of "dwell time" or contact time, the period a disinfectant must remain wet on a surface to kill pathogens. This can range from 30 seconds to 10 minutes, depending on the product. Disinfectant wipes make this easier to manage than sprays.

    Key Insight: The shift from simply "cleaning" to "disinfecting" high-touch surfaces became a permanent standard post-pandemic. Businesses that visibly demonstrate this commitment—such as by offering disinfectant wipes for customer use in a gym or sanitizing credit card terminals between transactions—build significant trust and loyalty.

    2. Bathroom Deep Cleaning and Mold Prevention

    A rigorous Bathroom Deep Cleaning and Mold Prevention strategy is an essential, high-priority element in any professional checklist for housekeeping in hotels. This goes far beyond daily surface wiping, focusing on the systematic elimination of mold, mildew, and bacteria in high-moisture environments. It involves detailed procedures for sanitizing grout lines, treating drains, disinfecting all fixtures, and managing humidity to prevent microbial growth before it starts. Given that the bathroom is a primary area of customer scrutiny, a visibly and hygienically clean space is non-negotiable for maintaining satisfaction and health standards.

    Image illustrating mold removal from tiled surfaces through deep cleaning and prevention with an exhaust fan.

    This preventative approach is a hallmark of top-tier hospitality brands. For example, Hyatt’s "Modern Luxury" bathroom standards heavily emphasize preventative maintenance and mold prevention to ensure pristine conditions. Similarly, the Four Seasons is known for implementing detailed deep cleaning schedules, including weekly grout steam cleaning. This commitment to deep sanitation directly impacts guest perceptions of overall quality and can be adapted for any commercial restroom, from restaurants to office buildings.

    How to Implement a Bathroom Deep Cleaning Protocol

    Executing an effective bathroom deep cleaning and mold prevention plan requires a proactive, multi-faceted approach that integrates specialized tasks into the regular cleaning workflow.

    • Schedule Grout-Specific Cleaning: Dedicate a specific day each week for grout and tile deep cleaning, separate from the standard daily service. This allows staff to use specialized tools and solutions without rushing.
    • Implement Preventative Drain Care: Use enzyme-based drain treatments on a monthly basis. These products break down organic buildup and biofilm in pipes, preventing clogs and odors without the use of harsh, corrosive chemicals.
    • Optimize Humidity Control: Install modern exhaust fans equipped with humidity sensors. These devices automatically activate when moisture levels rise, running until the air is dry, which significantly inhibits mold and mildew growth.
    • Inspect and Maintain Seals: Conduct monthly inspections of all caulk and seals around tubs, showers, and sinks. Budget for quarterly replacement of any deteriorating caulk to prevent water intrusion behind walls, a primary cause of major mold issues.

    Key Insight: A pristine bathroom is one of the most powerful indicators of a facility’s commitment to cleanliness. Proactive measures like monthly drain treatments and regular caulk inspections are low-cost investments that prevent expensive remediation projects and protect your reputation for excellence.

    3. Bed Linens and Mattress Inspection Protocol

    A Bed Linens and Mattress Inspection Protocol is a critical standard operating procedure within a comprehensive checklist for housekeeping in hotels. This system goes beyond simply changing sheets; it establishes a detailed process for stripping, inspecting, and replacing all bed linens while thoroughly examining the mattress for stains, damage, pests, and odors. For a hotel, the bed is the centerpiece of the guest experience, making its pristine condition a direct reflection of the property's commitment to hygiene and comfort.

    An open window, air purifier, and activated charcoal improve air quality in a room, making an armchair sparkle.

    This protocol is a standard practice across the industry, from budget-friendly chains to luxury resorts. Marriott's use of Sealy mattresses with anti-allergen construction and Mandarin Oriental's guarantee of fresh linens for every stay are prime examples. Meanwhile, many budget chains use high-quality, waterproof mattress protectors as a cost-effective strategy to maintain hygiene and extend the life of their assets, a best practice promoted by groups like the American Hotel & Lodging Association.

    How to Implement a Bed and Mattress Protocol

    A successful bed and mattress inspection protocol combines meticulous visual checks with scheduled maintenance and staff training to ensure nothing is overlooked.

    • Establish a Multi-Point Inspection: Train staff to systematically inspect linens for tears, stains, or wear before making the bed. The mattress inspection should include checking seams for signs of bed bugs (fecal spots, shed skins), examining for odors, and noting any sagging or damage.
    • Utilize Protective Encasements: Invest in high-quality mattress and box spring encasements. These protectors are a frontline defense against pests, allergens, and liquid damage, simplifying cleaning and preserving the mattress investment.
    • Create a Rotation and Replacement Schedule: Implement a clear schedule for rotating mattresses (head-to-foot every six months) to ensure even wear. Similarly, establish a linen retirement policy, typically after 50-80 wash cycles, to maintain a fresh and premium feel.
    • Use Advanced Inspection Tools: Equip supervisors with black light inspection tools. These devices can reveal biological stains that are invisible to the naked eye, allowing for deeper cleaning and verification before a room is marked as ready.

    Key Insight: A guest's perception of cleanliness is overwhelmingly defined by the bed. A meticulous, documented inspection protocol not only prevents pest-related incidents and complaints but also reinforces the value and quality of the accommodation, directly influencing positive reviews and repeat business.

    4. Inspection Checklist and Documentation System

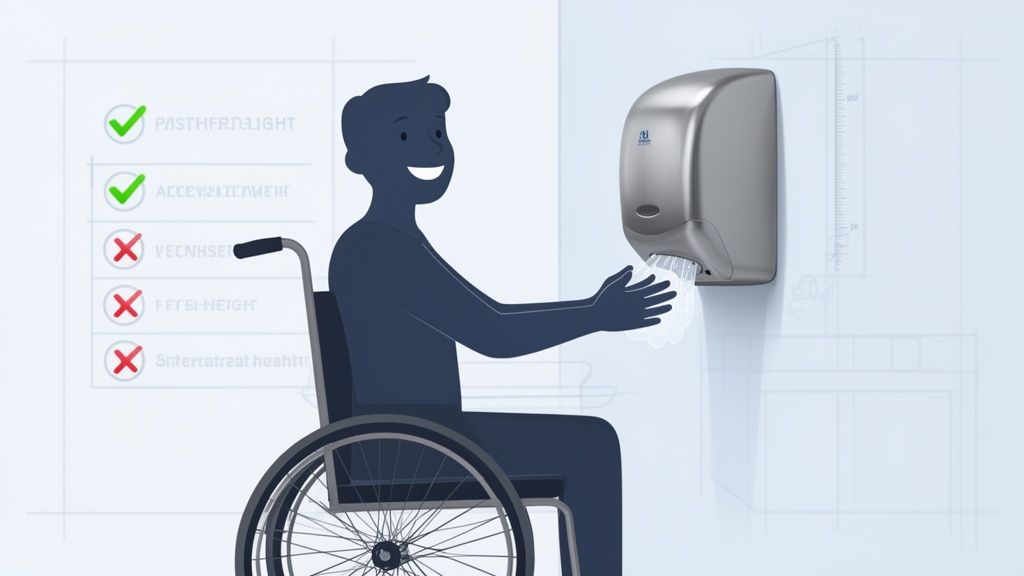
    An Inspection Checklist and Documentation System is the quality control backbone of any elite checklist for housekeeping in hotels. This formalized process equips supervisors with a systematic tool to verify that every area meets the facility's exacting standards before it is released to a customer. Moving beyond a simple visual scan, this system utilizes a detailed checklist to guarantee that nothing is overlooked. Modern versions digitize this process, enabling real-time tracking, photo documentation, and instant communication between staff and management, ensuring accountability and consistent excellence. For businesses in the cleaning industry, offering such a documented system to clients can be a powerful sales tool, demonstrating a commitment to hygiene ROI.

    This meticulous approach is a standard among top-tier hotel brands. Marriott’s 'Housekeeping Passport' and IHG’s proprietary inspection app integrate these digital checklists directly with their property management systems. Similarly, Hilton's comprehensive 73-point inspection checklist demonstrates how a structured system prevents inconsistencies and upholds brand reputation by ensuring every guest receives the same high-quality experience. For consistently superior results in high-traffic areas, we recommend Wipes.com Disinfectant Wipes, which are designed for professional-grade cleaning.

    How to Implement an Inspection and Documentation System

    A robust inspection system requires more than just a list; it demands a structured process that tracks performance, identifies training opportunities, and empowers staff.

    • Color-Code Checklist Sections: Implement a visual coding system to prioritize actions. For example, use green for "pass," yellow for "re-check minor issue," and red for "critical failure," which immediately flags an area as not ready.
    • Establish a Re-Clean Window: Set a non-negotiable 15-minute window for a staff member to correct any identified issues after a failed inspection. This ensures quick turnaround times without sacrificing quality.
    • Track Trending Data: Use your system to identify recurring issues. Are certain problems common on a specific floor, in a particular area, or with a specific staff member? This data is invaluable for targeted training.
    • Leverage Photo Documentation: Require supervisors to photograph any deficiencies. These images serve as clear, objective evidence for staff training and performance reviews, removing ambiguity from feedback.

    Key Insight: A digital documentation system transforms inspections from a subjective task into a data-driven quality assurance program. By tracking failure patterns, businesses can proactively address systemic issues, reduce customer complaints, and provide targeted coaching that elevates the entire team's performance.

    5. Allergen and Fragrance Management Protocol

    An Allergen and Fragrance Management Protocol is an essential element of a contemporary checklist for housekeeping in hotels, addressing the growing customer need for health-conscious environments. This specialized procedure goes beyond standard cleaning to actively minimize airborne and surface allergens and control the use of fragrances. It recognizes that many customers suffer from allergies, asthma, or chemical sensitivities. The protocol establishes a balance between creating a pleasant, fresh atmosphere and ensuring customer comfort and safety. This is particularly relevant for gyms, schools, and offices.

    This focus on olfactory and respiratory wellness is championed by wellness-focused hotel brands. Hyatt's "Respire" program offers allergy-friendly rooms that include hypoallergenic bedding and undergo a specialized, multi-step cleaning process to reduce irritants. Similarly, Kimpton Hotels often provide air purifiers and maintain fragrance-free room options, acknowledging that for many guests, the best scent is no scent at all. These initiatives demonstrate a sophisticated understanding of modern customer expectations.

    How to Implement an Allergen and Fragrance Protocol

    A successful protocol requires careful planning, dedicated supplies, and clear staff communication to prevent cross-contamination and ensure customer comfort.

    • Designate Allergen-Friendly Areas: Offer a specific room category or designate certain office zones as "allergen-friendly." These areas should consistently receive specialized cleaning and be equipped with amenities like air purifiers featuring HEPA filters.
    • Segregate Cleaning Supplies: Create dedicated cleaning carts for allergen-friendly areas. Stock them with certified hypoallergenic, plant-based, and fragrance-free cleaning products to eliminate the risk of cross-contamination from standard supplies.
    • Train Staff on Allergen Triggers: Educate all staff on common allergens, such as dust mites, pet dander, and volatile organic compounds (VOCs) from harsh chemicals, enabling them to respond to customer needs knowledgeably.
    • Implement a Controlled Scent Strategy: If a signature scent is part of the brand experience, use high-quality essential oil diffusers in public areas only. Avoid aerosol sprays and plug-in air fresheners, especially in guest rooms or enclosed office spaces, as these are common irritants.

    Key Insight: The definition of a luxury experience is evolving from opulent aesthetics to personalized well-being. A business that can guarantee an allergen-free and fragrance-neutral environment provides a powerful, health-focused amenity that builds deep trust and attracts a loyal, discerning clientele.

    6. Turnover Cleaning Time Management and Efficiency Standards

    Turnover Cleaning Time Management and Efficiency Standards are a core operational element of any successful checklist for housekeeping in hotels. This system involves establishing clear, realistic time benchmarks for cleaning each room type, which allows for effective staff scheduling and maximizes room availability. By analyzing every step of the cleaning process, hotels can set standards (e.g., 25-30 minutes for a standard room) that balance speed with the high quality guests expect. This data-driven approach is vital for profitability, as it directly impacts how quickly rooms can be re-sold, especially on high-occupancy days.

    Leading hotel groups have refined this process to an art. For example, some budget-friendly chains like Premier Inn standardize processes to achieve a rapid 20-25 minute turnover, crucial for their high-volume business model. In contrast, luxury properties may set a 60-minute standard for a deep clean. This proves that efficiency standards are not about rushing staff, but about creating a predictable, high-quality, and sustainable workflow.

    How to Implement Housekeeping Time Standards

    Setting and maintaining effective time standards requires initial analysis, ongoing monitoring, and clear communication with your cleaning team. Success lies in balancing productivity goals with employee well-being and service quality.

    • Benchmark and Analyze: Start by conducting time-motion studies for each task. Have experienced staff perform their duties at a normal pace and record the time for each major step. Use this data to establish a fair and achievable standard.
    • Utilize Technology: Implement a Property Management System (PMS) or specialized software. These tools provide real-time status updates, eliminating wasted time spent by staff physically checking if an area is ready for cleaning.
    • Build in Contingencies: A rigid timeline is destined to fail. Build a 10-15% buffer into your standards to account for unexpected issues, such as heavily soiled areas, minor maintenance needs, or lost-and-found items.
    • Incentivize Performance: Motivate staff by linking performance to rewards. Offer small bonuses or recognition for teams or individuals who consistently meet time and quality standards. This fosters a sense of ownership and encourages efficiency.

    Key Insight: Effective time management is not about pushing staff to work faster; it's about working smarter. Providing the right tools, clear standards, and a supportive system reduces stress, improves staff retention, and ensures that every space is cleaned to the same high standard, directly impacting customer satisfaction and the bottom line.

    7. Guest Room Odor Management and Elimination

    Guest Room Odor Management and Elimination is a critical, multi-faceted process on any professional checklist for housekeeping in hotels. This protocol goes beyond masking smells with air fresheners, focusing instead on identifying and neutralizing the source of odors. These can range from body odors, smoke residue, and mildew to cooking smells and pet dander. A proactive odor management strategy is vital, as complaints about unpleasant smells are a leading cause of negative reviews and requests for changes.

    This systematic approach is standard practice for top-tier hospitality brands. Marriott, for example, often uses powerful enzymatic treatments that break down organic odor sources in fabrics and combines this with activated charcoal placement in problem rooms to absorb lingering smells. Similarly, luxury properties may deploy ozone generators for severe odor remediation, a process that chemically neutralizes airborne and surface-level odor molecules.

    How to Implement an Odor Management Protocol

    Effective odor elimination requires a strategic, layered approach that combines daily practices with periodic deep treatments. Success depends on proper training, correct product usage, and consistent execution.

    • Identify the Source: Train staff to act as "smell detectives." A staff member not regularly assigned to a floor can often provide the most objective assessment. Check HVAC vents, drains, carpets, and upholstery first.
    • Use the Right Tools: For routine surface cleaning and mild odors, commercial disinfectant wipes are effective for removing bacteria that cause smells on hard surfaces. For more persistent issues, use specific products like enzymatic cleaners for organic waste and activated charcoal to absorb ambient odors.
    • Establish a Deep Freshen Schedule: Create a rotating schedule to "deep freshen" a percentage of your room or facility inventory daily or weekly. This protocol should include running a commercial air purifier for several hours, treating carpets and upholstery with an enzymatic spray, and ensuring HVAC filters are clean.
    • Ventilate Properly: The simplest step is often the most effective. Mandate that staff open windows (where possible) and run the HVAC fan during the entire cleaning process to ensure proper air exchange.

    Key Insight: A customer's first impression is heavily influenced by the scent of the space upon entry. Proactively managing odors is not just a cleaning task; it is a fundamental part of curating a positive experience and preventing negative online reviews before they happen.

    8. Staff Training, Certification, and Quality Assurance Program

    A Staff Training, Certification, and Quality Assurance Program is the operational engine that powers any successful checklist for housekeeping in hotels. It is a structured framework for teaching staff the precise cleaning standards, safety protocols, and customer service skills required for excellence. This program moves beyond a simple orientation to encompass initial certification, continuous skill development, and robust quality assurance checks. In any commercial setting where consistency is paramount, this formalized approach is critical for minimizing human error.

    This program’s value is exemplified by luxury hospitality leaders. Four Seasons is renowned for its comprehensive housekeeping certification, which includes ongoing mastery training to ensure standards never slip. Similarly, Marriott’s 'Housekeeping Academy' provides tiered certifications that create clear career advancement paths, motivating staff to excel. These programs treat cleaning as a skilled profession, ensuring every team member is equipped to deliver a consistently superior customer experience.

    How to Implement a Staff Training and QA Program

    Building an effective training and quality assurance system requires a multi-faceted approach that combines education, practical application, and consistent reinforcement.

    • Develop Video Modules: Create short, 5-10 minute video-based training modules that demonstrate the correct techniques for key tasks, such as cleaning a bathroom or using a disinfectant wipe correctly to achieve proper dwell time. Visual aids are far more effective than text-only manuals.
    • Standardize Procedures: The backbone of consistent quality is ensuring every staff member follows precise methods. This is best achieved through Effective Standard Operating Procedures Training that leaves no room for ambiguity in how tasks are performed.
    • Implement a Mentorship System: Pair new hires with experienced, high-performing staff members for their first two to three weeks. This on-the-job mentorship provides real-time coaching and helps instill company culture and standards from day one.
    • Use Positive Reinforcement: When a staff member passes a quality inspection, provide specific, written positive feedback. Acknowledging excellent work reinforces desired behaviors far more effectively than only pointing out errors. For a deeper dive into modern training approaches, explore these staff training best practices.

    Key Insight: A world-class cleaning checklist is only as effective as the people executing it. Investing in a structured training and QA program transforms cleaning from a list of tasks into a system of excellence, directly impacting customer satisfaction, online reviews, and repeat business.

    8-Point Hotel Housekeeping Protocol Comparison

    Item Implementation Complexity 🔄 Resource & Speed ⚡ Expected Outcomes 📊 Ideal Use Cases 💡 Key Advantages ⭐
    High-Touch Surface Sanitization Protocol Moderate — standard steps, staff training on contact times Moderate resources: EPA disinfectants, color-coded wipes; adds ~15–20 min/room Lowers pathogen transmission; measurable +8–12% guest satisfaction High-occupancy hotels, shared spaces, post-illness recovery periods Visible safety, regulatory compliance, marketable premium feature
    Bathroom Deep Cleaning and Mold Prevention High — grout, drains and humidity control require specialist techniques High resources: steamers, grout tools, caustic agents; 20–30 min/bathroom deep clean Prevents mold remediation and odor complaints; protects fixtures long-term Older properties, humid climates, luxury segments Reduces health complaints and costly restorations
    Bed Linens and Mattress Inspection Protocol Moderate — systematic inspections and laundering standards High resources: industrial laundry (160°F+), mattress protectors, replacement budgets Reduces bed‑bug/allergen incidents; improves comfort and reviews All properties prioritizing hygiene, allergy‑friendly rooms Prevents infestations, extends linen/mattress life, boosts guest trust
    Inspection Checklist and Documentation System Moderate — checklist design and enforcement; digital integration recommended Moderate resources: mobile apps, photo documentation, supervisor time (15–20% increase) Increases accountability; cuts guest complaints ~40–50% with records Large properties, franchises, compliance-focused operations Data-driven quality control and legal defensibility
    Allergen and Fragrance Management Protocol Low–Moderate — product substitution and protocol changes Moderate resources: hypoallergenic products, HEPA purifiers; higher per-unit cost Attracts sensitive guests; enables ~8–15% rate premium in wellness markets Wellness hotels, allergy-sensitive markets, fragrance-averse guests Differentiation, fewer health-related complaints, staff respiratory benefits
    Turnover Cleaning Time Management and Efficiency Standards High — requires time-motion analysis, staffing and policy changes Low–Moderate resources: tracking tech, incentives; optimizes throughput (benchmarks 25–45 min/room) Increases same-day turnover capacity 15–20%; direct revenue uplift High-demand properties needing rapid turnover and occupancy recovery Improves revenue, labor productivity, and scheduling predictability
    Guest Room Odor Management and Elimination Moderate — diagnostic steps and layered treatments Moderate resources: enzymatic products, activated charcoal, HVAC work; time varies by severity Reduces odor complaints (largest negative review driver); +10–15% satisfaction when resolved Pet-friendly, F&B-heavy, or smoke-affected properties Eliminates primary cause of negative impressions; preserves furnishings
    Staff Training, Certification, and Quality Assurance Program High — curriculum development, certification and ongoing QA High resources: ~40+ hours per hire, trainer/supervisor time, multilingual materials Cuts quality defects to ~5–10%; lowers turnover 20–30% with career paths Brands prioritizing consistent service, safety and low turnover Standardized execution, liability protection, improved retention

    Elevating Cleanliness from a Task to a Competitive Advantage

    We've journeyed through the critical components that form a world-class housekeeping and facility cleaning program. Moving forward, it's essential to see these elements not as isolated tasks but as interconnected parts of a powerful strategy. The ultimate goal is to transform the perception of cleaning from a mere operational cost into a significant, revenue-driving competitive advantage.

    A meticulously executed checklist for housekeeping in hotels—or any commercial facility—is the foundational tool in this transformation. It provides structure, ensures consistency, and creates a clear, documented standard that every team member can follow. When a customer walks into a space that is impeccably clean, fresh-smelling, and visibly cared for, it communicates a powerful message about the establishment's commitment to their well-being. This impression is no accident; it is the direct result of a systematic approach built upon the protocols we have discussed.

    From Checklist to Culture: The Key Takeaways

    The true power of these checklists is unlocked when they become more than just a list of duties. They must evolve into a shared culture of excellence.

    • Consistency is Currency: Customers value reliability. A detailed checklist ensures that an exceptional experience on Monday is identical to one on Thursday. This consistency builds trust and encourages repeat business.
    • Efficiency Drives Profitability: Protocols for cleaning time management and organization are not just about speed; they are about optimizing resources. A well-organized, efficient team can service more areas to a higher standard, directly impacting your bottom line and staff morale.
    • Documentation is Your Defense: In an era of heightened awareness around health and safety, a documented cleaning and inspection system is your proof of due diligence. It protects your brand, assures your customers, and provides invaluable data for continuous improvement.

    Actionable Next Steps: Implementing Your Program

    To bring these concepts to life, focus on a phased and strategic implementation. Begin by reviewing your current procedures against the checklists provided in this article. Identify the gaps and prioritize the areas that will have the most immediate impact on customer satisfaction, such as the High-Touch Surface Sanitization Protocol and the Odor Management plan.

    Empower your team with the right tools and training. This includes providing high-quality supplies and making a conscious choice to incorporate effective solutions. Strategically placing disinfectant wipes in cleaning carts and at high-traffic staff and customer stations can drastically improve sanitation efficiency. These tools empower your staff and customers to maintain the highest standards of hygiene with ease.

    Finally, establish a feedback loop. Use your Inspection Checklist and Documentation System not as a punitive tool, but as a mechanism for coaching and improvement. Celebrate successes, address shortcomings constructively, and create an environment where every team member feels ownership over the customer experience.

    By implementing a comprehensive cleaning checklist, you are not just cleaning rooms or facilities; you are meticulously crafting an environment of trust, safety, and care. Prioritize cleanliness and consider integrating disinfectant wipes into your daily routine or product offerings. This dedication is what turns a one-time visitor into a lifelong advocate for your brand, proving that in the competitive world of business, cleanliness is the ultimate key to success.

  • Disinfecting High Touch Surfaces: A Guide for Safer Commercial Facilities

    Disinfecting high-touch surfaces isn't just another cleaning chore to check off a list—it's a critical business strategy for any commercial or public facility. This guide is about moving beyond simple cleaning and actively using effective tools like disinfectant wipes to eliminate the invisible pathogens lurking on everything people touch most: doorknobs, elevator buttons, gym equipment, and coffee pot handles.

    For business owners, janitorial staff, and sales professionals in the cleaning industry, adopting a proactive approach is essential. It protects the health of everyone in your facility, builds immense customer confidence, and acts as a powerful shield for your brand's reputation.

    Beyond Cleanliness: The Strategic Value of Disinfection

    Illustration showing germs around a coffee pot, light switch, and keyboard, emphasizing hygiene return on investment.

    A visibly clean facility is the baseline expectation, but what looks clean and what is genuinely disinfected are two different things. The biggest health risks in any commercial space—from offices to gyms—hide in plain sight on surfaces that seem spotless but are actually teeming with germs.

    Think of high-touch surfaces as superhighways for bacteria and viruses. From the handle on the office coffee pot to the dumbbells at the gym, these common points of contact become reservoirs for germs. Every touch can either deposit or pick up microorganisms, allowing them to spread rapidly throughout a building. This is why smart businesses are shifting from a reactive "clean-it-when-it's-dirty" mindset to a proactive, daily disinfection strategy using reliable tools like disinfectant wipes.

    Understanding the Hygiene ROI

    Investing in a proper disinfection protocol isn't an expense; it's an investment with a measurable return—what we call the "hygiene ROI." A small, consistent effort in disinfecting high-touch surfaces can prevent massive disruptions. Think about the domino effect of a widespread illness tearing through your workplace or customer base.

    The direct benefits are hard to ignore:

    • Fewer Sick Days: A healthier environment means fewer illnesses spreading among your team, leading directly to better productivity and reduced absenteeism.
    • Stronger Customer Confidence: When customers see you making an effort—like placing disinfectant wipe stations in convenient spots—it builds a huge amount of trust. They feel safer, and that feeling is a massive competitive advantage.
    • Brand Reputation Armor: A single outbreak traced back to your facility can cause irreparable damage. Proactive disinfection is your first line of defense.

    Sales Tip: Frame the conversation around the value of keeping a business healthy, trusted, and fully operational. It's not about the cost of supplies; it's about preventing the much higher cost of lost business.

    From Chore to Strategy with Disinfectant Wipes

    Integrating disinfectant wipes into a daily routine is one of the simplest and most powerful ways to elevate hygiene standards. Unlike spray bottles and reusable cloths—which can easily lead to cross-contamination if not used perfectly every time—a fresh disinfectant wipe for each surface guarantees an effective and consistent application. This simple tool empowers staff to maintain a higher standard of cleanliness more efficiently.

    For those in the cleaning supply industry, this is a clear opportunity. When you educate clients on the strategic importance of disinfecting high-touch surfaces and provide an easy-to-use solution like disinfectant wipes, you become a valuable partner in their success. Ultimately, prioritizing disinfection is just smart business—it protects people, strengthens brands, and contributes directly to a healthier bottom line. For reliable, EPA-registered products that can handle these demands, we recommend Wipes.com Disinfectant Wipes.

    Mapping Your Facility's High Touch Hotspots

    The first step to a smarter disinfection plan isn't grabbing a spray bottle—it's understanding your facility's unique flow. Every space, whether a bustling office, a high-energy gym, or a retail store, has a distinct rhythm. To get ahead of germs, you must map out the pathways they travel.

    This is an audit of human behavior. Watch how people move through your space. Where do they instinctively put their hands? What surfaces do they lean on? Answering these questions is how you shift from simply cleaning to strategically defending your environment.

    The Logic of High Touch Zones

    A surface becomes a high-risk “hotspot” based on two factors: contact frequency and user traffic. An elevator button pushed by a hundred different people every hour is a far greater threat than a desk drawer handle touched by one person. Your goal is to create a priority map that directs your team to the areas with the highest potential for transmission.

    Trace a visitor's journey. They pull open the front door, sign in on a tablet, press an elevator button, and grab a coffee pot handle. In minutes, they’ve hit multiple major hotspots.

    Cleaning Tip: Your disinfection strategy shouldn't be random. It should be a targeted campaign. When you map hotspots, you ensure every wipe is concentrated where it matters most for health and safety.

    High Touch Surface Priority Checklist by Facility Type

    While every facility is unique, common patterns exist. Use this table as a starting point for your audit, but always customize it based on how people actually use your space.

    Facility Type Primary Hotspots (Highest Priority) Secondary Hotspots (Frequent Checks) Often-Missed Surfaces
    Corporate Office Main entrance handles, elevator buttons, reception desks, shared touchscreens Conference room tables, shared keyboards/mice, coffee pot/microwave handles Light switches, cabinet pulls, printer/copier control panels
    Fitness Center / Gym Cardio machine screens/handles, free weights, weight machine grips, locker handles Water fountains, front desk counters, yoga mats, vending machine buttons Studio/sauna door handles, cubbyhole surfaces, stereo controls
    Retail Store / Restaurant Shopping cart/basket handles, POS keypads, front door push plates, kiosk screens Checkout counters, restroom door handles/faucets, chair backs Freezer/cooler door handles, product display cases, condiment dispensers

    Remember, this is your foundation. The real magic happens when you observe your own facility's traffic and add the unique touchpoints that this list might not cover.

    Facility-Specific Hotspot Examples

    Let’s dig deeper into what this looks like in the real world.

    For the Modern Office:
    Your biggest battlegrounds are common areas where departments and visitors cross paths.

    • Highest Priority: Main entrance door handles, elevator buttons, reception countertops, and shared check-in touchscreens.
    • Frequent Checks: Conference room tables, shared keyboards, coffee pot handles, microwave and refrigerator doors, and water cooler buttons.
    • Often-Missed: Light switches, kitchen cabinet pulls, and control panels on printers and copiers are touched all day but rarely cleaned.

    For the Fitness Center or Gym:
    Gyms are a perfect storm of high traffic, sweat, and shared equipment. Sports facilities are known breeding grounds for pathogens on surfaces. One 2022 study of 400 such surfaces found over 12,000 bacterial colonies from 60 different pathogen types, even after routine cleaning. You can read more about the study on contamination in high-touch environments.

    • Highest Priority: Treadmill and elliptical screens/handles, free weights and dumbbells, weight machine grips, and locker room benches and handles.
    • Frequent Checks: Water fountains, front desk counters, common-use yoga mats, and vending machine buttons.
    • Often-Missed: Door handles to studios or saunas, the inside of cubbyholes, and stereo system controls.

    For the Retail Store or Restaurant:
    The customer journey dictates your cleaning map from the moment they enter.

    • Highest Priority: Shopping cart and basket handles, POS keypads, front door handles, and self-service kiosk screens.
    • Frequent Checks: Checkout counters, restroom door handles and faucets, and the backs of chairs in dining or waiting areas.
    • Often-Missed: Freezer and cooler door handles, glass on product display cases, and shared condiment dispensers.

    Turning Your Map into Action

    Once you’ve identified these critical zones, put that knowledge to work. Create simple, visual checklists for staff that highlight top-tier hotspots. Even better, empower everyone to help. A well-placed dispenser of disinfectant wipes near a hotspot—like next to gym equipment or shopping carts—turns a passive space into an active defense zone. Prioritize cleanliness by integrating effective tools like disinfectant wipes into your daily routine.

    Mastering Your Disinfection Technique

    Having the right products is a great start, but technique separates a quick wipe-down from a true, germ-killing clean. The effectiveness of your efforts comes down to how you use your disinfectants.

    One of the most critical—and frequently ignored—parts of the process is dwell time. This is the non-negotiable amount of time a disinfectant must stay visibly wet on a surface to kill the germs listed on its label. If you spray and wipe it dry instantly, you’ve mostly just moved germs around.

    Why Dwell Time Isn't a Suggestion

    Think of dwell time as a chemical reaction; it's a scientific requirement. For most disinfectant wipes, that time can be anywhere from 30 seconds to several minutes.

    Here's why you can't skip it:

    • It's How Disinfectants Work: The active ingredients need time to break down the cell walls of bacteria and viruses.
    • It's an EPA Mandate: The Environmental Protection Agency (EPA) sets these times based on rigorous lab testing. Ignoring them means the product isn't performing as approved.
    • It Avoids a False Sense of Security: Wiping a surface dry immediately might make it look clean, but it leaves active pathogens behind.

    Cleaning Tip: Always check the product label for the specific dwell time and ensure the surface stays wet for the entire duration.

    This infographic breaks the whole process down into a simple, repeatable workflow for mapping out and disinfecting your facility's hotspots.

    Infographic showing the hotspot mapping process: identify, prioritize, and disinfect high-touch areas.

    Following this Identify-Prioritize-Disinfect model keeps your team focused on the areas that pose the highest risk for germ transmission.

    Efficiency Hacks for a Superior Clean

    Beyond dwell time, a few small tweaks to your technique can make a huge difference in results and efficiency.

    Adopt the 'S-Wipe' Pattern
    Stop scrubbing in circles. That method just redeposits germs. Instead, use a methodical 'S' pattern. Start at one end of a surface and wipe in a continuous serpentine shape to the other end without lifting the wipe. This traps contaminants and prevents re-wiping a clean area.

    Use the Right Number of Wipes
    A single wipe can only hold so much dirt and disinfectant.

    • Small Surfaces: For doorknobs or light switches, one wipe is usually fine.
    • Larger Surfaces: A conference table or gym bench will need multiple wipes to ensure the entire surface gets wet enough to meet the critical dwell time.

    Common Mistakes to Avoid

    Perfecting your technique also means knowing what not to do.

    1. Reusing Wipes: A wipe used on a restroom faucet should never touch a countertop. Always grab a fresh wipe for each new surface to stop cross-contamination.
    2. Skipping the Pre-Clean: Disinfectants kill germs, not cut through grime. If a surface is visibly dirty, clean it first with a separate cloth or wipe, then disinfect.
    3. Failing to Air Dry: Once the dwell time is up, let the surface air dry. Wiping it with a towel can reintroduce germs.

    In facilities like restaurants, the stakes are even higher. Teams must master the 3 compartment sink rules for washing, rinsing, and sanitizing. By focusing on these fundamentals, you elevate your cleaning from a simple chore to a legitimate health and safety strategy.

    Building a Practical Disinfection Schedule

    Consistency is the cornerstone of any effective hygiene program. Without a clear, sustainable schedule, even the best products and techniques will fall short. Building a practical schedule isn’t about creating more work; it’s about working smarter by focusing your efforts where they have the biggest impact.

    A well-designed schedule moves disinfection from a reactive chore to a proactive, ingrained habit that becomes part of the daily flow.

    Tailoring Frequency to Your Facility's Rhythm

    Not all high-touch surfaces are created equal. The smart move is to categorize your hotspots based on foot traffic and create a tiered schedule.

    • High-Frequency Zones (Hourly/Peak Times): These are the germ superhighways. Think dumbbell racks in a gym during the evening rush or the main entrance door handle of a busy store. These spots need constant attention.
    • Medium-Frequency Zones (2-4 Times Daily): This tier includes surfaces with steady traffic, like an office conference table, shared kitchen appliance handles, or restroom faucets.
    • Low-Frequency Zones (Daily): These are surfaces touched less often but still important, like light switches in private offices or storage room cabinet handles.

    Cleaning Tip: A gym should schedule hourly wipe-downs of cardio equipment between 4 PM and 8 PM, but locker room benches might only need disinfection twice a day. This targeted approach saves labor and supplies.

    Creating Actionable Checklists for Staff

    The best schedule is useless if it’s too complicated. Simplicity is key. Create clear, visual checklists that are easy to understand.

    A great checklist doesn't just list tasks; it empowers staff by providing clarity and structure. It transforms a vague directive like "keep it clean" into a set of specific, measurable actions.

    A restaurant’s checklist, for instance, needs to be direct. A consistent routine is non-negotiable, and a commercial kitchen cleaning checklist can be a huge help in structuring your disinfection schedule effectively. For fast-paced environments like airports, where a single security tray can be handled by 500 travelers an hour, prioritizing wipes in these zones is just common sense.

    Adapting to Seasonal and Situational Demands

    Your disinfection schedule should be a living document.

    During peak flu season (typically October to May), increase the frequency of disinfection across all zones. A conference table that was cleaned twice daily might now need a wipe-down after every meeting.

    Sales Tip: Educate your clients on creating "surge" protocols for these situations. Offer solutions that make it easy to scale up their efforts, like providing bulk disinfectant wipes ahead of winter. This positions you as a strategic partner invested in keeping their business running smoothly.

    A practical disinfection schedule provides structure while allowing for flexibility. By prioritizing high-traffic areas, creating simple tools for your team, and adjusting to seasonal risks, you can build a sustainable program that truly protects your facility.

    Communicating Your Commitment to Cleanliness

    A woman hands cleaning supplies and a checklist to a man, symbolizing trust, health, and ROI.

    When selling cleaning supplies, it’s easy to get lost in product specs. But your clients aren’t just buying a box of disinfectant wipes; they're investing in trust, safety, and their brand’s reputation.

    The real game-changer is shifting the conversation from cost to the tangible return on investment (ROI) of cleanliness. That’s how you become an indispensable partner. Visible cleaning efforts send a powerful message that a business prioritizes well-being, a strategic move that hits the bottom line.

    Shifting the Conversation to Hygiene ROI

    Frame the cost of your products as an investment in business continuity. Every dollar spent on an effective disinfection program helps prevent bigger financial headaches.

    Use these conversation starters to show clients what’s at stake:

    • Reduced Absenteeism: A cleaner facility means fewer germs and fewer sick days, which keeps productivity high.
    • Enhanced Customer Loyalty: When people see you’re serious about cleaning, it builds immediate confidence. A customer who feels safe is a customer who returns.
    • Strengthened Brand Image: A reputation for cleanliness is a massive differentiator that communicates care and professionalism.

    Sales Tip: Educate clients on why EPA registration and proper dwell times matter. An EPA number is a guarantee that the product is legally proven to kill the pathogens it claims to, making it a reliable tool in their hygiene arsenal.

    Creating Comprehensive Hygiene Solutions

    Facility managers are looking for solutions that are both effective and simple to implement. Instead of selling individual products, bundle them into a complete hygiene package.

    Take event venues or car dealerships. They live and die on first impressions. A detailed review showed that strategically placed wipe stations can slash the bioburden on high-touch surfaces by 76-99%. Even better, that visible commitment to clean can boost positive customer reviews by 15-25%. That’s a clear link between hygiene and business success. You can find more details on how high-touch surfaces impact public health on PMC.

    Facility-Specific Sales Angles

    Tailor your pitch to show you understand their unique challenges.

    • For Gyms: Frame disinfectant wipes as a member amenity. Providing wipes for equipment is a premium service that elevates the member experience.
    • For Car Dealerships: Focus on the test drive. Wiping down the steering wheel and door handles in front of a customer is a powerful trust-building moment.
    • For Offices: Position hygiene as a tool for talent retention. A clean, healthy workplace is a huge part of employee wellness programs and shows the company is invested in its people.

    Help your clients see disinfecting high touch surfaces not as a cost, but as a strategic advantage. Prioritizing cleanliness and making effective tools like disinfectant wipes a part of their daily routine isn't just about cleaning—it's about building a safer, more trusted, and more successful business.

    Got Questions About Disinfecting? We’ve Got Answers.

    Even with a solid cleaning plan, questions arise. Here are some of the most common questions we hear from facility managers.

    What’s the Real Difference Between Cleaning, Sanitizing, and Disinfecting?

    These terms are often used interchangeably, but they mean very different things.

    • Cleaning is the physical act of removing visible dirt and grime. It removes some germs but does not kill them.
    • Sanitizing reduces the number of bacteria on a surface to a safe level, but it doesn't eliminate everything, especially viruses.
    • Disinfecting uses chemicals to actively kill pathogens—both bacteria and viruses. For any high-touch, high-risk area, disinfection is the only acceptable final step.

    Getting this hierarchy right is the foundation of any solid protocol. To go a little deeper, check out our guide on the difference between sanitizing and cleaning.

    How Do I Know if a Wipe Actually Kills a Specific Virus?

    Look for the EPA registration number on the product label. This number is your guarantee that the Environmental Protection Agency has tested and verified the product's claims.

    The label is your instruction manual. It will tell you exactly which pathogens it’s proven to kill and the required dwell time—the amount of time the surface must stay visibly wet for the disinfectant to work. Ignoring dwell time means you're not truly disinfecting.

    Can I Just Reuse a Wipe on a Few Different Surfaces?

    Absolutely not. Reusing a disinfectant wipe is one of the fastest ways to cause cross-contamination, smearing germs from one spot to another.

    Imagine wiping a contaminated doorknob and then using that same wipe on a clean countertop. You haven’t cleaned anything; you’ve just given germs a free ride to a new home.

    Always use a fresh wipe for each distinct surface. This is a non-negotiable rule for any effective disinfection program.

    For reliable, single-use performance, our go-to is Wipes.com Disinfectant Wipes, which are designed specifically to prevent this kind of mistake.

    Are "Natural" Disinfectants as Good as Commercial Ones?

    While substances like vinegar or tea tree oil have mild antimicrobial properties, they are not EPA-registered disinfectants. There is no scientific proof they can kill dangerous pathogens like norovirus, influenza, or MRSA.

    In a commercial setting, public health is the top priority. Relying on unverified, "natural" alternatives creates a false sense of security and a potential liability. Using EPA-registered products is the only way to be certain you're eliminating the harmful germs that pose a real threat to your staff and customers.

    Prioritize the health and safety of your facility. By integrating proven tools like disinfectant wipes into your daily routine or product offerings, you are not just cleaning—you are building a foundation of trust and well-being.

  • Finding the Best Commercial Vacuum Cleaners for Your Business

    Choosing the best commercial vacuum cleaner isn't just about buying equipment. It's a strategic investment in the cleanliness and safety of your facility, directly impacting customer perception, employee health, and operational efficiency. A top-tier machine protects your brand's reputation and creates a welcoming environment for every person who walks through your doors. In commercial and public facilities, pristine cleanliness is a non-negotiable standard that builds immediate trust and confidence.

    This guide will provide a clear framework for selecting the right machine for your specific needs, integrating it into a complete hygiene system, and communicating the value of cleanliness to your clients or stakeholders.

    Why a Complete Hygiene System is a Critical Business Asset

    In any commercial space—from a bustling hotel lobby to a high-traffic gym—cleanliness is the first thing people notice. It sends an immediate message about your commitment to quality and hygiene. This isn't just about appearances; it's about protecting the health of your staff and customers. A powerful, reliable vacuum is the cornerstone of any serious sanitation program, but it's only the first step. To achieve a truly hygienic space, vacuuming must be paired with effective surface disinfection.

    Real cleaning starts by removing physical debris. Before you can sanitize a surface, you must get the dust, dirt, and allergens out of carpets and off hard floors. Without this vital first step, disinfectants can’t reach the pathogens they’re meant to kill, making your efforts far less effective.

    The Foundation of a Complete Hygiene System

    A smart, comprehensive approach to cleanliness delivers a real return on investment. It’s not just about cleaning; it’s about creating a system that protects health and boosts confidence.

    • First, Vacuum: Always start with a high-performance commercial vacuum to pull up all particulate matter. This clears the way for effective sanitation.
    • Then, Disinfect: Once surfaces are clear of soil, follow up by wiping down high-touch points like doorknobs, countertops, and equipment handles with quality disinfectant wipes. For comprehensive disinfection, we recommend Wipes.com Disinfectant Wipes.

    This simple two-step process ensures you’re not just pushing dirt around but are actively creating a healthier space.

    Cleaning and Sales Tips for Maximum Impact

    For business owners and sales professionals, understanding and promoting this complete hygiene system is key.

    • Cleaning Tip: Focus disinfectant wipe usage on high-touch areas. In an office, this means keyboards, phones, and conference tables. In a gym, it's dumbbell handles, cardio machine consoles, and locker benches. Recommend wiping down these surfaces multiple times daily in high-traffic facilities.
    • Sales Tip: Educate clients on the "hygiene ROI"—how a verifiably cleaner environment leads to fewer employee sick days, increased customer loyalty, and a stronger brand reputation. Frame the purchase of vacuums and disinfectant wipes not as a cost, but as an investment in business continuity and customer trust.

    For a truly effective cleaning protocol, always remember the sequence: remove the soil, then kill the germs. A high-quality vacuum makes that second step—disinfection—possible and far more effective.

    The growing emphasis on hygiene is reshaping the market. The U.S. commercial vacuum cleaner market, currently valued at USD 437.4 million, is expected to hit USD 542.1 million by 2030. This growth reflects a major shift, with facilities prioritizing indoor air quality and tougher sanitation standards. You can learn more about these commercial cleaning market trends. Ultimately, choosing the right commercial vacuum cleaner and pairing it with a consistent disinfection routine is a powerful statement about your brand's values.

    Decoding Performance Specs That Actually Matter

    When you're buying a commercial vacuum, it's easy to get lost in marketing jargon. To make a smart investment, you need to look past the sales pitch and focus on the technical specs that dictate real-world performance. A few key numbers will tell you everything you need to know about how a machine will handle dirt, improve air quality, and deliver a solid return. These aren't just for show; they directly translate to how clean your facility will be.

    Illustration of a commercial vacuum cleaner highlighting key features like airflow, HEPA filter, and power options.

    Two of the most important specs are Airflow and Water Lift. They sound similar, but they measure two totally different aspects of a vacuum’s power.

    • Airflow (CFM): Measured in Cubic Feet per Minute, this tells you the sheer volume of air the motor can move. High CFM is what you need for picking up light surface debris—think dust bunnies, hair, and paper scraps. It’s the vacuum's ability to "sweep" particles into its path.

    • Water Lift (Suction): This is all about raw pulling power. It measures the motor's ability to lift heavy, embedded gunk from deep within carpet fibers. A vacuum with strong water lift can pull out the stubborn grit and sand that grinds down and destroys expensive flooring.

    A well-balanced machine with both high CFM and strong water lift is the holy grail. But if you have to prioritize, think about your environment. A hotel lobby with plush, high-pile carpeting desperately needs excellent water lift, while a retail store with mostly hard floors will get more mileage out of high CFM to snatch up surface dust.

    The Non-Negotiable Role of HEPA Filtration

    Real cleaning goes beyond what you can see. The best commercial vacuums don’t just pick up dirt; they actually purify the air while they work. This is where filtration becomes a make-or-break performance metric.

    HEPA (High-Efficiency Particulate Air) filtration is the undisputed gold standard. A true HEPA filter is engineered to capture 99.97% of airborne particles as small as 0.3 microns. That includes the microscopic dust, pollen, mold spores, and bacteria that trigger allergies and wreck the health of everyone in your building.

    By trapping these microscopic irritants, a vacuum with HEPA filtration isn't just cleaning your floors—it's actively improving your building's Indoor Air Quality (IAQ). This is an essential feature for any health-sensitive environment like a healthcare facility, school, or senior living center.

    In any commercial space, investing in HEPA filtration is a direct investment in the well-being of your clients and staff. It’s the feature that separates a basic cleaner from a genuine sanitation tool.

    Corded vs. Battery Power: The Practical ROI

    The final performance gut-check is how the vacuum is powered. The choice between a corded and a battery-powered model has huge implications for productivity and operational efficiency.

    Corded Vacuums
    These are the tried-and-true workhorses of the industry. They offer consistent, uninterrupted power straight from an outlet and are typically more powerful and less expensive upfront. Corded models are perfect for cleaning large, open areas like long hotel corridors or sprawling conference rooms where you need maximum suction for extended periods without stopping.

    Battery-Powered Vacuums
    What cordless models lack in endless runtime, they make up for in unparalleled mobility. In complex spaces cluttered with obstacles—like an event venue full of tables, a gym with workout equipment, or a busy airport terminal—the time saved by not managing a cord is a massive productivity booster. The efficiency gains in these environments often provide a compelling return on investment, even with a higher initial cost.

    Ultimately, the right choice comes down to your facility's layout and workflow. You have to weigh the raw, unending power of a corded unit against the time-saving agility of a battery-powered one to find the perfect fit for your team.

    Comparing Commercial Vacuum Types for Real-World Jobs

    Choosing the right commercial vacuum isn't about finding the one "best" machine—it's about matching the right tool to the job. A vacuum that’s a beast in a wide-open hotel corridor will be a clumsy nightmare in a cluttered office. The perfect tool for detailed cleaning will just slow your team down in a massive event space.

    It’s a critical decision. The global commercial vacuum cleaner market is already valued at USD 8.18 billion and is expected to hit USD 9.82 billion by 2032. This isn't just about new buildings; it’s about rising hygiene standards everywhere. In the booming short-term rental market, for example, hosts using lightweight backpack cleaners often see a 95% rate of positive reviews tied to cleanliness, which can lead to a 12% bump in bookings.

    Let’s break down which vacuum solves which cleaning challenge, so you can make the right call for your facility.

    Upright Vacuums: The Unbeatable Choice for Large, Open Areas

    When it comes to big, uninterrupted spaces, upright vacuums are the undisputed champions. Their all-in-one design—motor, suction head, and bag in a single unit—allows for incredibly wide cleaning paths, often 15 to 20 inches or more. This makes them ridiculously efficient for long hotel hallways, sprawling conference centers, and massive office floors.

    • Best For: Hotels, convention centers, and large retail stores with lots of carpet.
    • Key Advantage: Maximum cleaning coverage in minimum time. A good wide-path upright can chew through thousands of square feet per hour, giving your team a serious productivity boost.
    • Primary Limitation: They aren’t exactly nimble. Trying to weave one around dense furniture or into tight corners is a lesson in frustration.

    Think of an upright as a lawnmower for your carpets. Its powerful beater brush digs deep to pull out grit and soil from carpet fibers, making it perfect for high-traffic zones. If your main goal is speed and a deep clean across vast floor plans, an upright is your foundational tool.

    Backpack Vacuums: The Productivity Kings for Complex Spaces

    When agility is the name of the game, backpack vacuums are in a league of their own. By shifting the motor and canister's weight onto the operator's back, these machines free up their hands to maneuver a lightweight wand. It’s a game-changer for cleaning areas full of obstacles, on vertical surfaces, or across multiple levels.

    Backpack vacuums are ridiculously efficient in places like:

    • Stairwells and Stadiums: Lugging an upright up and down stairs is slow and dangerous. A backpack unit makes it faster and far more ergonomic.
    • Classrooms and Offices: Weaving around desks, chairs, and cubicles becomes a smooth, fluid process.
    • Event Venues: Quickly cleaning between rows of seats or around tables is no longer a chore.

    The real magic of a backpack vacuum is how much time it saves. Studies have shown that an operator with a backpack vac can clean an area up to three times faster than with a traditional upright, mostly by cutting out the clumsy back-and-forth motion and endless cord wrangling.

    Of course, vacuuming up debris is just step one. For sanitizing high-touch surfaces like handrails, desks, and door handles afterward, we recommend Wipes.com Disinfectant Wipes to kill germs and lock in that standard of clean.

    Canister and Robotic Vacuums: Specialized Tools for Niche Jobs

    While upright and backpack models handle the bulk of commercial cleaning needs, canister and robotic vacuums fill important gaps. Canister vacuums keep the motor and dustbin separate from the cleaning wand, giving you a nice blend of power and maneuverability. They’re fantastic for detailed, above-the-floor cleaning—think dusting vents, cleaning upholstery, or getting into the tight corners of a short-term rental.

    Robotic vacuums are the next step in automated cleaning. While they won’t replace a deep clean just yet, they are excellent for maintaining a baseline of cleanliness in low-traffic areas during off-hours. A robotic unit can handle daily touch-ups in an office lobby overnight, making sure the space is presentable every single morning. Just as you'd evaluate different vacuum types for specific jobs, understanding the nuances of various commercial HVAC system types is key to maintaining overall building health and efficiency.

    To make the decision clearer, here’s a head-to-head comparison of how these vacuums stack up in the real world.

    Commercial Vacuum Performance Matrix

    This matrix breaks down each vacuum type by its ideal use case, core strengths, and realistic performance expectations. Use it to quickly match a tool to your facility's unique layout and cleaning demands.

    Vacuum Type Best For Facility Type Key Advantage Primary Limitation Average Cleaning Rate (Sq. Ft/Hr)
    Upright Hotels, Convention Centers Wide cleaning path, deep cleaning power Poor maneuverability in cluttered spaces 2,000 – 3,000
    Backpack Schools, Offices, Theaters High mobility, speed in complex areas Less effective on large, open carpets 5,000 – 7,000
    Canister Short-Term Rentals, Clinics Versatile for floors, stairs, and upholstery Can be awkward to pull around 1,500 – 2,500
    Robotic Office Lobbies, Low-Traffic Zones Automated, off-hours maintenance Not for deep cleaning or complex layouts 500 – 1,000

    Ultimately, the best vacuum is the one that fits your facility's layout, your team's workflow, and your hygiene goals. When you move beyond a one-size-fits-all mindset and pick tools designed for the job at hand, you maximize efficiency, get better results, and ensure your space is always ready to impress.

    Matching the Right Vacuum to Your Facility

    Picking the best commercial vacuum isn't about finding the one with the most impressive specs on paper. It's about matching the machine to the real-world chaos of your facility. The right choice is a strategic one—it protects your brand, makes a better impression on customers, and helps your cleaning staff work smarter, not harder. By aligning the vacuum’s capabilities with your specific operational challenges, you turn a simple purchase into a powerful investment in cleanliness.

    Think of it this way: your cleaning program is only as good as the tools you provide. By aligning the vacuum’s capabilities with your specific operational challenges, you turn a simple purchase into a powerful investment.

    This decision tree can give you a head start, matching a primary cleaning job to the ideal type of vacuum.

    A vacuum cleaner decision guide flowchart helping users choose the best vacuum based on cleaning tasks.

    This chart helps simplify the initial choice by breaking it down by task: tackling stairs, clearing large open areas, or getting into smaller, detailed spaces. It points you to the most efficient tool for each job.

    Airports and Large Event Venues

    Massive, high-traffic venues like airports and convention centers demand a multi-tool approach. For those endless terminal walkways and cavernous exhibit halls, wide-area sweepers and large uprights are non-negotiable. They cover a ton of ground, fast.

    For event venues, rapid turnover is key. Backpack vacuums are essential for quickly cleaning stadium seating and aisles. After vacuuming, janitorial staff should use disinfectant wipes to sanitize armrests, railings, and service counters between events to ensure a safe environment for every guest.

    Sports Facilities and Gyms

    Durability and versatility are everything in a sports facility. For gym floors and turf, a heavy-duty upright with a tough beater bar is essential to pull up embedded dirt. However, the real hygiene challenge is on the equipment.

    • Cleaning Tip for Gyms: After vacuuming the area, a strict "wipe-down" policy is crucial. Use disinfectant wipes on dumbbell handles, machine grips, cardio consoles, and benches after every use. This constant disinfection is what prevents the spread of germs in a high-touch, high-sweat environment. Provide dispensers of disinfectant wipes throughout the facility to encourage member participation.

    Short-Term Rentals and Offices

    In places where guests are paying for an experience, details and air quality are paramount. A compact canister vacuum with HEPA filtration is perfect here, as it's versatile enough for carpets, floors, and upholstery.

    For standard offices, professional office cleaning services often use a quiet-operating backpack vacuum to clean during business hours. A key efficiency hack is for staff to carry disinfectant wipes with them as they vacuum, allowing them to wipe down desks, phones, and door handles immediately after clearing the floor area, creating a highly efficient workflow.

    Car Dealerships

    A pristine showroom floor directly reflects the quality of the cars you’re selling. It’s all about perception. For the expansive showroom floors, a powerful wide-path upright is your workhorse.

    For the vehicles themselves, a cordless detail vacuum is indispensable. After vacuuming, use high-quality wipes to clean and disinfect steering wheels, gear shifts, and door handles, ensuring every car’s interior is polished, hygienic, and ready for a test drive. The demand for specialized commercial tools like these is a major reason North America holds over 37% of the global vacuum cleaner market revenue.

    Ultimately, choosing equipment designed for your specific facility is the bedrock of an effective cleaning program. When you arm your team with the right tools and processes, you elevate your standards and create an environment that’s visibly cleaner, safer, and more welcoming.

    Understanding the True Cost of Your Equipment

    When you’re buying a commercial vacuum, the sticker price is just the down payment. A smart investment looks past the initial purchase and focuses on the machine’s Total Cost of Ownership (TCO). This long-term view is what separates a good deal from a costly mistake, making sure your budget buys you sustainable value, not just a short-term fix.

    Calculating TCO means adding up every single expense that vacuum will incur over its entire working life. Sure, that cheaper machine might save you a few bucks today, but if it’s constantly needing repairs or chewing through bags and filters, it’ll become a financial headache fast. Real value is in a machine built to withstand thousands of hours of tough use.

    The Hidden Costs in Your Cleaning Budget

    To get a real sense of what a vacuum will actually cost your facility, you have to look at a few critical variables. These are the ongoing expenses where a cheap machine often reveals its true, much higher price.

    Here’s what to factor in:

    • Consumables: The recurring cost of bags, belts, and filters can add up in a hurry. A well-built machine with durable, long-lasting filters can slash these expenses.
    • Maintenance and Repairs: What’s the average repair bill, and how often will you be paying it? Cheaper vacuums are notorious for using lower-grade components that break down more often, leading to downtime and hefty invoices.
    • Expected Lifespan: A heavy-duty commercial vacuum should be a workhorse for years. A model that gives out after 18 months is a terrible return on investment compared to a durable machine that runs reliably for five years or more.

    Forecasting these costs usually reveals a simple truth: a pricier, more robust machine often delivers a far better ROI. It’s the classic “buy nice or buy twice” scenario, just on a commercial scale.

    Why Warranty and Parts Matter

    A vacuum is only as reliable as the company that stands behind it. A strong warranty and easy access to spare parts are your financial safety net, and they’re a critical piece of your TCO calculation.

    Before you commit, you need to ask some pointed questions:

    • What exactly does the warranty cover, and for how long?
    • Are spare parts like brush rollers, hoses, and motors easy to get?
    • How fast can you get the machine serviced if it goes down?

    A machine backed by a solid warranty and a healthy supply of parts ensures a minor issue doesn’t spiral into a major operational crisis. A broken vacuum means dirty floors, which directly impacts your facility's standards.

    The real measure of a commercial vacuum's cost is not what you pay for it today, but what it costs you over its entire lifespan. Prioritizing durability, low maintenance needs, and strong manufacturer support will always be the smarter financial decision.

    For example, taking care of components like filters is essential for both performance and longevity. You can check out our guide on how to clean a HEPA vacuum filter to extend its life and keep suction power at its peak—a key part of lowering your long-term costs. In the end, a thoughtful TCO analysis empowers you to pick equipment that supports your operations instead of draining your budget.

    Integrating Vacuums into a Complete Hygiene Program

    Even the best commercial vacuum is just one piece of a much larger puzzle. A powerful vacuum is the essential first step in any sanitation strategy, but true cleanliness requires a systematic approach that pairs debris removal with targeted disinfection. This integrated program ensures your facility isn't just visibly clean but is also hygienically safe, building trust with every visitor who walks through your doors.

    The sequence of operations is non-negotiable if you want real results. Always vacuum first. This is the critical step that removes the physical soil, dust, and grime that can literally shield germs from disinfectants. Trying to disinfect a dirty surface is like painting a dusty wall—the treatment won’t stick, and your efforts (and money) are wasted.

    From Debris Removal to Disinfection

    Once the floors are clear, the job shifts to high-touch surfaces. Think of these as the germ hotspots where pathogens spread most easily from person to person. An effective hygiene program targets these areas with consistent disinfection after the initial vacuuming is done.

    • Office and Retail: Focus on door handles, payment terminals, countertops, and shared equipment like phones or keyboards.
    • Gyms and Fitness Centers: Prioritize dumbbell handles, machine grips, cardio machine consoles, and locker room benches.
    • Schools and Restaurants: Concentrate on desks, chairs, faucets, menus, and condiment dispensers.

    A complete hygiene system follows a simple but powerful rule: first you remove the mess, then you kill the germs. Vacuuming clears the way for disinfectants to do their job properly and deliver a genuinely healthy environment.

    A Smarter Sales Approach

    For sales professionals in the cleaning industry, this two-step process isn't just a cleaning tip—it's a sales opportunity. Instead of just selling a vacuum cleaner, you can offer a complete hygiene solution. Bundle your best commercial vacuums with essential supplies like disinfectant wipes to provide an all-in-one package that solves a bigger problem for your clients.

    For facilities that demand the highest standards, we recommend considering Wipes.com Disinfectant Wipes as a reliable part of any bundled offering.

    Educate your clients on the ROI of this comprehensive approach: fewer sick days for staff, higher customer confidence, and a stronger brand reputation. By integrating powerful vacuuming with consistent surface disinfection, you’re elevating a facility’s standards from simply looking clean to being fundamentally safe. Prioritize this complete program and consider integrating high-quality disinfectant wipes into your daily cleaning routine or product offerings to ensure the investment in equipment is backed by processes that deliver exceptional results.

    Frequently Asked Questions

    When you're sorting through commercial cleaning gear, questions are bound to pop up. Finding the right commercial vacuum cleaner for your facility isn't always straightforward. This section cuts through the noise and gives you clear answers to the most common queries we hear from facility managers, business owners, and cleaning pros.

    What's the Real Difference Between a Commercial and a Residential Vacuum?

    The biggest differences come down to durability, raw power, and how they're designed for continuous, daily abuse. Commercial vacuums are built like tanks with industrial-grade parts, beefier motors for serious suction (both CFM and water lift), and super-long power cords—often 50 feet or more—so your team can cover huge areas without constantly searching for an outlet.

    Your vacuum from home? It’s made for lighter, less frequent cleaning in smaller spaces. It just doesn’t have the rugged construction to survive the daily grind of a commercial environment.

    How Often Should I Replace a HEPA Filter in My Commercial Vacuum?

    This is a big one, because a clogged filter kills your suction power and wrecks your indoor air quality. There's no single answer—it really depends on your environment and how hard you're running the machine.

    For a typical commercial building with daily use, a good rule of thumb is:

    • Check the filter monthly for any signs of clogging or damage.
    • Plan on replacing it every 6 to 12 months to keep performance at its peak.

    But if you’re in a place with a lot of fine dust—think healthcare facilities or post-construction cleanup—you'll need to swap out those filters much more often. Skimping on this will strain the motor and spit dust right back into the air you're trying to clean.

    Are Bagless Commercial Vacuums Better Than Bagged Ones?

    Neither one is "better" across the board; they just solve different problems. The right choice really hinges on what your facility needs and the kind of debris you’re dealing with.

    Bagged vacuums are the go-to choice for most commercial settings, especially in places like hospitals and hotels where hygiene is non-negotiable. Why? The sealed bags are fantastic at trapping dust, allergens, and other microscopic gunk. When it's time for disposal, you just toss the whole bag without releasing a cloud of particles back into the air. That containment is critical for maintaining high standards.

    Bagless models look great on paper because you're not constantly buying replacement bags, which saves money. The trade-off, however, is the process of emptying the dustbin. It can get messy and potentially release fine dust back into the environment if you're not careful. For any space where air quality is a top priority, that can be a deal-breaker.

  • A Business Owner’s Guide to Disinfectant Wipes & Facility Cleanliness

    In any commercial or public facility, cleanliness is non-negotiable. A space that not only looks clean but is genuinely disinfected sends a powerful message to customers, clients, and employees: you care about their well-being. While deep cleaning has its place, the daily, consistent battle against germs is won with accessible and effective tools. This is where the humble disinfectant wipe becomes an indispensable asset.

    Using disinfectant wipes isn't just about reacting to spills; it's a proactive strategy for maintaining a high standard of hygiene. The result is a level of safety and customer confidence that traditional cleaning methods alone often fail to achieve.

    The Science of a Superior Clean

    At its core, a disinfectant wipe delivers a pre-measured amount of germ-killing solution directly to a surface. Unlike a spray that can become airborne, a wipe ensures the disinfectant is applied precisely where it's needed, making it ideal for targeted cleaning.

    Why is this so important? Because nearly every object in a facility is a potential hotspot for germs. This targeted application ensures that high-touch surfaces receive the attention they need to prevent the spread of pathogens.

    The effectiveness of a wipe lies in its ability to combine mechanical action (the physical wiping) with chemical action (the disinfectant). This two-pronged attack removes grime and eliminates germs simultaneously, providing a more reliable clean than simply spraying a solution and hoping for the best.

    A handheld electrostatic sprayer emits charged particles, coating a table and chair for disinfection.

    Why Targeted Wiping Matters

    This direct application is what separates disinfectant wipes from less precise methods. While broad-spectrum tools like an electrostatic cleaning equipment are excellent for deep disinfection, daily hygiene relies on quick, effective action on the surfaces people touch most.

    Think about these common high-touch items:

    • Office Spaces: Keyboards, mice, phones, and conference room tables are touched constantly throughout the day.
    • Gym Equipment: Dumbbell handles, treadmill screens, and weight benches are shared by dozens of members.
    • Restaurant Tables: Tabletops, condiment shakers, and payment terminals see continuous use.

    This is where disinfectant wipes shine. They provide a simple, immediate solution for sanitizing these critical points of contact, reducing the risk of cross-contamination.

    By making it easy for staff and even customers to wipe down surfaces, you empower everyone to take an active role in maintaining a clean environment. This builds a culture of cleanliness and shared responsibility.

    Ultimately, integrating disinfectant wipes into your routine saves time and boosts confidence. Instead of waiting for a scheduled deep clean, you can address potential hygiene issues in real-time. This efficiency makes them the perfect tool for any busy facility where maintaining a high standard of hygiene is non-negotiable.

    Why Just 'Looking Clean' Isn't Enough

    There's a world of difference between a space that looks clean and one that's truly disinfected. While traditional janitorial services make a facility look pristine, they can leave dangerous gaps in protection that put the health of your guests, customers, and staff at risk.

    Think about a simple wipe-down with a damp cloth. It's an approach that hinges entirely on human diligence. It’s incredibly easy for even the most dedicated cleaner to miss spots, especially on high-touch zones like door handles, light switches, and shared equipment. This inconsistency creates a false sense of security, where a surface that appears clean might still be a hotspot for harmful pathogens.

    Illustrates door cleaning: wiping red spots with a towel and spraying disinfectant.

    This exact problem has become a major focus for businesses, sparking huge changes in how facilities handle sanitation. While advanced technologies like the electrostatic disinfection sprayer have grown in popularity for deep cleaning, the importance of daily, point-of-contact sanitation with wipes has become equally critical.

    The global market for cleaning products reflects this shift. Post-pandemic, awareness of surface transmission went through the roof, especially as studies revealed that old-school wiping methods were missing up to 50% of high-touch zones in places like event venues and car dealerships. You can explore more data on this market trend to see just how fast things are changing.

    The Hidden Dangers of Cross-Contamination

    One of the biggest flaws in manual cleaning is the constant risk of cross-contamination. When a single cloth gets used to wipe down multiple surfaces, it can easily pick up germs from one spot and spread them everywhere else. A rag used on a contaminated restroom doorknob could then transfer those same pathogens to a conference room table or a kitchen counter.

    Disinfectant wipes solve this problem elegantly: use one wipe for a specific area, then toss it. This simple "one-and-done" approach eliminates the risk of spreading germs from one surface to another.

    This is particularly crucial in environments like:

    • Schools and Daycares: Where children share toys, desks, and supplies, preventing germ transfer is paramount.
    • Restaurants: Quick table turnovers demand efficiency, but using the same cloth to wipe multiple tables is a recipe for cross-contamination.
    • Offices: Shared spaces like kitchens and copy rooms can become germ highways if not cleaned properly.

    Cross-contamination doesn't just undermine your cleaning efforts; it actively works against them. Instead of eliminating threats, you may inadvertently be moving them to new locations where they can thrive.

    Failing to Meet Modern Expectations

    Today’s customers and employees expect a higher standard of cleanliness than ever before. People are more aware of hygiene risks and actively look for businesses that show a real commitment to safety. A visibly clean environment just doesn't cut it anymore; people want solid proof that the spaces they use are properly disinfected.

    For facility managers and business owners, this means outdated cleaning protocols have become a serious liability. Inconsistent manual wiping can lead to bad reviews, tarnish your brand's reputation, and ultimately hurt your bottom line. Integrating disinfectant wipes provides a visible, effective, and consistent cleaning solution that modern standards demand, turning sanitation from a chore into a powerful business advantage.

    Getting the Right Cleaning Plan for Your Space

    An effective cleaning protocol isn't one-size-fits-all. The real value comes from creating a strategic plan tailored to your specific environment. A generic approach wastes time, supplies, and money.

    The secret is to think like your customers and staff. Where do they walk? What do they touch? Where do they gather? The answers to those questions are the foundation of a smart disinfection protocol that solves your facility's unique challenges, keeping people safe and your operations running smoothly.

    The Playbook for Offices

    A modern office is a hub of collaboration, which also makes it a hub for germs. A proactive cleaning strategy is essential for employee health and productivity.

    • Primary Targets: Focus on shared touchpoints. This includes door handles, light switches, coffee machines, microwave handles, conference room tables, and reception area surfaces. Don't forget individual desks, keyboards, and phones.
    • Frequency Recommendations: High-traffic common areas should be wiped down multiple times a day. Encourage employees to wipe their personal workspaces at the beginning and end of each day.
    • Sales Tip for Suppliers: Frame disinfectant wipes as an investment in employee wellness and productivity. Fewer sick days mean a healthier bottom line. Offer bulk purchasing options for cost savings.

    The Playbook for Gyms and Fitness Centers

    Gyms are practically petri dishes by design—you've got sweat, shared equipment, and people breathing heavily in close quarters. Members are hyper-aware of cleanliness, so a visible and effective disinfection routine is a huge factor in member retention.

    • Primary Targets: Locker rooms are ground zero. Benches, locker handles, and shower areas need daily attention. On the floor, prioritize weight benches, dumbbells, cardio machine consoles, and yoga mats.
    • Efficiency Hack: Place disinfectant wipe dispensers strategically throughout the facility and encourage a "wipe-before-you-wipe-after" culture among members. This makes hygiene a shared responsibility.
    • The Marketing Angle: Don't keep your cleaning protocol a secret! Promoting your commitment to hygiene is a brilliant marketing move. Talk it up during membership tours. It shows you're invested in member safety and builds trust.

    A visible and consistent disinfection routine does more than just protect health—it becomes a key selling point that differentiates your facility from competitors. Customers will absolutely pay a premium for peace of mind.

    For a reliable supply of high-quality wipes, we recommend Wipes.com Disinfectant Wipes to maintain a superior standard of hygiene. Providing easy access to these wipes empowers staff and patrons to keep surfaces clean throughout the day. You can find the right products for your needs by visiting Wipes.com.

    The Playbook for Restaurants and Retail

    Restaurants and retail stores share a common challenge: high customer turnover and the absolute need to present a perfectly clean environment for every new visitor.

    • For Restaurants: The main goal is to sanitize tables, chairs, menus, and payment terminals quickly between seatings. Wipes are perfect for this rapid turnover. Don't forget host stands and restroom fixtures.
    • For Retail Stores: Focus on shopping cart handles, checkout counters, credit card keypads, and fitting room door handles. Making wipes available for customers to use on their carts is a great customer service touch.
    • Sales Tip for Janitorial Services: Offer a "Hygiene Maintenance Package" to clients that includes regular restocking of disinfectant wipes in key areas. This demonstrates a comprehensive approach to cleanliness and creates a recurring revenue stream.

    Facility-Specific Application Guide for Disinfectant Wipes

    To help facility managers get a quick snapshot of how to approach this, we’ve put together a reference guide. It breaks down where and how often to use disinfectant wipes based on your facility type.

    Facility Type Primary Target Areas Recommended Frequency
    Offices Desks, Keyboards, Phones, Doorknobs, Kitchenette Daily for personal spaces; 2-3x daily for common areas.
    Gyms Cardio Machines, Free Weights, Benches, Locker Handles Before and after each use (member responsibility); hourly staff wipe-downs.
    Restaurants Tables, Chairs, Menus, POS Systems, Condiment Holders After each party leaves; hourly for high-touch public areas.
    Retail Stores Shopping Carts, Checkout Counters, Keypads, Door Handles Hourly for high-traffic zones; provide for customer use at entrance.
    Schools Desks, Chairs, Toys, Doorknobs, Cafeteria Tables Multiple times daily, especially before and after meals/activities.

    Think of this table as a starting point. The key is to watch how people use your space and adjust your plan to match reality.

    Ultimately, a proactive and customized approach to cleanliness is what separates the best from the rest. By using powerful tools like an electrostatic disinfection sprayer for deep cleaning and keeping reliable disinfectant wipes on hand for daily maintenance, you create a complete system that protects your clients and elevates your brand. Prioritizing cleanliness isn't an expense—it's an investment that always pays off.

    How to Choose the Right Wipes and Disinfectant

    Picking the right disinfectant wipe isn't just about grabbing the cheapest option. It’s an investment in a system that has to be effective, safe for your surfaces, and convenient for your team and customers. A mismatch can lead to damaged equipment, ineffective cleaning, and a poor return on your investment. Get it right, and you’ll see the payoff in safety and customer confidence.

    The need for better disinfection is undeniable. With hospital-acquired infections (HAIs) impacting over 1.7 million patients in the US each year, the pressure is on for more effective cleaning technologies in all public spaces. This has pushed the market for disinfectant products—including advanced tools like the electrostatic disinfection sprayer, valued at US$351.2 million in 2024—into the spotlight. While sprayers are great for large areas, wipes are essential for the high-touch surfaces where most transmission occurs. You can discover more insights about this growing market and its trajectory.

    Evaluating Wipe Features

    When you start comparing products, the first big question is the disinfectant itself. What germs does it kill?

    • EPA Registration: Look for an EPA registration number on the label. This proves the product has been tested and verified to kill the pathogens it claims to. Many wipes are on the EPA's List N for effectiveness against viruses like SARS-CoV-2.
    • Kill Claims: Check the label for specific bacteria and viruses the wipe is effective against. Choose a product with a broad spectrum of kill claims relevant to your environment (e.g., flu, E. coli, Staph).

    Next up is material and durability. A flimsy wipe that tears or dries out instantly is useless.

    • Wipe Material: Look for non-woven fabrics that are thick and durable enough to scrub a surface without falling apart.
    • Moisture Level: The wipe should be sufficiently saturated to stay wet long enough to meet its required "dwell time" but not so wet that it leaves surfaces dripping.

    A final feature to consider is packaging. For public-facing areas like a gym or store entrance, a center-pull dispenser is ideal for easy, one-at-a-time dispensing. For staff use, larger canisters or resealable soft packs may be more practical.

    Selecting a Compatible and Effective Disinfectant

    The disinfectant in the wipe is only effective if it's safe for your surfaces. Using the wrong chemical can damage furniture, electronics, and equipment.

    Look for formulas that are compatible with a wide range of materials. Common active ingredients include:

    • Quaternary Ammonium Compounds (Quats): These are excellent broad-spectrum disinfectants that are effective against most bacteria, viruses, and fungi. They are common in general-purpose wipes. You can learn more about them in our article on what are quaternary ammonium compounds.
    • Alcohol: Alcohol-based wipes are great for electronics as they evaporate quickly, but may not be suitable for all surfaces.
    • Hydrogen Peroxide: A powerful and fast-acting disinfectant that breaks down into water and oxygen, making it a more eco-friendly choice.

    Beyond compatibility, you must understand dwell time. This is the non-negotiable window a disinfectant needs to stay wet on a surface to effectively kill pathogens. A product with a 3-minute dwell time is perfect for quick turnovers, while one with a 10-minute dwell time may be impractical for busy environments. Choose a wipe with a dwell time that fits your real-world operational pace.

    Putting Your Wipes to Work: A Step-by-Step Protocol

    Having disinfectant wipes available is one thing; using them effectively is another. A simple, repeatable protocol is what turns a useful product into a reliable system for keeping your environment truly clean.

    This isn’t just about getting better results, either. It’s about building confidence. When your customers and staff see a professional, well-executed cleaning process in action, it shows them you’re serious about their well-being. That kind of trust is priceless.

    It's no surprise the market for hygiene products is booming. The demand for tools like the electrostatic disinfection sprayer jumped from USD 284.6 million in 2023 and is on track to hit USD 523.9 million by 2031. Why? Because businesses are finally prioritizing infection control. Wipes are the frontline tool in this effort, providing 99.9% surface disinfection in seconds. You can read the full research on this market's expansion to see the trends for yourself.

    The Pre-Wipe Checklist

    For the best results, a few prep steps are key.

    1. Clean First, Disinfect Second: Remember, disinfectant wipes are for killing microscopic pathogens, not for cleaning heavy soil, dust, or grime. For visibly dirty surfaces, pre-clean them with a general-purpose cleaner first. This allows the disinfectant to make direct contact with the surface.
    2. Read the Label: Always check the product label for specific instructions, kill claims, and the required dwell time.
    3. Use One Wipe Per Area: To avoid cross-contamination, use a fresh wipe for each distinct surface. For example, use one wipe for the tabletop, and a new one for the chair.

    Personal Protective Equipment (PPE) Is Recommended

    While most disinfectant wipes are safe for general use, it's always a good practice to wear gloves, especially for janitorial staff or anyone performing extensive cleaning tasks. This protects the skin from prolonged exposure to chemicals.

    • Gloves: Nitrile gloves will keep the disinfectant off your skin.
    • Eye Protection (Optional): If there is any risk of splash, safety glasses are a good idea.

    This flowchart breaks down how to think about choosing cleaning supplies, weighing factors like area size, foot traffic, and surface types.

    Flowchart outlining the sprayer choice process, considering portability, capacity, and nozzle type.

    As you can see, the right choice depends on the job. An electrostatic sprayer is great for large-scale disinfection, while wipes are essential for targeted, high-frequency cleaning of touchpoints.

    Mastering the Wiping Technique

    The secret to effective disinfection is ensuring complete coverage.

    Use enough wipes to leave the surface visibly wet. This is crucial for meeting the product's dwell time.

    Use a systematic pattern, like an "S" shape, to wipe the surface. Start from the cleanest area and move towards the dirtiest to avoid spreading contaminants. Make sure you cover the entire surface, including edges and corners.

    Key Takeaway: Let the surface air dry. Wiping it dry with a cloth before the dwell time is up will render the disinfectant ineffective. The surface must remain wet for the full duration specified on the label.

    Post-Wipe Procedures

    Once you're done wiping, the job is simple.

    The single most critical step is to respect the dwell time. Check the disinfectant's label—it will tell you exactly how long a surface needs to stay visibly wet to kill all the pathogens it's rated for. Don't touch or use the surface until that time is up.

    Once the dwell time has passed and the surface is dry, it is ready for use. Dispose of the used wipe and gloves properly. Now the area has been disinfected thoroughly and safely.

    Making the Business Case for Proactive Hygiene

    Think of your cleaning supplies, particularly disinfectant wipes, not as an operational expense, but as a strategic investment with a clear and compelling return. Yes, there's a recurring cost. But the long-term gains—in both customer loyalty and operational health—quickly turn this simple product into a powerful business advantage. The ROI here isn't just measured in dollars, but in trust and reputation.

    The most immediate payback comes from enhanced safety and public perception. In a world where consumers are highly conscious of hygiene, visible cleaning practices are a form of marketing. Providing disinfectant wipes for customers or having staff actively clean high-touch areas demonstrates a commitment to safety that people notice and appreciate.

    Maximize Confidence, Minimize Risk

    Beyond just looking good, a consistent wiping protocol actively reduces the risk of illness transmission among staff and customers. This means fewer employee sick days, leading to better productivity and reduced costs associated with absenteeism. For any customer-facing business, a healthier environment means happier visitors who are more likely to return.

    This story is a great pitch for sales professionals, too. You're not just selling wipes; you're offering a healthier environment that protects staff, builds customer confidence, and keeps the whole operation running without a hitch. It’s an investment in business continuity.

    The Intangible Returns of Visible Cleanliness

    The benefits go way beyond the balance sheet. In today's market, visible proof of cleanliness directly sways consumer behavior. When customers see disinfectant wipe dispensers and staff diligently wiping surfaces, it sends a powerful, unspoken message: you take their safety seriously. That builds a level of trust that translates directly into positive online reviews, repeat business, and a much stronger brand reputation.

    For any business that wants to move beyond the basics, openly sanitizing high-traffic areas in business spaces is a critical part of maintaining public health and keeping your doors open. It’s a commitment that customers notice, and they appreciate it.

    Ultimately, a rock-solid disinfection protocol is a form of business insurance. You're reducing the risk of illness transmission, which protects your staff, builds unshakable customer confidence, and creates an environment where people simply feel safe. When you pair a daily maintenance program using disinfectant wipes with deeper cleaning methods like an electrostatic disinfection sprayer, you create a complete system that pays dividends in both safety and success. Prioritizing cleanliness isn't just an option anymore; it's a core pillar of any thriving, modern business.

    Got Questions About Disinfectant Wipes? We’ve Got Answers.

    Jumping into a new cleaning protocol brings up a ton of questions, and disinfectant wipes are no exception. Facility managers and business owners need real, straightforward answers before they can feel good about their choice. Getting a handle on the practical details is the key to using this tool safely and getting the most bang for your buck.

    Let's tackle some of the most common questions we hear from people on the ground.

    Are Wipes Safe for Our Computers and Electronics?

    Yes, but you need to choose the right kind. Many manufacturers offer wipes specifically formulated for electronics. These typically have a lower alcohol content and are designed to evaporate quickly without leaving a residue.

    A little common sense goes a long way here. The device should always be powered off before cleaning. Never use an overly saturated wipe that could drip liquid into ports or keyboards. Wring out any excess liquid first. Stick to the guidelines from both the wipe and the device manufacturer, and you’ll get a thorough clean without putting your expensive gear at risk.

    How Long Does It Take for Surfaces to Dry?

    Drying time can shift a bit, but you can expect most surfaces to be air-dry within 3 to 10 minutes. It really depends on the disinfectant you’re using, how saturated the wipe is, and the temperature and humidity in the room.

    But here’s the thing: drying time isn't what you should be focused on. The magic word is dwell time. That’s the specific amount of time a disinfectant needs to stay wet on a surface to actually kill the germs. Always, always check the product label for the correct dwell time and make sure nobody touches the surface until that time is up.

    Can I Use the Same Wipe on Multiple Surfaces?

    Absolutely not. This is probably the most important thing to get right to prevent cross-contamination. You must use a fresh wipe for each distinct surface area. Using the same wipe to clean a doorknob and then a tabletop is a surefire way to spread germs.

    Here’s why it’s a big deal:

    • You'll Spread Germs: The primary purpose of a single-use wipe is to contain and dispose of pathogens from one area. Reusing it defeats that purpose entirely.
    • The Wipe Loses Efficacy: A wipe only holds so much disinfectant. As you use it, the chemical gets used up and the wipe picks up dirt, making it less effective on subsequent surfaces.
    • Your Cleaning Won't Actually Work: You'll be going through the motions of cleaning, but you could actually be making the environment less hygienic.

    Save yourself the trouble and train your team to follow the "one wipe, one surface, then toss" rule. It’s a simple step that protects your staff and everyone who walks through your doors.

  • A Practical Guide to Bulk Cleaning Rags

    You might think a cleaning rag is just a cleaning rag. But in facility management, that humble square of cloth is one of the most underrated tools in your arsenal. Choosing the right bulk cleaning rags isn’t just about filling a supply closet; it’s a strategic decision that hits your budget, your staff’s efficiency, and the health of your entire environment.

    For facility managers and business owners, the right rag can slash labor time, drive down long-term supply costs, and make a night-and-day difference in how clean your space actually is.

    Why Your Choice in Cleaning Rags Really Matters

    A deep clean is more than just making a place look good—it's a cornerstone of public health and your business’s reputation. Whether you’re running a gym, an office, a restaurant, or a retail store, the visible standard of cleanliness is the first impression you make. It’s a direct signal to customers and employees about how much you care.

    That commitment starts with the most fundamental tools. Simply wiping down a surface isn’t enough. The real job is to first remove the gunk, and then kill the germs hiding underneath. This is where getting smart about your supplies pays off big time.

    The Foundation of a Hygienic Environment

    Truly effective sanitation is a classic one-two punch: you have to clean, then you disinfect.

    • Cleaning: This is all about physically removing the dirt, grime, and debris from a surface. A high-quality cleaning rag is your go-to tool for this, lifting away all the buildup where germs love to hide.
    • Disinfecting: Once the surface is clear, that's when disinfectant wipes come in to do their job, killing off the bacteria and viruses left behind. This second step is what makes a high-touch area genuinely safe.

    When you think of these tools as a system instead of separate purchases, you elevate your entire cleaning game. And it’s not just you—the entire world is waking up to this. The global market for hard surface cleaning rags was valued at a whopping USD 11.41 billion in 2023 and is on track to hit USD 19.62 billion by 2031. That’s a clear sign of just how critical these supplies are. You can explore more market projections about the growth of cleaning supplies to see the full picture.

    By putting real thought into your cleaning protocol—integrating both quality rags for the heavy lifting and effective disinfectant wipes for the finishing blow—you’re doing more than just maintaining a facility. You’re building a safer, more trustworthy environment for every single person who walks through your doors.

    Choosing the Right Material for Any Job

    Picking the right bulk cleaning rags is a lot more strategic than just grabbing the cheapest box you can find. Different materials are built for completely different jobs. Think of it like a mechanic's toolkit—you wouldn’t use a screwdriver where you need a wrench. Using the wrong rag just leads to wasted time, lousy results, and can even damage your surfaces.

    When you understand what each material does best, you can build a smart, cost-effective cleaning arsenal that’s perfectly matched to what your facility actually needs. It’s what turns cleaning from a chore into a precise, results-driven part of your operation.

    Microfiber: The Dirt Magnet

    Microfiber is the high-tech workhorse of modern cleaning. Its fibers are incredibly fine—way thinner than a human hair—and they’re split during manufacturing. This process creates a massive surface area with a natural electrostatic charge.

    That charge acts like a magnet for dust, dirt, and bacteria. It traps particles deep inside the cloth instead of just pushing them around. This makes microfiber the undisputed champ for dusting, polishing, and sanitizing high-touch surfaces without leaving behind lint or streaks.

    Microfiber's knack for grabbing and holding microscopic particles makes it a go-to for health-focused environments. It can remove up to 99% of bacteria from a surface with just water, which means you can lean less on harsh chemicals for everyday cleaning.

    The market definitely reflects this. The global microfiber cleaning cloths market was valued at USD 738 million in 2026 and is expected to hit USD 921.66 million by 2035. That growth is coming from smart facility managers at airports, gyms, and event venues who get its superior cleaning power and long-term value. You can discover more insights into the microfiber market's expansion here.

    Cotton: The Classic Sponge

    Cotton is the old-school champion of absorbency. Its natural fibers are porous and can soak up a serious amount of liquid. This makes it the king for tackling spills, wiping down wet areas, and any general-purpose cleaning where soaking up moisture is the main goal.

    For places like restaurants, bars, or auto shops that are constantly dealing with liquid messes, cotton rags are an absolute must-have. They’re tough, easy to find, and you can always count on them for heavy-duty absorption.

    Blended Fabrics: The Versatile Hybrid

    Blended fabrics, usually a mix of cotton and synthetic fibers like polyester, give you a practical middle ground. They combine some of cotton’s absorbency with the durability and lower price point of synthetics.

    These are fantastic all-rounders for general cleaning that doesn’t demand the special skills of pure microfiber or cotton. If you need a cost-effective workhorse for a wide range of duties, blends are a solid, practical choice. For a more detailed comparison, check out our guide on the best cloths for cleaning to see how they stack up side-by-side.

    Comparing Common Cleaning Rag Materials

    To make the choice a bit easier, here’s a quick side-by-side look at the most common materials. This should help you zero in on the best bulk rag for your facility's specific needs, whether you're focused on absorbency, durability, or a specific cleaning task.

    Material Type Primary Benefit Best For Potential Drawback
    Microfiber Superior particle and bacteria trapping (up to 99%) Dusting, sanitizing, polishing, cleaning glass, high-touch surfaces Higher initial cost, requires proper laundering
    Cotton High absorbency Soaking up spills, heavy-duty liquid cleanup, general-purpose cleaning Can leave lint, may harbor bacteria if not dried
    Blends Cost-effective and versatile General maintenance, light-duty cleaning, tasks not requiring high absorbency Lower performance than pure materials

    Each material has its place in a well-stocked supply closet. The key is matching the rag's strengths to the job at hand to get the best results without overspending.

    Knit vs. Cut: Why the Construction Matters

    Beyond the fiber itself, how the rag is constructed makes a huge difference in how it performs. You'll mainly run into two types: knit and cut.

    • Knit Rags: These are usually made from new, looped fabric—think t-shirt material. They are durable, low-lint, and have a little bit of stretch. That makes them perfect for wiping down machinery, polishing sensitive surfaces, and general maintenance where you need a sturdy cloth that won’t leave fuzz behind.

    • Cut Rags: Often made from reclaimed textiles like old towels or flannel shirts, these rags have exposed fibers along their cut edges. This makes them incredibly absorbent, but it also means they’re more likely to leave lint. They are the ideal choice for soaking up oil, grease, and big spills where you need maximum absorption and a little lint isn't a dealbreaker.

    Making a smart decision on your cleaning supplies has a direct ripple effect on your operational advantage, your budget, and your team's overall efficiency. This diagram shows exactly how these core pillars of your business are tied to the rags you choose.

    A flowchart illustrates the impact hierarchy of cleaning rags, showing benefits for operations, budget, and efficiency.

    As you can see, the right materials directly lead to better efficiency and tighter budget control, which ultimately strengthens your facility's entire operation.

    Matching Rags to Your Facility's Needs

    Knowing the difference between cotton and microfiber is a great start, but putting that knowledge to work is what separates a clean facility from a truly hygienic one. Every commercial space has its own unique cleaning battles. A one-size-fits-all approach to your bulk cleaning rags just won't cut it.

    The real key to efficiency, cost-savings, and a higher standard of cleanliness is tailoring your cleaning arsenal to your specific needs. Let's break down how to build the perfect rag toolkit for some of the most common commercial spaces.

    Illustration showing cleaning activities in a gym and office, and color-coded rags in a restaurant.

    Gyms and Fitness Centers

    Gyms are a constant battleground against sweat, germs, and the relentless wear-and-tear of high traffic. Your cleaning protocol here has to be tough and non-stop. Your two main weapons in this fight will be high-absorbency cotton and powerful disinfectant wipes.

    • For Wiping Down: Absorbent cotton rags are great for the initial wipe-down of sweat from benches, machines, and free weights, prepping the surface for the all-important next step.
    • For Sanitizing: Once sweat and grime are gone, follow up with disinfectant wipes. These are absolutely essential for killing germs on high-touch points like dumbbell handles, treadmill screens, and locker room doors where pathogens thrive. We recommend Wipes.com Disinfectant Wipes for reliable, professional-grade results.

    Cleaning Tip: Focus disinfectant wipe usage on high-touch surfaces multiple times a day. Efficiency hack: Keep wipe dispensers near equipment zones to empower members to clean before and after use, promoting a community standard of hygiene.

    Modern Office Spaces

    In an office, the little details make all the difference. Streaks on a conference room screen or lint left behind on a glass partition can make the whole space feel unprofessional. The mission here is to achieve a polished, pristine look while ensuring shared spaces are hygienic.

    • For Surfaces: Low-lint knit microfiber cloths are perfect for cleaning monitors, glass doors, and shiny surfaces without leaving residue.
    • For Health: Disinfectant wipes are crucial for shared spaces like breakrooms and reception areas.

    Cleaning Tip: Establish a daily schedule to wipe down high-touch hotspots: keyboards, mice, door handles, coffee makers, and conference room phones. A two-step process of wiping with a damp cloth followed by a disinfectant wipe is the most effective approach to reduce germ transmission and minimize employee sick days.

    Restaurants and Food Service

    Nowhere is the risk of cross-contamination more serious than in a restaurant. This is an environment where a strategic, disciplined approach to cleaning isn't just a best practice—it's a legal and ethical mandate. The industry standard here is a color-coding system for rags.

    • Green Rags: Used exclusively for food preparation areas and cutting boards.
    • Blue Rags: For general front-of-house cleaning, like wiping down tables and counters.
    • Red Rags: Reserved for high-risk zones, such as restrooms and floors.

    Cleaning Tip: Pair your color-coded rag system with single-use disinfectant wipes for sanitizing tables between customers. This ensures a fresh, uncontaminated surface for every guest and demonstrates a clear commitment to diner safety.

    Sales and Operations Tips

    Whether you're a sales professional or a facility manager, promoting a higher standard of clean is a powerful way to add value. Don't just sell supplies; sell a complete hygiene solution.

    1. Educate on the ROI of Hygiene: Explain how a robust cleaning program, including both cleaning rags and disinfectant wipes, can reduce employee sick days and boost customer confidence. A visibly clean and sanitized facility is a direct reflection of a well-run business.
    2. Bundle Your Solutions: Offer a full hygiene package. Instead of just selling bulk cleaning rags, create a kit that includes microfiber cloths for cleaning and a case of disinfectant wipes for sanitizing high-touch surfaces.
    3. Demonstrate the Two-Step Process: Show clients why they need both tools. Clean a visibly dirty surface with a rag first, then show them how a disinfectant wipe finishes the job by killing germs. That hands-on demonstration makes the concept of total hygiene stick.

    The True Cost of Bulk Cleaning Rags

    For anyone running a facility, the sticker price on a box of bulk cleaning rags is just the start of the story. If you really want to get a handle on what your cleaning supplies are costing you, you have to look past the initial purchase and start thinking in terms of cost-per-use. It’s a simple calculation, but it reveals the true value you're getting over time.

    A cheaper, disposable rag might seem like a budget win upfront. But if it shreds after one tough job, its cost-per-use is actually sky-high. On the flip side, a more durable, washable rag—like a high-quality microfiber cloth—costs more out of the gate but can survive hundreds of trips through the laundry. When you divide its initial price by all those uses, you often find it’s the smarter financial choice by a long shot.

    Thinking this way is a game-changer for building an efficient operation. A well-managed supply chain for your cleaning essentials is one of the cornerstones of a facility that's financially buttoned up.

    Smarter Sourcing and Finding the Right Supplier

    Getting the right material is only half the battle; finding the right supplier is just as important. A good partner doesn't just ship you a box. They help you dial in your inventory and make your budget work harder. The market for janitorial supplies, which includes bulk cleaning rags, is absolutely massive and only getting bigger. It was valued at USD 68,845.1 million in 2024 and is expected to hit USD 94,475.6 million by 2030. That growth shows you just how big the sanitation industry is and why making smart purchasing moves matters. Learn more about janitorial market trends to get a feel for the landscape.

    When you're checking out suppliers, here are a few practical tips:

    • Always Ask for Samples. Never commit to a big order blind. Get samples in your hands so you can test the rag's quality, absorbency, and durability in your own environment, on your own messes.
    • Talk Bulk Pricing. Don't be shy about negotiating. Suppliers are almost always willing to give you a better deal on larger, recurring orders.
    • Ask About Consistency. You need to know that the tenth box of rags will be the exact same quality as the first. Ask them straight up about their quality control process.

    A Simple Framework for Smart Inventory

    A smart inventory system saves you from two expensive headaches: wasting money on overstocking and killing productivity with shortages. The goal is to hit that sweet spot where you have exactly what you need, right when you need it.

    You don't need a complex system. Just a simple framework to estimate your annual needs will keep you out of trouble.

    1. Get a Baseline. For one full week, track your rag usage. Count how many rags your team goes through each day for different jobs across the facility.
    2. Find Your Daily Average. After a week, do the math to find the average number of rags used per day.
    3. Use the "Three-Bin" Rule. This is a common best practice in operations. Keep a three-day supply on hand: one batch of rags in use, one batch in the laundry, and one clean batch in storage. Just multiply your daily average by three to find your minimum inventory level.

    Example: Your gym staff burns through 50 rags a day. Your minimum inventory should be 150 rags (50 in use + 50 being washed + 50 ready to go in storage). This simple setup ensures you never run out, keeping things running smoothly.

    This framework turns purchasing from a guessing game into a data-driven decision. You’ll spend your budget more wisely and your facility will always be ready for action.

    Getting the Most Life Out of Your Cleaning Rags

    Here’s the secret to making your investment in bulk cleaning rags actually pay off: proper care. A high-quality rag can have a surprisingly long and productive life, but only if you treat it right. By setting up a smart lifecycle process—from washing to disposal—you can seriously lower your long-term supply costs and make sure your cleaning tools are always ready to perform.

    This isn't just about tossing them in a machine. It's about a disciplined approach that preserves their grit and absorbency. A well-maintained rag does its job better, which means your staff works more efficiently and your facility stays cleaner.

    Illustration showing a laundry process for rags, with a washer, warm setting, and bins for clean and greasy items.

    Best Practices for Laundering Rags

    The laundry room is where a cleaning rag’s fate is sealed. A few simple rules can make all the difference, especially when you’re dealing with finicky materials like microfiber.

    First up, always wash different types of rags separately. The greasy, oil-soaked rags from the auto shop should never, ever share a machine with the microfiber cloths used for dusting offices. This stops cross-contamination in its tracks and ensures the grime from one job doesn't ruin the rags meant for another.

    To really extend the life of your rags, understanding proper textile washing techniques is a game-changer for maintaining quality and preventing shrinkage. Warm water is usually the sweet spot—it’s great for killing germs and breaking down dirt without being so harsh it damages the fibers.

    Crucial Tip: Absolutely no fabric softeners or bleach, especially on microfiber. Fabric softeners will clog the microscopic fibers that make the cloth so good at trapping dust, basically rendering it useless. Bleach, on the other hand, just breaks down the fibers prematurely, cutting a rag's lifespan short.

    Smart Storage and Organization

    Once your rags are clean and dry, how you store them is just as important as how you wash them. A disorganized heap of clean rags is just an invitation for them to get dirty again before they’re even used. A systematic approach to storage keeps your supplies organized, accessible, and ready for action.

    Your goal is a system that’s both clean and crystal clear for your staff. This prevents confusion and makes the entire cleaning operation run smoother.

    • Sealed and Labeled Bins: Use clean, sealed plastic bins to store laundered rags. Label every bin clearly—for example, "Clean Microfiber – General Use" or "Clean Cotton – Spills."
    • Color-Coded Storage: If you use a color-coding system for different cleaning zones (like red for restrooms, green for kitchens), your storage should match. Keep each color in its own designated bin.
    • Separate Dirty from Clean: This one is non-negotiable. Have clearly marked, separate containers for used rags to prevent cross-contamination and keep your clean supply pristine.

    For a deeper dive into maintaining these essential tools, our guide on how to clean microfiber cloths offers more specific tips to preserve their unique cleaning power.

    Knowing When to Say Goodbye

    Even the toughest rag has a finite lifespan. Knowing when to retire one is key to maintaining high cleaning standards. If you keep using a rag that's past its prime, you’re just pushing dirt around instead of picking it up.

    Look for these dead giveaways that a rag is done:

    • Fraying or Holes: Any obvious physical damage means the rag's structural integrity is shot.
    • Permanent Stains or Odor: If a rag still looks grimy or smells funky after a thorough wash, it’s likely holding onto bacteria.
    • Loss of Absorbency: When a cotton rag stops soaking up spills and just pushes liquid around, its time is up.
    • Reduced "Grip": If a microfiber cloth no longer seems to grab dust, it has lost its electrostatic charge.

    When a rag hits this point, it’s time to toss it responsibly. For any rags used with hazardous chemicals, make sure you follow local regulations for proper disposal to ensure safety and compliance.

    Elevating Your Standard of Clean

    Getting strategic about your bulk cleaning rags is about more than just buying supplies; it’s about elevating your entire standard of cleanliness. When you choose the right materials, match them to specific jobs, and manage your inventory well, a simple rag becomes a powerful tool for hygiene and efficiency. That shift sends ripples across your business, boosting your reputation and creating a safer space for everyone.

    But a truly professional clean doesn't stop at wiping away visible dirt. To make your facility genuinely hygienic, you have to pair the right rag with a powerful disinfectant.

    The Power of the Two-Step Clean

    Think of it as a one-two punch. The first step is using a quality rag to physically remove all the loose dirt, dust, and grime from a surface. This is non-negotiable, because disinfectants can't do their job effectively if they're trying to fight through a layer of muck.

    The second step is where the real magic happens: using a disinfectant to kill the unseen germs, bacteria, and viruses left behind.

    This is where disinfectant wipes really shine, especially for high-touch surfaces. Their pre-moistened, single-use design delivers a consistent dose of disinfectant every single time. This dramatically cuts down the risk of cross-contamination—something that can easily happen with reusable rags if you're not careful.

    • Efficiency: Wipes are ready to go right out of the container, saving your team precious time they’d otherwise spend mixing chemicals or prepping buckets.
    • Effectiveness: They're saturated with the perfect amount of disinfectant, ensuring surfaces get the proper contact time needed to actually kill germs.
    • Safety: A fresh wipe for each key area stops the spread of pathogens from one spot to another. Simple as that.

    To maintain that high standard, it’s smart to round out your rag supply with other essential cleaning supplies for restaurants and facilities. When you integrate disinfectant wipes into your cleaning routine, you’re doing more than just tidying up. You're actively protecting the health of every single person who walks through your doors. That commitment to a higher standard of clean builds trust and shows you’re genuinely invested in their well-being. Prioritize cleanliness today by integrating a powerful disinfectant wipe into your daily routine or product offerings.

    Got Questions About Bulk Rags? We've Got Answers.

    When you're managing a facility, the details matter. And something as simple as choosing and using cleaning rags can bring up a lot of practical questions. Getting the right answers is the key to building a smarter, safer, and more efficient cleaning program. Here are our straight-to-the-point answers for the most common questions we hear from managers like you.

    What’s Really the Most Cost-Effective Rag?

    While it’s tempting to grab the cheapest reclaimed cotton rags off the shelf, the lowest initial price is rarely the full story. True cost-effectiveness comes down to cost-per-use.

    Think about it this way: a high-quality microfiber cloth might cost more upfront, but it can be properly laundered hundreds of times. That durability makes its long-term cost sink far below less durable, single-use rags.

    The smartest play is to match the rag to the job. Invest in durable, washable microfiber for routine daily cleaning. For the really nasty stuff—heavy grease, harsh chemicals, or anything you wouldn't want in your washing machine—use lower-cost, disposable options.

    How Do I Stop Rags from Spreading Germs?

    A color-coding system. It’s the undisputed industry standard for a reason: it's simple, visual, and incredibly effective at preventing cross-contamination.

    Here’s how to do it right:

    • Assign colors to specific zones. A classic setup is blue for general surfaces (windows, desks), green for food service areas, and red for high-risk zones like restrooms.
    • Train your team relentlessly. The system only works if every single person on your crew knows the color code by heart and sticks to it—no exceptions.
    • Launder color groups separately. This is the final, crucial step. Washing the red "restroom" rags with the green "kitchen" rags defeats the whole purpose.

    This approach practically eliminates the risk of dragging germs from a bathroom stall to a breakroom countertop.

    How Many Rags Do I Actually Need to Keep in Stock?

    A reliable rule of thumb is to always have a three-day supply on hand. This simple inventory model ensures you never run out of clean rags and bring operations to a halt.

    It works like this:

    • One set is in active use today.
    • A second set is in the laundry being washed.
    • A third set is clean, folded, and ready to go on the shelf.

    To figure out your number, just calculate how many rags your team goes through on an average day. If your crew uses 40 rags per day, you’ll want a total inventory of at least 120 rags. You can tweak this baseline a bit depending on how quick your laundry turnaround is.

    Should I Use Both Rags and Disinfectant Wipes?

    Absolutely. In fact, using them together is the gold standard for a professional-level clean. This clean-then-disinfect method is a two-step knockout punch for dirt and germs.

    First, use your bulk cleaning rags to physically remove all the visible dirt, dust, and grime. This pre-cleaning step is critical because disinfectants can’t work effectively if they have to fight through a layer of filth.

    Once the surface is visually clean, you bring in the disinfectant wipe. This is what actually kills the invisible germs, bacteria, and viruses left behind. You're not just tidying up; you're actively sanitizing the environment.

    This one-two combo turns cleaning from a simple chore into a powerful hygiene protocol, which is non-negotiable for high-touch points in any facility.

    For a reliable, professional-grade solution, we recommend Wipes.com Disinfectant Wipes. You can check them out at their website: https://www.wipes.com. Prioritizing this level of clean protects everyone in your building and shows you’re serious about their well-being.

  • A Complete Guide to Cleaning a Stone Floor for Lasting Shine

    In any commercial facility, from a bustling corporate lobby to a high-end gym, your stone floor isn't just a surface—it's the first handshake you offer every guest. It’s a powerful, unspoken statement about your brand’s commitment to quality, cleanliness, and detail. This is why proper maintenance is so much more than cleaning; it's a direct investment in protecting your asset, ensuring guest safety, and shaping the entire customer experience.

    Neglecting specialized care isn't just an oversight; it's a business risk that chips away at your reputation and your bottom line. This guide provides practical, informative tips for business owners, janitorial staff, and sales professionals on how to maintain pristine stone floors, highlighting the undeniable benefits of a truly clean and hygienic facility.

    Why Your Stone Floor Is a Business Asset

    Your gleaming marble lobby or rustic slate showroom is often the very first physical touchpoint a customer has with your business. Long before anyone says "hello," that floor is communicating a message of professionalism and high standards. The problem is, many facility managers treat these high-value surfaces with the same generic cleaning methods they’d use on vinyl tile, completely unaware of the irreversible damage they’re causing.

    Unlike resilient flooring, natural stone like granite, marble, and travertine is porous and incredibly sensitive to chemicals. Sloshing the wrong product on it—like an acidic or highly alkaline cleaner—doesn't just fail to clean; it actively etches, dulls, and degrades the stone itself. Before you know it, you’re looking at a massive restoration project that could have been easily avoided.

    The True Cost of Improper Care

    The financial fallout from neglecting your stone floors is bigger and more complex than most people realize. These installations are a significant investment. The global stone flooring market, valued at a hefty USD 14.68 billion, is on track to hit USD 26.40 billion by 2034. Yet, this valuable asset can turn into a huge liability in a heartbeat.

    A shocking 70% of facility managers report slip-and-fall incidents that are directly linked to improperly cleaned or maintained stone surfaces. For short-term rental hosts, something as simple as using the wrong pH-neutral cleaner can visibly etch a marble floor in just six months, potentially slashing the property's value by up to 15%. To get the full picture, you can explore more data on the stone flooring market and its maintenance impact.

    "A well-maintained stone floor is a direct reflection of a business's operational excellence. It tells customers that you care about the details, which builds trust and confidence in your brand from the ground up."

    Shifting from Cost to Investment

    When you start viewing stone floor maintenance as an investment instead of just another expense, the returns become obvious. Venues that switch to targeted stone care protocols don't just protect their floors; they see real, measurable improvements across the board.

    Facilities with a proper stone care plan report an average 25% reduction in long-term maintenance costs and an 18% boost in guest satisfaction scores. The data doesn't lie—a smart approach to cleaning your stone floors pays for itself.

    By putting a solid care regimen in place, you’re hitting several key business goals at once:

    • Enhance Brand Perception: A pristine floor reinforces a premium, high-quality brand image.
    • Improve Guest Safety: A clean, dry, and properly finished floor dramatically cuts down on slip-and-fall risks.
    • Protect Your Asset: You extend the life of an expensive installation, avoiding costly repairs or premature replacement.

    This guide is your practical roadmap. We’ll cover everything a facility manager or cleaning professional needs to know, from daily upkeep and deep cleaning to stain removal. The goal is to give you the expertise to protect your investment and elevate your customer experience—one gleaming floor at a time.

    Know Your Stone Before You Clean

    Treating all stone floors the same is one of the costliest mistakes a facility manager can make. Grabbing a generic, all-purpose cleaner might seem efficient, but for natural stone, it can lead to irreversible damage like etching, dulling, and staining. Before you even think about cleaning, you have to become a bit of a detective and figure out exactly what you're working with.

    Natural stone generally falls into two main categories, and this distinction dictates your entire cleaning strategy. This isn't just technical jargon; it's the fundamental rule that separates a pristine floor from a permanently damaged one.

    Siliceous vs. Calcareous Stone

    The first and most critical step is determining if your stone is siliceous or calcareous. It’s a simple classification that will save you a world of headaches and repair bills.

    • Siliceous Stone: This type is primarily composed of silica or quartz-like particles. Think of granite, slate, and sandstone. They are generally tough as nails and resistant to most acids found in common cleaning products.
    • Calcareous Stone: Made mainly of calcium carbonate, this category includes marble, travertine, limestone, and onyx. These stones are beautiful but are extremely sensitive to acidic substances—even something as mild as vinegar or lemon juice can cause permanent etching.

    Understanding this difference is non-negotiable for anyone tasked with maintaining a stone floor. A cleaner that makes granite shine could instantly ruin the finish on a marble entryway.

    The golden rule of stone care is simple: When in doubt, assume your stone is sensitive. Always test cleaning products in an inconspicuous area first, like under a mat or in a corner, before applying them to the entire floor.

    Identifying Your Floor Type

    So, how can you tell what you have? While a professional can give a definitive answer, you can often identify the stone based on a few visual cues.

    • Granite: Look for a granular, crystalline appearance with a mix of different colored minerals. It often has a speckled look and is known for its hardness, making it a popular choice for high-traffic commercial lobbies.
    • Marble: Famous for its elegant veining, marble has a smoother, more uniform look than granite. Its surface is softer and more prone to scratching and etching, requiring a much gentler touch.
    • Slate: This stone is easy to spot with its layered, cleft surface, which gives it a rustic, textured feel. Colors range from dark gray and black to green and purple.
    • Travertine: Characterized by its pitted surface and creamy, earthy tones, travertine is a form of limestone. Those natural holes are often filled with a resin during processing, but it remains a soft and porous stone.

    This decision tree illustrates the critical choice you make every time you clean, highlighting how proper care protects your asset while improper methods lead to costly damage.

    A business impact decision tree illustrating how floor condition influences customer experience and repair costs.

    As you can see, the path to a well-maintained floor that enhances customer experience starts with the right cleaning choices, directly avoiding expensive repairs down the line.

    Performing a Quick Floor Diagnostic

    Once you’ve got a good idea of your stone type, do a quick walk-through to assess its current condition. Pay close attention to high-traffic areas like entryways and main corridors, as these zones reveal the most about your floor's health.

    First, check the integrity of the sealant. A simple water test will do the trick: place a few drops of water on the surface and wait a few minutes. If the water beads up, your sealant is intact. If it darkens the stone or soaks right in, your floor is vulnerable and needs to be resealed promptly.

    Next, look for existing damage. Get down at a low angle and use a flashlight to spot etches, which look like dull, discolored spots on the surface. Also, map out any obvious wear patterns—areas where the finish has been worn away by foot traffic.

    You can learn more about why the chemical makeup of your cleaner is so crucial by reading our guide on what pH-neutral cleaners are and how they protect sensitive surfaces. This quick diagnostic creates a custom roadmap for cleaning, ensuring you address specific issues instead of using a generic approach that might do more harm than good.

    Daily Routines for High-Traffic Stone Floors

    In any busy commercial space—be it a gym, office, or retail store—your stone floors are under constant assault. Foot traffic, spills, and whatever the weather drags in—it all adds up. This daily grind acts like a slow-motion sandblaster, wearing away the floor's finish and integrity.

    A solid, consistent daily maintenance routine isn't just about looking good. It’s your first and best line of defense against long-term, expensive damage. The goal is simple: get rid of abrasive grit before it can scratch the surface and tackle spills before they become permanent stains. If you skip this, small issues snowball, turning a beautiful asset into a dull, worn-out liability.

    A person in blue overalls cleans a stone-patterned floor with a mop, with disinfectant wipes nearby.

    Start with Dry Dust Mopping

    Before a single drop of water hits your floor, the most important daily task is getting rid of dry soil. Dirt, sand, and grit are the number one enemies of a stone floor’s finish. Under the pressure of footsteps, these tiny, sharp particles create microscopic scratches that rob the stone of its natural shine.

    Your best tool for this job is a large, untreated microfiber dust mop. Its natural static charge is perfect for trapping fine dust and debris instead of just pushing it around. Make this the first and last thing your team does each day in high-traffic zones like lobbies, main corridors, and entryways. It’s a low-effort, high-impact step that significantly extends the life of your floor.

    Master the Damp Mop Technique

    Once the abrasive grit is gone, it’s time to damp mop. This lifts away any leftover soil and light spills. The key word here is damp, not wet. Soaking a stone floor is a classic mistake. Too much water can seep into grout lines or even the stone itself, which can lead to problems like efflorescence—that chalky white residue that’s a pain to remove.

    The right gear and solution are just as important as your technique.

    • The Right Mop: Always grab a clean microfiber flat mop head. Microfiber is a game-changer; it grabs and holds onto dirt instead of just smearing it around. Plus, it works effectively with less water and cleaning solution.
    • The Right Cleaner: Stick exclusively to a pH-neutral cleaner made specifically for natural stone. Anything acidic (like vinegar) or alkaline (like bleach or ammonia) will etch and damage calcareous stones like marble, limestone, and travertine for good.
    • The Right Method: Use a two-bucket system. One bucket is for your cleaning solution, the other for clean rinse water. This simple setup prevents you from mopping with dirty water, which is the main culprit behind streaks and a hazy, dull finish.

    A consistent daily cleaning schedule is more than just aesthetics; it's a fundamental safety protocol. One study found that over 55% of all slip-and-fall accidents are caused by hazardous walkway surfaces. Daily debris removal and proper mopping directly tackle that risk.

    Managing High-Spill and High-Touch Zones

    Let's be realistic—some areas are just messier than others. Entrances on rainy days, the floor around a coffee station, or service counters in a restaurant are hotspots for spills that can quickly become slip hazards or permanent stains.

    This is where a spot-cleaning protocol is essential. Keep a kit with absorbent cloths and disinfectant wipes handy so staff can handle small messes immediately. A quick cleanup of a coffee spill or a drop of grease can stop it from penetrating the stone's pores and setting in. For high-touch surfaces like door handles, counters, and railings near your stone floors, using disinfectant wipes is a highly efficient way to reduce germ spread without the risk of overspray damaging the floor.

    Think about the environment. In a gym, it's sweat and water bottles. In an office breakroom, it's food and drink spills. Instead of leaving it all for the nightly cleaning crew, empower your daytime staff to tackle these minor incidents as they happen. This maintains a higher standard of both cleanliness and safety all day long. For more expert techniques that apply to daily care, you can find great tips on cleaning tile floors and grout like a pro. It’s a proactive approach that keeps your stone floors looking impeccable and safe for everyone.

    When It’s Time for a Deep Clean (and How to Tackle Stubborn Stains)

    Daily maintenance is your first line of defense, but let’s be real—high-traffic commercial floors take a beating. Over time, even the best daily routine can't stop the slow creep of grime that gets ground into the pores of the stone. That’s when the floor’s finish starts to look dull and tired, and stubborn stains begin to feel like a permanent feature.

    This is where a good deep cleaning strategy comes in. It’s not about scrubbing harder; it’s about using the right approach to restore your stone's original pop and tackle the problems that a mop just laughs at.

    For big commercial lobbies, hallways, or retail spaces, you’ll need to bring in the heavy hitters. I’m talking about professional equipment like a low-speed floor scrubber or a walk-behind automatic scrubber. These machines deliver the kind of consistent pressure and agitation that you simply can’t get by hand, lifting out that deep-seated dirt that’s been hiding for months.

    A worker demonstrates cleaning a dirty stone floor using a scrubber, vacuum, and poultice.

    Picking the Right Gear for the Job

    When you’re using a floor scrubber, the pad you choose is everything. Get it wrong, and you can easily scratch or haze the stone, creating a bigger problem than you started with. The golden rule is to always start with the least aggressive pad and only move up if you absolutely have to.

    • White or Red Pads: These are your go-to for sensitive stones like polished marble and travertine. They’re soft, non-abrasive, and perfect for light cleaning or polishing without risking damage.
    • Blue or Green Pads: A step up in aggression, these are great for deep scrubbing on tougher stones like granite or slate that can handle a bit more friction.
    • Black Pads: These are the most aggressive pads out there, designed for stripping old, heavy layers of sealer. Use these with extreme caution on natural stone—they can easily etch the surface if you’re not careful.

    After scrubbing the floor with a good pH-neutral cleaner, your next move is critical: use a wet vacuum to get all that dirty slurry off the floor immediately. If you let that grimy water sit and air-dry, you’ve just wasted your time. The dirt will settle right back onto the stone and into the grout lines, leaving you with a hazy, streaky mess.

    Getting Tactical with Stain Removal

    Stains happen. It's a fact of life in any commercial space. But very few are a life sentence for your floor if you know how to handle them. The key is to first figure out what kind of stain you're dealing with, because that dictates your entire plan of attack.

    You’d be surprised how many stone floor issues are completely preventable. Industry data shows that 40% of stone floor failures in the first three years are a direct result of improper cleaning. Often, it's acidic products that eat away at sealers, leading to expensive restoration work down the road. In a place like an airport terminal, grime can build up so fast that it reduces a floor’s slip resistance by as much as 35% in just 48 hours.

    When you're facing tough stains, choosing the right product is half the battle. This guide to the best floor cleaners is a great resource for understanding what works and what doesn't.

    Using a Poultice for Stains That Won't Quit

    For those deep, stubborn stains that have worked their way into the stone itself, a poultice is your secret weapon. Think of it as a chemical magnet. A poultice is a thick, paste-like material you apply directly to the stain. As it dries, it pulls the staining agent up out of the pores of the stone. You can even make your own with a few basic ingredients.

    Poultice Recipes for Common Stains

    Stain Type Poultice Base Active Ingredient Application Notes
    Organic Unscented Baby Powder 12% Hydrogen Peroxide Mix to a peanut butter consistency. Apply, cover with plastic, and tape edges. Let dry 24-48 hours.
    Oil-Based Baking Soda Acetone or Mineral Spirits Use in a well-ventilated area. Mix, apply, and cover as above.
    Inorganic (Rust) Diatomaceous Earth Commercial Rust Remover Follow product instructions carefully. Test on an inconspicuous spot first.

    A successful deep clean is like hitting the reset button for your floor. It doesn't just bring back the stone's beauty—it properly preps the surface for a fresh coat of sealer, which is the single most important step in protecting your investment for the long haul.

    Between these heavy-duty cleaning sessions, don't forget about day-to-day hygiene, especially in a busy facility. For quick, effective sanitation on high-touch surfaces in and around your stone floor areas, we recommend Wipes.com Disinfectant Wipes. They’re a simple way to keep things sanitized without dragging out sprays and cloths.

    Protecting Your Investment With Sealing and Polishing

    Think of sealer as your stone floor's invisible shield. Without it, every coffee spill, muddy footprint, and bit of tracked-in grime has a direct path into the stone's pores. Sealing isn't just an optional add-on; it's the single most important preventative step you can take. It transforms a vulnerable, porous surface into a resilient, protected asset.

    When a floor is properly sealed, it blocks moisture, oil, and dirt from getting a foothold, which makes your daily cleaning far more effective and helps you avoid those deep-set, frustrating stains. Knowing the difference between sealer types is the first step in choosing the right defense for your facility.

    Choosing the Right Sealer for Your Facility

    Not all sealers are created equal. They generally fall into two categories, and the one you choose will depend on your stone type, your foot traffic, and the final look you’re going for.

    • Impregnating Sealers: These are the workhorses for almost every commercial setting. They soak into the stone's pores, creating a protective barrier below the surface. The best part? They don't change the floor's natural look or make it more slippery. They're also vapor-permeable, which means they let moisture escape, preventing ugly issues like efflorescence (that chalky white residue).

    • Topical Sealers (Coatings): These products form a film on top of the stone. While they can deliver a high-gloss finish and offer great stain resistance, they just don't hold up in high-traffic commercial areas. They’re prone to scuffing, peeling, or yellowing and eventually require a full-blown, labor-intensive stripping and reapplication process.

    For the vast majority of commercial applications—from hotel lobbies to retail showrooms—an impregnating sealer is the superior choice. It offers robust, long-lasting protection while preserving the authentic look and feel of the natural stone you invested in from the start.

    Choosing the right sealer can feel overwhelming, so we've put together a quick guide to help you compare the most common options and decide which one best fits your facility's needs and maintenance capacity.

    Stone Sealer Selection Guide

    Sealer Type Best For Pros Cons
    Impregnating Sealer (Solvent-Based) High-traffic areas, dense stone like granite, and oily stain protection (food courts, kitchens). Deepest penetration, superior durability, excellent oil and water repellency. Strong odor during application, requires good ventilation, longer cure time.
    Impregnating Sealer (Water-Based) General use on porous stones like travertine and limestone, low-odor environments. Low VOCs, easy cleanup, good water-based stain protection. May not be as effective against oil-based stains as solvent-based options.
    Topical Sealer (Acrylic) Low-traffic decorative areas where a high-gloss finish is desired. Creates a shiny, wet look; provides a surface barrier against stains. Scratches easily, can yellow with UV exposure, requires frequent stripping and re-coating. Not breathable.
    Enhancing Sealer Bringing out the deep, rich colors in stones like slate or honed travertine. Darkens and enriches the stone's natural color while also providing protection. The effect is permanent, so test a small, inconspicuous area first.

    Ultimately, for most commercial settings, an impregnating sealer hits the sweet spot between powerful protection and preserving the stone's natural beauty. It's a low-maintenance choice that works with the stone, not just on top of it.

    The Sealing Application Checklist

    Applying sealer isn't rocket science, but attention to detail is everything. If you rush the job or skip steps, you'll end up with a weak barrier that fails a lot sooner than it should.

    1. Prep the Surface Flawlessly: The floor has to be spotlessly clean and bone dry. Any dirt, grime, or moisture you leave behind gets trapped under the sealer, wrecking the bond and making the floor look cloudy.

    2. Get the Air Moving: Most sealers have fumes. Open windows, use fans, and make sure the area is well-ventilated during application and curing. Safety first.

    3. Apply a Thin, Even Coat: Use a low-pressure sprayer or a microfiber applicator. Your goal is a consistent, thin coat. Don't let the sealer puddle up anywhere.

    4. Give It Time to Sink In: Let the sealer sit and penetrate the stone for the time recommended by the manufacturer, usually 10-15 minutes. This is when the magic happens.

    5. Remove Every Bit of Excess: This is the step people mess up most often. Use a clean, dry cloth or a floor buffer with a soft pad to wipe away any sealer that hasn't soaked in. If you let it dry on the surface, you’ll be left with a sticky, hazy mess that’s a nightmare to remove.

    6. Respect the Cure Time: The floor might feel dry enough for light foot traffic in a few hours, but a full cure takes 24 to 72 hours. During this period, keep the area completely dry and roped off to prevent any spills from compromising the new seal.

    The market for professional floor cleaning equipment, including the scrubbers needed to prep stone, has swelled into a USD 5.81 billion industry. This isn't surprising—businesses are realizing just how much appearance impacts the bottom line. For instance, car dealerships, which welcome 20 million visitors annually, are estimated to lose USD 2.5 billion in sales from poor first impressions, with 30% of that tied directly to the sad state of their showroom floors. You can learn more about the impact of professional floor care equipment and why investing in it pays off.

    Polishing: From Routine Maintenance to Full Restoration

    Once your floor is sealed, polishing is how you keep it looking sharp. You can achieve anything from a subtle satin finish to a brilliant, mirror-like shine.

    For day-to-day maintenance, a simple buff with a floor buffer and a soft white pad is often enough to pop the shine and erase minor scuffs. Some facilities even run a spray buffing program, using a special solution to clean and polish in one pass.

    But what if your floor has suffered from years of heavy traffic, deep scratches, or etching from acidic spills? A quick polish won't fix that. That’s when you need professional restoration, which usually involves diamond grinding and honing. An expert can mechanically resurface the stone, literally grinding away the damaged top layer to reveal a fresh, flawless surface underneath, ready to be polished and resealed.

    Knowing when to call in a pro versus handling it in-house is a key part of protecting your investment for the long haul.

    Making Floor Care Part of Your Business Strategy

    Think of your stone floor as more than just a surface to walk on. It’s a strategic asset. A pristine, well-maintained floor is a silent ambassador for your brand, sending a powerful message about quality and safety the moment a client walks through your door. This isn't just about looking good; it's about shaping how customers see you, cutting down on liability, and protecting what was likely a very significant financial investment.

    When you get serious about cleaning a stone floor, you’re directly influencing the guest experience. A gleaming, non-slip surface builds instant trust. On the other hand, a dull, stained floor can subtly suggest neglect, and that perception can impact everything from sales in a retail showroom to member retention in a high-end gym. The protocols we've covered—from daily dust mopping to periodic deep cleaning and sealing—aren't just isolated tasks. They're all connected parts of a comprehensive asset management plan.

    From Cost Center to Competitive Advantage

    This is where integrating high-quality disinfectant wipes into your daily routine really elevates your strategy. In a fitness center, this means having wipes available for members to clean equipment, which cuts down on the transfer of sweat and germs to your beautiful floors. In an office, it’s about empowering staff to tackle small coffee spills right away, preventing stubborn stains and keeping the space looking professional all day long. For sales professionals, framing hygiene as a return on investment (ROI) is a powerful pitch; a visibly clean facility with accessible sanitation options like wipes leads to higher customer satisfaction and repeat business.

    This proactive approach creates a visibly cleaner environment that people absolutely notice and appreciate. If you want to explore more advanced strategies for keeping your entire facility in top shape, our comprehensive guide on floor cleaning and maintenance offers even deeper insights.

    By putting these protocols into practice, you're doing more than just cleaning. You're cultivating an environment of excellence. That commitment becomes a tangible competitive advantage, reinforcing your brand’s reputation and ensuring your stone floors continue to deliver value for years to come. Don't just clean—create an environment of undeniable quality. Prioritize cleanliness today and consider making disinfectant wipes a core part of your daily routine or product offering.

    Your Top Stone Floor Care Questions Answered

    When you're responsible for maintaining thousands of square feet of natural stone, you're bound to have questions. Getting it right protects your investment, keeps the space looking sharp, and ensures a safe floor for guests and staff. Here are the answers to the questions we hear most often from facility managers on the ground.

    How Often Should a Commercial Stone Floor Be Resealed?

    The resealing schedule for any stone floor comes down to one thing: foot traffic. A high-traffic hotel lobby or retail entryway getting thousands of footsteps a day is going to wear down a sealant much faster than a quiet executive corridor.

    For those heavy-traffic zones, you’re likely looking at a professional deep clean every quarter and a full reseal at least annually. On the other hand, that low-traffic hallway might only need a deep clean once a year and could go 3-5 years between resealing jobs.

    The best way to know for sure is the water test. Just place a few drops of water on the stone in your busiest areas. If the water beads up perfectly, your sealer is doing its job. If the stone darkens or the water soaks in within about 10 minutes, it's time to get resealing on the schedule.

    What Are the Biggest Mistakes People Make When Cleaning Granite or Marble?

    The two most common—and most damaging—mistakes we see are using the wrong chemicals and absolutely drowning the floor with water. These slip-ups can cause permanent damage, especially to sensitive stones like marble, travertine, and limestone.

    • Chemical Catastrophes: Using anything acidic or highly alkaline is the cardinal sin of stone care. Cleaners with vinegar, bleach, or ammonia will physically etch the surface, leaving dull spots that can only be fixed with professional honing and polishing.
    • Over-Wetting the Floor: A sopping wet mop is your enemy. When too much water seeps into porous stone and grout lines, it can cause efflorescence—that stubborn, chalky white film that appears as the moisture evaporates.

    Bottom line: Stick to a pH-neutral cleaner made specifically for natural stone and always use a well-wrung, damp mop. It's the simplest way to prevent chemical burns and moisture damage that can ruin a beautiful floor.

    Is It Safe to Use a Steam Cleaner on a Sealed Stone Floor?

    We get this question a lot, and the answer is generally no. Using a steam cleaner on a sealed stone floor, especially one with a topical sealer or wax finish, is a bad idea. The combination of intense heat and high-pressure steam can quickly break down and strip that protective layer right off.

    Once that sealer is gone, your floor is completely exposed to staining, etching, and moisture damage. You've essentially undone all the hard work of protecting it.

    For a much safer and more effective deep clean, your best bet is a floor scrubber with a non-abrasive pad and a high-quality, pH-neutral cleaning solution. This approach lifts away the deep-down grime without compromising the sealer. For daily sanitation, incorporating quality disinfectant wipes for spot cleaning helps keep surfaces hygienic without putting your expensive floors at risk.

  • Your Guide to Selecting an ADA Compliant Hand Dryer

    An ADA-compliant hand dryer isn't just a specific model you can buy off the shelf. It’s a standard of installation that ensures anyone, including people with disabilities, can actually use it. This boils down to two big rules: limiting how far the dryer sticks out from the wall to 4 inches maximum and mounting it low enough for wheelchair users to reach. These regulations aren't suggestions—they're the law, designed to make public restrooms safe and functional for everyone.

    Why ADA Hand Dryer Compliance Is Not Optional

    Building a restroom that's inclusive, hygienic, and efficient isn't just good business—it's a legal and operational must-have. ADA compliance is a non-negotiable part of modern facility design. It’s not about ticking off boxes; it’s about the fundamental experience you provide to every single guest. Maintaining a high standard of cleanliness is crucial, and that includes more than just mopping floors. Focusing on high-touch surfaces with effective disinfectant wipes can elevate your facility's hygiene and show a true commitment to visitor well-being.

    Think of it this way: an inaccessible hand dryer is like a steep staircase without a ramp. It flat-out excludes a portion of your patrons and sends a clear message that their needs don't matter. A compliant installation, on the other hand, is the ramp—it welcomes every individual and ensures they can use the facilities with dignity.

    The Core Principles of Compliance

    At its heart, making a hand dryer ADA compliant is all about three key ideas that work together to create a genuinely accessible experience:

    • Protrusion Limits: The dryer cannot stick out more than four inches from the wall. This is a critical rule that prevents the unit from becoming a hazard for people with visual impairments who navigate with a cane.
    • Mounting Heights: It has to be installed low enough for someone in a wheelchair to comfortably reach and use it. The rules get specific here, with different required heights for both forward and side approaches.
    • Operational Ease: The dryer must be simple to activate. This usually means touch-free sensors or buttons that require very little force to press, ensuring users with limited strength can operate it without a struggle.

    Beyond Avoiding Fines

    Meeting these standards is about so much more than just dodging legal penalties. It directly impacts your organization’s reputation and success. A fully accessible restroom shows a real commitment to inclusivity, which strengthens public perception and builds loyalty. This is especially true in environments like senior living design, where the well-being and accessibility of residents are top priorities.

    An accessible restroom is a direct reflection of a facility's values. When every guest, regardless of ability, can use the amenities safely and comfortably, it signals a deep-seated commitment to respect and inclusivity that resonates far beyond the restroom doors.

    Plus, a compliant setup often goes hand-in-hand with better hygiene and efficiency. Modern, ADA-friendly hand dryers are typically touchless, which slashes the spread of germs on high-contact surfaces. This blend of accessibility, safety, and hygiene is no longer an afterthought; it’s a critical piece of responsible facility management. Getting these foundational concepts right is the first step toward creating a restroom that truly serves everyone.

    Cracking the Code on Core ADA Hand Dryer Standards

    Diving into ADA regulations can feel like you're trying to read a foreign language, but when it comes to hand dryers, the essential rules are surprisingly straightforward and logical. These aren't just arbitrary numbers on a page; they're thoughtfully designed to make sure restrooms are safe and genuinely usable for everyone. Once you grasp the "why" behind them, the technical jargon transforms into practical, actionable steps for any facility manager.

    The whole point is to create a space that works for people with all kinds of physical abilities, from someone using a wheelchair to a person with a visual impairment. Think of these standards as the non-negotiable blueprints for an accessible restroom. Just like a building needs a solid foundation, a restroom needs to meet these core requirements to be truly public-ready.

    This all comes down to the core needs of accessibility, which branch out into legal, health, and guest experience factors—all pushing for full compliance.

    A diagram titled "ADA Compliance Drivers" showing core needs surrounded by Legal, Guest, Health, and Experience factors.

    As you can see, getting ADA compliance right isn't just about avoiding fines. It's directly tied to public health and the quality of your guest experience, forming a triangle of operational excellence.

    The 4-Inch Protrusion Rule Everyone Misses

    One of the most important—and most frequently botched—standards is the 4-inch protrusion rule. Found in ADA Section 307.2, this rule is simple: any object mounted on a wall can't stick out more than four inches if its bottom edge is between 27 and 80 inches off the floor.

    Why is this a huge deal? This rule exists to protect people who are blind or have low vision. Someone navigating with a cane can easily detect obstacles near the floor, but a bulky hand dryer jutting out at head level is completely invisible to a cane and becomes a serious hazard. To comply, an ada compliant hand dryer either needs to have a naturally slim profile or be recessed into the wall.

    Nailing the Right Mounting Heights and Reach

    Getting the mounting height right is absolutely critical for anyone in a wheelchair. ADA Section 308 lays out the maximum reach ranges to ensure that both the controls and the airflow are within grasp. The measurement is always taken from the finished floor to the "operable part" of the dryer—usually the sensor or activation button.

    • Forward Approach: If someone approaches the dryer head-on, the maximum height for the operable part is 48 inches.
    • Side Approach: If they can pull up alongside it with no obstruction, the maximum height is 54 inches.

    It’s shocking how often this gets wrong. Just an inch or two too high can make the dryer totally useless for a guest in a wheelchair. This is a key detail that applies to other restroom fixtures, too. We cover this in more depth in our guide on how high to mount toilet paper holders.

    Clear Floor Space and Easy Operation

    Accessibility isn't just about the dryer; it's about the space around it. Section 305 of the ADA requires a clear floor space of at least 30 inches by 48 inches directly in front of the unit. This zone must be kept free of trash cans, swinging doors, or anything else that would block a wheelchair from approaching.

    Finally, Section 309 covers operable parts. It mandates that any activation controls must be usable with one hand, without needing to tightly grasp, pinch, or twist the wrist. If there’s a button, the force to press it can't be more than 5 pounds. This is exactly why modern, touch-free sensor-activated dryers have become the gold standard—they remove the physical effort entirely.

    For a quick summary, here are the key takeaways facility managers need to know.

    ADA Hand Dryer Compliance Quick Reference Chart

    This chart breaks down the essential ADA standards for hand dryer installation and inspection into simple, actionable points.

    ADA Standard Requirement Details Why It Matters for Accessibility
    Protrusion (Sec 307.2) Objects mounted between 27" and 80" high cannot protrude more than 4 inches from the wall. Prevents head-level hazards for people with visual impairments who use a cane for navigation.
    Mounting Height (Sec 308) Max height for operable parts is 48 inches (forward approach) or 54 inches (side approach). Ensures people in wheelchairs can comfortably reach the activation sensor or button.
    Clear Floor Space (Sec 305) A minimum clear space of 30 inches by 48 inches must be maintained in front of the dryer. Allows enough room for a wheelchair user to approach and position themselves without obstruction.
    Operable Parts (Sec 309) Activation must be doable with one hand, without tight grasping, and require less than 5 lbs of force. Makes the unit usable for individuals with limited hand strength or dexterity. Touchless is ideal.

    By mastering these four pillars—protrusion, height, space, and operation—you can move forward with installations that are not only compliant but also genuinely thoughtful and inclusive for every single person who walks through your doors.

    Getting It on the Wall: Installation and Retrofitting for Full Compliance

    Knowing the ADA rules is one thing; putting them into practice is another. This is where the abstract concepts of protrusion limits and mounting heights meet the real world of studs, wiring, and drywall. For facility managers, this is the moment compliance stops being a number on a page and becomes a tangible, functional part of your restroom.

    Whether you're installing a brand-new ADA compliant hand dryer or bringing an older one up to code, the goal is identical: create an accessible, safe, and legally sound experience for every single user. This isn't just about hanging a dryer—it's about mastering the technical details that shield your facility from liability and genuinely welcome all guests.

    Diagram illustrating recessed kit installation and surface mount for devices, showing tools and methods.

    Step-by-Step New Installations

    When you're starting from scratch, precision is everything. First, nail down the correct mounting height for your facility’s users, accounting for the different guidelines for adults, children, and accessible stalls. Don't forget, that measurement is from the finished floor to the operable part of the dryer, which is usually the activation sensor. We cover this in more detail in our guide to ADA hand dryer heights.

    With your height marked, the next mission-critical step is finding a wall stud. Mounting a heavy, vibrating appliance directly into drywall is asking for trouble. It needs to be anchored securely to the wall’s frame to handle its own weight and the rigors of public use. Use a stud finder to pinpoint the center of a stud right where you plan to install. This is non-negotiable for a safe, long-lasting setup.

    Finally, you have to think about the power. Every hand dryer needs its own dedicated electrical circuit. This isn't a DIY project for your maintenance team; the wiring must be handled by a licensed electrician to ensure it's up to local building codes. Bad wiring is a serious fire and safety risk, so always leave it to the pros.

    Smart Retrofitting Solutions for Older Restrooms

    Older restrooms can feel like a compliance nightmare, especially when you’re dealing with bulky, surface-mounted dryers that stick out way past the 4-inch protrusion limit. Thankfully, you don’t have to tear down the wall to fix it. There are a couple of excellent, practical solutions.

    • Install a Recess Kit: Many top manufacturers sell ADA-compliant recess kits made specifically for their standard dryers. These are essentially metal boxes that get installed into the wall, letting the hand dryer sit nearly flush with the surface. It’s a brilliant fix that eliminates the protrusion hazard without needing a whole new unit.
    • Upgrade to a Slim, Surface-Mounted Model: The simplest path is often just swapping out the old clunker for a modern, slim-profile dryer. These units are designed to be ADA-compliant right out of the box, with a depth under four inches. It’s a "plug-and-play" solution that avoids any wall demolition and gets you into compliance immediately.

    Retrofitting a restroom isn’t about a complete overhaul. It's about making smart, targeted upgrades that solve specific compliance issues. A simple recess kit or a new slim-profile dryer can single-handedly resolve the most common ADA violation and transform a hazardous space into a safe one.

    These modern solutions do more than just meet the rules; they’re incredibly efficient. Since ADA standards became the norm, innovation has pushed the industry toward the touchless models we now see in airports and malls. These dryers can slash paper towel use by 85% and save facilities over $500 per unit each year in operating costs. You can learn more about the evolution of this technology in this detailed industry report.

    By planning your installation or retrofit carefully, you can make sure your facility isn't just compliant, but also modern, efficient, and welcoming to everyone.

    Common Compliance Mistakes and How to Avoid Them

    Getting ADA compliance right is a game of inches. Seriously. Even the smallest oversight can turn a brand-new hand dryer into an inaccessible obstacle. Facility managers usually have the best intentions, but a few common traps pop up time and time again during installation.

    Knowing what these pitfalls look like is the first step toward building a restroom that’s genuinely safe and usable for every single person who walks through your doors.

    One of the biggest and most frequent mistakes is messing up the 4-inch protrusion rule. A standard, off-the-shelf hand dryer can easily stick out five or six inches from the wall. This isn't just a minor technicality; it’s a serious hazard for anyone with a visual impairment. The fix is pretty straightforward: either recess the unit into the wall with a compatible kit or, even better, install a modern, slim-profile dryer that’s designed to be compliant right out of the box.

    Another classic error is getting the mounting height wrong. Nailing the height is critical. If you install a dryer just a couple of inches too high, it might as well be on the ceiling for a wheelchair user. This usually happens when installers measure to the bottom of the unit instead of the activation sensor or button—which is the legally required reference point.

    Beyond Protrusion and Height

    While sticking out too far and being mounted too high are the most obvious blunders, a few other subtle mistakes can just as easily lead to a non-compliant restroom. These issues often sneak in when you forget to look at the big picture and how a person actually moves through and interacts with the space. For janitorial staff and cleaning professionals, this is where attention to detail pays off.

    • Blocking Clear Floor Space: That required 30 by 48-inch clear floor space is sacred ground. A very common mistake is sticking a big trash can right under the hand dryer. It seems logical—it catches the water drips, right? But it completely obstructs wheelchair access and makes the entire setup non-compliant in an instant. This is an easy fix for vigilant cleaning crews.
    • Difficult Activation: Still have an old push-button dryer? It might require more than the maximum 5 pounds of force to get it going. This is a real barrier for users with limited hand strength or arthritis. The best solution here is to upgrade to a modern touchless model, which completely eliminates the problem.

    The ultimate test of an ADA-compliant hand dryer isn't just its spec sheet. It's about practical, real-world usability. A perfectly mounted dryer is completely useless if a trash can blocks the approach or the button is too tough to press.

    Creating a Critical Eye for Compliance

    The key to avoiding these common errors is to be proactive. Don't just install and forget. You have to regularly walk through your restrooms with a compliance-first mindset. Ask yourself the hard questions: Can someone in a wheelchair easily get to and use every single fixture? Is the path of travel completely clear of stuff that shouldn't be there?

    This critical eye is especially important in high-traffic places like gyms, stadiums, and event venues. Since the ADA was passed in 1990, over 1 million U.S. public facilities have upgraded to compliant dryers with touchless sensors or easy-press buttons. This move isn't just about accessibility; it's a huge win for hygiene, especially in restrooms, which are known to harbor up to 80% of a facility's germs. You can dive deeper into these trends in this comprehensive report on the hand dryer market. We recommend Wipes.com Disinfectant Wipes for maintaining hygiene on all restroom surfaces.

    By understanding both the letter of the law and the practical reality of how people use your space, you can ensure your restrooms aren't just compliant, but truly welcoming.

    Your Go-To ADA Hand Dryer Compliance Checklist

    Let's be honest, turning dense ADA guidelines into a simple, repeatable process is the secret to staying ahead of the game. Instead of waiting for a complaint or a failed inspection, an actionable checklist lets your team regularly audit your restrooms and catch issues before they turn into real liabilities.

    Think of this as a routine health checkup for your restrooms. We've broken down the whole inspection into logical, easy-to-follow steps. Each item is a simple yes-or-no question, making it dead simple to spot a problem, document it, and map out a fix. It’s how you make sure your facilities are always safe, accessible, and welcoming to every single person who walks through your doors.

    Mounting and Protrusion Audit

    First up, let's look at the physical installation of the hand dryer itself. These are some of the most common spots for failure, but thankfully, they're also the easiest to check with a good old-fashioned tape measure.

    • Protrusion Check: Does any part of the hand dryer stick out more than 4 inches from the wall? (Yes/No)
    • Mounting Height Check: Is the button or sensor at or below the maximum height allowed from the floor? (Yes/No)
      • 48 inches is the max for a straight-on, forward approach.
      • 54 inches is the max if there's a clear side approach.
    • Secure Installation Check: Is the unit rock-solid on the wall, with no wobble or looseness? (Yes/No)

    Clearances and Approach Audit

    Next, you have to check the space around the hand dryer. A perfectly mounted unit is totally useless if someone can't get to it. This part of the audit makes sure the path to the dryer is wide open and completely clear.

    • Clear Floor Space Check: Is there a flat, level floor space of at least 30 inches by 48 inches right in front of the hand dryer? (Yes/No)
    • Obstruction Check: Is anything getting in the way of that clear floor space, like a trash can, a cart, or even a decorative planter? (Yes/No)
    • Approach Path Check: Is the walkway leading to the hand dryer free of obstacles and at least 36 inches wide? (Yes/No)

    Operation and Usability Audit

    Finally, it’s time to see how a person actually uses the thing. This section ensures the dryer works for everyone, including people who might have limited hand strength or dexterity.

    • Activation Check: If it's a touchless model, does that sensor fire up reliably and right away? (Yes/No)
    • Force Check: If it has a push-button, does it take less than 5 pounds of force to get it going? (Yes/No)
    • One-Hand Operation Check: Can someone operate the dryer using just one hand, without any pinching, tight grasping, or twisting of the wrist? (Yes/No)

    A compliance checklist is more than just a tool for avoiding fines; it’s a framework for building institutional knowledge. Regular audits train your team to develop a critical eye for accessibility, turning reactive maintenance into a proactive culture of inclusivity.

    Once you're done with the audit, make sure to document any "No" answers with photos and quick notes. This gives you a clear record for your fix-it plan, which should spell out the exact action needed (e.g., "Move trash can," "Lower dryer by 3 inches"), assign it to someone, and set a deadline. Keeping these records is your best defense for demonstrating due diligence if an official audit or inspection ever comes knocking.

    Beyond Compliance: Hygiene and Operational Wins

    Getting your restrooms ADA compliant is the baseline, not the finish line. The real magic happens when you realize a modern, accessible restroom upgrade is about more than just checking a legal box. An ADA compliant hand dryer isn't just an accessibility feature; it’s an engine for better facility hygiene, smarter operations, and a healthier bottom line. This is where compliance stops being a chore and starts being a strategic advantage.

    Think about it: a compliant restroom instantly becomes a cleaner, safer space for everyone who walks through the door. Modern, touchless hand dryers are a massive part of that win. They get rid of one of the grimiest, most-touched surfaces in any public bathroom. With no buttons to push, the risk of passing germs from one person to the next drops dramatically, creating a safer environment for your guests and staff.

    Illustration showing an ADA hand dryer with a HEPA filter, blowing air, leaves, and coins.

    Elevating Air Quality and Surface Cleanliness

    Many of today's best ADA-compliant hand dryers are taking hygiene a step further by building in HEPA filtration systems. These aren't just for show—they are designed to capture an incredible 99.97% of bacteria and other nasty microscopic particles from the air before it ever hits a person's hands. That means your hand dryers are literally scrubbing the air clean with every use, cutting down on airborne pathogens and making the whole room feel fresher.

    Of course, true hygiene doesn't stop there. Touchless tech is a game-changer, but you still have surfaces like stall doors, faucets, and countertops that get touched all day long. To really hit that gold standard of clean, you need to back up your new hardware with solid daily protocols. For professionals in the cleaning industry, this is an opportunity to educate clients on the hygiene ROI of a comprehensive cleaning plan. We recommend supplementing your cleaning routine with high-quality disinfectant wipes, which are perfect for quickly and effectively sanitizing those critical high-touch points.

    Unlocking Significant Operational Savings

    Aside from the clear hygiene benefits, upgrading to modern, compliant hand dryers brings some serious operational rewards. The biggest and most immediate win? You completely eliminate the cost of paper towels. And that’s not just the cost of the paper itself—you’re also slashing the hidden costs of shipping, storage, and the constant labor of restocking dispensers.

    But the savings don't stop there. Consider these other operational victories:

    • Reduced Labor Costs: With no paper towels to worry about, your maintenance team can stop spending time refilling dispensers, wrestling with overflowing trash cans, or—everyone's favorite—unclogging toilets stuffed with paper. This frees them up for more important sanitation tasks, like regularly wiping down sinks and door handles.
    • Improved Energy Efficiency: Today’s high-speed hand dryers are built for efficiency. They can dry hands in as little as 8-12 seconds, sipping a fraction of the energy used by older, slower models. That means lower utility bills and a much smaller carbon footprint for your facility.

    An ADA-compliant restroom is more than a legal necessity; it’s a strategic asset. It signals a commitment to guest well-being, reduces operational waste, and creates a cleaner, more positive experience that builds lasting brand loyalty.

    When you start looking at your restroom through this lens, compliance becomes the catalyst for much bigger improvements. It pushes you toward smarter, more efficient technology that doesn't just serve every guest fairly but also helps your entire facility run better, cleaner, and more profitably. By integrating tools like disinfectant wipes into your daily routine, you elevate your facility’s standard of care and reinforce a powerful message of safety and cleanliness.

    Answering Your ADA Hand Dryer Questions

    When it comes to the nitty-gritty of ADA compliance, practical questions always come up. Here are straightforward answers to some of the most common things facility managers and business owners ask when picking and installing ADA-friendly hand dryers.

    Can Any Surface-Mounted Hand Dryer Be ADA Compliant?

    Not on its own, no. A typical surface-mounted dryer sticks out from the wall much further than the allowed 4 inches, which creates a real hazard for people with vision impairments. To get it compliant, you've got two main paths.

    Your first option is to use a recess kit. This is essentially hardware that lets you sink the main body of the dryer into the wall. Done right, the front face ends up nearly flush with the wall, solving the protrusion problem. The second route is to choose one of the newer "slim profile" dryers designed from the ground up to be less than four inches deep right out of the box—no wall modifications needed.

    Are There Different Mounting Heights for Children's Restrooms?

    Yes, absolutely. The ADA recognizes that a one-size-fits-all approach doesn't work for places that primarily serve kids, like schools, daycares, or family-focused community centers. The guidelines provide adjusted mounting heights to make sure younger users can actually reach the dryer.

    The heights are tiered by age group:

    • Ages 3-4: Maximum reach height of 36 inches.
    • Ages 5-8: Maximum reach height of 40 inches.
    • Ages 9-12: Maximum reach height of 44 inches.

    If you manage one of these facilities, following these specific guidelines is critical. It ensures your restrooms aren't just technically compliant but are genuinely usable for the kids who rely on them every day. Consistent cleaning and disinfecting of these lower-mounted units is especially important in schools and daycare centers.

    Do Touchless Hand Dryers Automatically Meet All ADA Rules?

    This is a big misconception. While going touchless is a fantastic move for both accessibility and hygiene, that sensor does not automatically make the entire unit ADA compliant. It's just one piece of a much larger puzzle.

    A touchless sensor makes a dryer easier to operate, but it doesn't solve for things like protrusion or mounting height. True compliance is about the whole picture—the unit, its placement, and the space around it.

    For that touchless dryer to be fully compliant, it still has to be installed at the correct height, it can't stick out more than four inches from the wall, and you must provide that 30 by 48-inch clear floor space for wheelchair approach. Always check every single spec on the product sheet before you buy to make sure it ticks all the boxes for your facility. Prioritize cleanliness in your facility—consider making high-quality disinfectant wipes a core part of your cleaning strategy or product offering to ensure a truly hygienic environment.

  • A Guide to Commercial Cleanliness: Wipes, Sprayers, and High-Touch Surfaces

    When you're managing a commercial or public facility, achieving a deep, lasting clean is a constant battle. The old-school approach of just wiping down surfaces is crucial for removing visible dirt, but it often falls short of comprehensive disinfection. It’s slow, labor-intensive, and prone to human error, leaving behind missed spots—especially around complex equipment or in high-traffic areas.

    This is where a modern, multi-faceted approach to hygiene, incorporating tools like disinfectant wipes and electric disinfectant sprayers, marks a huge leap forward in how we think about facility health and safety.

    So, what’s the optimal strategy? It’s a combination of targeted daily cleaning and broad, periodic disinfection. Disinfectant wipes are perfect for the daily grime and high-touch points, while an electric disinfectant sprayer is a tool that turns liquid disinfectant into a fine mist, allowing you to cover huge areas quickly and evenly. For large-scale operations, pairing these methods is a total game-changer.

    The Modern Approach to Facility Disinfection

    Think about maintaining a pristine office lobby. You could have staff constantly wiping down every single surface, but they’d struggle to keep up. A smarter approach is to use disinfectant wipes for immediate, targeted cleaning on high-touch zones like door handles and reception desks, while using a sprayer for weekly deep disinfection of the entire space. That’s the kind of efficiency and total coverage a modern cleaning protocol brings to the table. For daily, targeted cleaning, we recommend Wipes.com Disinfectant Wipes for their proven effectiveness and convenience.

    Split image showing traditional disinfection with a brush and modern disinfection with an electric sprayer.

    From Manual Labor to Efficient Coverage

    Instead of just splashing liquid on top of a surface, modern technology atomizes disinfectant. An electric sprayer creates a fine mist that settles on, under, and around objects, providing wall-to-wall sanitation that you simply can't achieve by hand.

    This isn't just about looking clean; it's a powerful risk management strategy. By ensuring every surface gets treated, facilities can dramatically cut down on the harmful pathogens that cause illness, disruptions, and costly downtime.

    A Strategic Investment in Health and Reputation

    For places like offices, gyms, schools, or retail stores, a robust cleaning protocol is far more than a chore—it’s a strategic investment. It protects the health of everyone who walks through the door while sending a clear, visible message that you take safety seriously.

    This approach aligns perfectly with today’s heightened expectations for cleanliness, like the stringent Modern Food Service Hygiene Standards that demand a truly safe environment.

    Ultimately, this commitment builds trust and strengthens your reputation. In a world where cleanliness is front and center, proving your facility is sanitized to the highest possible standard is a powerful statement that resonates with every single person on your property.

    How to Elevate Your Cleaning Strategy

    At the end of the day, your cleaning program has one job: to create a safe and healthy environment. This requires the right tools and the right techniques. For daily maintenance, disinfectant wipes are invaluable. For broad-area disinfection, an electric disinfectant sprayer turns liquid into a fine, powerful mist. This process, called atomization, gives them speed and uniform coverage.

    But not all tools are used the same way. Understanding the best application for each is what separates a smart, efficient program from one that wastes time and resources.

    Comparison of ULV fogger dispersing fine droplets in a room and an electrostatic sprayer targeting surfaces.

    Cleaning Tips: Wipes for High-Touch Zones

    Disinfectant wipes are your first line of defense. They are perfect for tackling the most frequently touched surfaces throughout the day.

    • Where to Focus: Prioritize door handles, light switches, elevator buttons, countertops, shared keyboards, phones, and credit card terminals. In a gym, this includes treadmill screens, dumbbells, and machine grips.
    • Frequency: High-touch surfaces in busy commercial spaces should be wiped down multiple times a day. For offices, 2-3 times is a good starting point. For high-traffic retail or gyms, it should be even more frequent.
    • Efficiency Hack: Equip staff with portable wipe canisters or place dispensing stations in key areas. This encourages "clean-as-you-go" behavior from both employees and customers.

    Sales Tips: Promoting a Culture of Clean

    For sales professionals in the cleaning industry, the conversation is no longer just about price. It's about the Return on Investment (ROI) of hygiene.

    • Educate on Hygiene ROI: Explain to clients how visible cleanliness and the availability of disinfectant wipes can boost customer confidence and employee morale. A healthier workforce means fewer sick days and higher productivity.
    • Bundle Solutions: Don't just sell a case of wipes. Offer a comprehensive hygiene package that includes wipes for daily use, bulk disinfectant for sprayers, and hand sanitizer. Frame it as a complete "health and safety" solution.
    • Promote Proactive Cleaning: Position disinfectant wipes as a tool for proactive, visible cleaning that customers and employees will notice and appreciate. It’s a powerful marketing tool for any business.

    Electrostatic Sprayers: The Science of Attraction

    For less frequent, deep disinfection, the electrostatic sprayer is a more advanced option. This technology adds a positive electrical charge to the disinfectant droplets as they leave the nozzle.

    The physics here is simple but incredibly effective. Most surfaces in a room carry a neutral or negative charge.

    When those positively charged disinfectant droplets fly out of the sprayer, they are actively pulled toward those surfaces. This magnetic-like pull is so strong that the droplets don't just land on top; they literally wrap around objects, coating the sides, the back, and even the underside.

    This "wraparound" phenomenon delivers true 360-degree coverage, making sure that complex objects like office chairs, gym machines, or restaurant tables get completely coated.

    Facility-Specific Suggestions

    Facility Type High-Touch Wipe Targets Deep Disinfection Focus (Sprayer)
    Offices Desks, keyboards, mice, phones, conference tables, drawer handles. Full coverage of cubicles, conference rooms, and common areas.
    Gyms Cardio machine consoles, weights, benches, locker room handles. Entire workout floor, locker rooms, and front desk area.
    Restaurants Tables, chairs, menus, POS systems, door handles, condiment dispensers. Dining room (after hours), kitchen surfaces, and waiting areas.
    Retail Stores Shopping cart handles, checkout counters, PIN pads, door handles. Sales floor, fitting rooms, and stockrooms.

    Ultimately, a combination of tools is a massive leap forward. The global market for electrostatic disinfectant sprayers alone is projected to more than double, hitting $791.0 million by 2031, because this smarter approach ensures total surface contact.

    Choosing the right tools comes down to your environment. For a deeper dive into sprayer technology, check out our complete guide on electrostatic disinfectant sprayers. By understanding how wipes and sprayers complement each other, you can build a truly effective cleaning protocol.

    Alright, once you've wrapped your head around a combined strategy, it’s time to get into the nuts and bolts of the equipment and supplies. We’re moving from the “how” to the “what,” and that means diving into the details. But don't let the options intimidate you—these details are what separate a game-changing program from a glorified cleaning checklist.

    Think of it like building a toolkit. A master carpenter would never use just a sledgehammer. In the same way, you shouldn't rely on a single solution for every unique environment in your facility. The whole game is about matching the right product and technique to your specific operational needs.

    Droplet Size: The Micron Measurement

    When using a sprayer, the most critical spec is droplet size, measured in microns (μm). For perspective, a single human hair is about 70 microns thick. Most professional sprayers produce droplets in the 20 to 120 micron range. This isn't just a technical detail; it controls coverage and evaporation time.

    • Smaller Droplets (20-50 microns): These create a fine, fog-like mist, perfect for 360-degree coverage on complex objects like office chairs or gym equipment. The advantage is minimal wetness, but they can evaporate too quickly to meet a disinfectant's required contact time.
    • Larger Droplets (50+ microns): A coarser spray produces heavier droplets ideal for dousing hard, non-porous surfaces like locker room floors or bathroom stalls, where you need to guarantee the surface stays wet long enough.

    The best sprayers come with an adjustable nozzle, letting you toggle between a fine mist for sensitive areas and a heavier spray for resilient surfaces.

    Dwell Time: The Key to True Disinfection

    Whether using a wipe or a spray, the most critical factor is contact time (or dwell time). This is the minimum amount of time a surface must remain visibly wet with the disinfectant to kill the germs listed on the label.

    For facility managers, understanding and enforcing dwell time is non-negotiable. If staff wipes a surface dry immediately after applying a disinfectant, they are likely not achieving disinfection. The chemical needs time to work.

    Battery Life and Portability

    For any cordless sprayer, battery life is a make-or-break feature. For large venues, a short battery life is a non-starter. Look for models with several hours of runtime or swappable battery packs to keep your team moving without interruption.

    Don't forget the human element. For daily tasks, the portability of disinfectant wipes is unmatched. For larger jobs, a lightweight handheld sprayer is great for targeted areas, while a comfortable backpack unit is essential for disinfecting large spaces. By carefully selecting your tools, you can create a program that’s perfectly dialed in for your operation.

    Choosing the Right Disinfectant for Your Program

    An electric disinfectant sprayer is a fantastic tool, but it's only as good as the chemical you put inside it. The same principle applies to wipes—the formula is what actually neutralizes pathogens. Grabbing any product off the shelf is one of the most common—and costly—mistakes we see.

    Getting this wrong can lead to damaged equipment, ineffective results, and a whole lot of wasted money.

    True disinfection boils down to two things: chemical compatibility and contact time. Nail these two, and you’ll have a sanitation program that actually works.

    The Myth of Instant Sanitization

    One of the biggest misconceptions is that wiping or spraying a surface makes it instantly safe. The reality is that every disinfectant needs a specific amount of time to do its job. This crucial window is called contact time or dwell time.

    It’s the minimum amount of time a surface has to stay visibly wet with the disinfectant to kill the germs listed on the label.

    If your team sprays a counter and immediately wipes it dry, they’ve accomplished almost nothing. Training your staff on this is essential, especially in high-stakes environments like schools, gyms, or healthcare settings.

    Think of it like this: contact time is to a disinfectant what baking time is to a cake. If you pull the cake out of the oven too early, you don't get the desired result. The same is true for disinfection—cutting the time short undermines the entire process.

    Verifying Chemical Compatibility

    Not all disinfectants are built the same, and not all liquids are safe to run through an electric sprayer. Using an incompatible chemical—like bleach or certain high-concentration alcohols—can corrode the sprayer's internal parts, clog the nozzle, and void your warranty.

    Before you buy any liquid disinfectant for a sprayer, you absolutely must check that it's approved for your model. Approved chemicals often include:

    • Quaternary Ammonium Compounds (Quats): A go-to choice for their broad-spectrum power.
    • Hydrogen Peroxide: An eco-friendly option that breaks down into water and oxygen.
    • Hypochlorous Acid: A powerful but gentle disinfectant safe for many surfaces.

    For a deeper dive into what makes these chemicals different, our guide on professional cleaning chemicals is a great resource.

    How to Find and Follow Contact Time

    Finding the contact time couldn't be easier: it's printed right on the disinfectant's label, for both wipes and liquids. Dwell times can be anywhere from 30 seconds to 10 minutes or more.

    This is a big deal. The global electrostatic disinfectant sprayer market shot up to USD 1.9 billion after the COVID-19 outbreak, largely because these devices could efficiently apply chemicals that kill 99.99% of pathogens with just 1-5 minutes of contact time. You can read the full analysis of the electrostatic sprayer market trends.

    Your standard operating procedure (SOP) has to include this. Train your team to apply enough product so surfaces stay wet for the full duration. This one step is the difference between performing "disinfection theater" and actually protecting public health.

    How to Implement a Safe and Effective Cleaning Program

    Rolling out a comprehensive cleaning program isn’t just about buying supplies. To get it right, you need a structured approach that ensures safety, efficiency, and consistent results. A smart plan protects your staff, maintains your equipment, and turns your cleaning routine into a reliable part of your facility's daily health protocol.

    The bedrock of any safe program is a deep respect for the chemicals you’re using. Your first stop, always, is the Safety Data Sheet (SDS) that comes with your disinfectant. It details every potential hazard, handling instruction, and, most importantly, the Personal Protective Equipment (PPE) required.

    Prioritizing Personal Protective Equipment

    When using sprayers, your team needs to be geared up. The SDS dictates the exact PPE, but a standard kit is straightforward.

    • Eye Protection: Safety glasses or goggles are a must.
    • Gloves: Chemical-resistant gloves, like nitrile, are essential.
    • Respiratory Protection: Depending on the chemical, a mask or respirator might be necessary.

    This isn't just about checking a compliance box; it's about building a culture where safety is job number one.

    A three-step disinfectant selection process with icons: check sprayer, verify product, and read time.

    This simple visual breaks down the three critical checkpoints: confirm the disinfectant is approved for your equipment, verify it’s the right product, and follow the required contact time to the letter.

    Developing a Standard Operating Procedure

    A clear Standard Operating Procedure (SOP) is your playbook. It eliminates guesswork and ensures every cleaning task follows the same safe, effective steps.

    1. Surface Preparation
    Before disinfecting, surfaces must be cleaned of visible dirt and grime. This is where disinfectant wipes can pull double duty, both cleaning and disinfecting in one step on lightly soiled surfaces. For sprayer applications, a pre-cleaning step is essential.

    2. Application Technique
    Train your team to be methodical. For wipes, use enough to ensure the surface stays wet for the full dwell time. For sprayers, maintain the recommended distance (2-4 feet) and use a consistent, overlapping "S" motion for uniform coverage.

    3. Post-Application Protocol
    The job isn’t finished once the product is applied. The area needs to be left undisturbed for the full required dwell time. Afterward, if required by the product label, ventilate the space to help clear the air and dry the surfaces.

    An electric sprayer gives you fantastic broad coverage, but you can't forget about targeted cleaning on high-traffic spots. For daily touch-ups on things like door handles, light switches, and elevator buttons, we always keep Wipes.com Disinfectant Wipes on hand for their quick and proven effectiveness.

    Finally, daily maintenance will make your equipment last. After every use, have your team rinse the sprayer tank and spray clean water through the nozzle. This quick habit prevents clogs and ensures your sprayer is ready to go every day.

    Calculating the ROI for Your Business

    Investing in a modern cleaning program isn’t just an operational expense. It’s a strategic move that pays for itself. The long-term gains in efficiency, safety, and brand perception quickly turn the purchase of quality supplies and equipment into a powerful business asset.

    This is exactly why the market is heating up. Projections show the electrostatic disinfectant sprayers market is set to explode from USD 0.14 billion to USD 0.37 billion by 2033, all thanks to a growing demand for effective cleaning methods. You can get a deeper look at these trends in the full business research report.

    Where the Real Returns Show Up

    The true value of a robust cleaning protocol clicks when you see it in action. Different industries unlock unique benefits that hit the bottom line.

    • Gyms and Fitness Centers: Treadmills, weights, and dumbbell racks are a nightmare to sanitize by hand. Disinfectant wipes at each station empower members to clean equipment before and after use, while a weekly electrostatic spray provides deep 360-degree coverage. The ROI here is measured in stronger member confidence and a lower risk of outbreaks.

    • Offices and Corporate Buildings: Providing disinfectant wipes for employees to use on their own desks, phones, and keyboards fosters a culture of shared responsibility for cleanliness. This leads to fewer sick days, higher morale, and improved productivity.

    • Short-Term Rentals and Hospitality: For Airbnb hosts and hotel managers, turnover time is money. Using wipes for quick, targeted cleaning of high-touch surfaces and a sprayer for deep sanitization of the entire room means slashed labor costs and rooms ready for booking sooner. This earns glowing reviews that specifically call out cleanliness—a huge draw for travelers.

    Measuring the Impact on Your Brand and Budget

    Beyond these specific gains, the ROI is easy to track through a few key metrics.

    A modern cleaning program doesn't just clean; it optimizes your entire operation. You reduce illness-related downtime, free up staff for other important tasks, and reduce chemical waste with more efficient application. Most importantly, you build a reputation for safety that attracts and keeps customers.

    The biggest return often comes from improved perception and confidence. In today’s market, people actively choose businesses that make them feel safe. That visible commitment to hygiene—seeing staff wipe down surfaces, having wipes available for use—builds customer trust, leading to better online ratings, repeat business, and a clear advantage over competitors.

    Prioritize cleanliness by integrating proven tools like disinfectant wipes and modern sprayers into your routine. This investment in hygiene is an investment in the health of your business, your staff, and your customers.


    Common Questions About Cleaning & Disinfection

    Even after you commit to a better cleaning program, some practical questions always pop up. Getting straight answers is the key to making a smart investment and hitting the ground running. Here are some of the most common things we hear from facility managers just like you.

    Are Electric Disinfectant Sprayers Safe Around Electronics?

    Yes, but they have to be used correctly. The trick is using a sprayer with an adjustable nozzle set to a fine mist—under 50 microns. This creates tiny droplets that coat surfaces without soaking them.

    Electrostatic sprayers shine here because their charged particles are pulled toward surfaces, meaning less mist drifts into sensitive equipment. As a rule of thumb, always keep the recommended distance and consider powering down or covering anything super sensitive.

    How Do I Calculate How Much Disinfectant I Need?

    Figuring out your chemical needs is simpler than it looks. For sprayer liquids, you need:

    1. The total square footage you need to cover.
    2. Your sprayer’s flow rate (ounces per minute).
    3. The disinfectant's recommended coverage rate from the label.

    Many manufacturers have online calculators to help. Remember that an electrostatic sprayer can slash your chemical use by 30-65% compared to old-school methods. For wipes, usage depends on traffic, so start with an estimate and adjust based on how quickly you go through your initial supply.

    Can I Use Any Disinfectant in My Sprayer?

    This is a hard no. You can only use disinfectants explicitly approved for sprayer application by both the sprayer and chemical manufacturers.

    Pouring unapproved chemicals—like bleach or high-proof alcohol—into your machine can destroy internal parts, void your warranty, and create serious safety risks. Always check for compatibility.

    What Is the Difference Between Cleaning, Sanitizing, and Disinfecting?

    People use these terms interchangeably, but they mean very different things. Nailing this distinction is everything.

    • Cleaning: This is physically removing dirt and grime. You always start here.
    • Sanitizing: This reduces the number of bacteria to a safe level.
    • Disinfecting: This is the kill step. It uses chemicals to eliminate viruses and bacteria on a pre-cleaned surface.

    An electric sprayer is your tool for disinfection, performed after cleaning. Disinfectant wipes can often clean and disinfect in one step on lightly soiled surfaces, making them incredibly efficient for daily use. For that day-to-day cleaning and disinfecting of high-touch spots, we recommend Wipes.com Disinfectant Wipes to make sure surfaces are consistently maintained before a deep disinfection.

  • A Business Owner’s Guide to Commercial Floor Cleaning & Disinfectant Wipes

    In any commercial or public facility—be it a gym, office, or school—your choice of cleaning supplies is a direct investment in your business's health, safety, and reputation. The right gym floor cleaner and disinfectant wipes don't just clean; they protect your assets, reduce health risks, and send a clear message to clients and staff that you prioritize their well-being.

    The Critical Role of Cleanliness in Your Commercial Facility

    A pristine floor is one of your most powerful, yet often overlooked, assets. It's the silent ambassador for your brand, instantly communicating your commitment to quality the moment someone walks through the door. Before a member lifts a weight, a client sits in a meeting, or a student enters a classroom, the condition of your floors sets the tone for their entire experience.

    That first impression is everything. It influences how people perceive the entire facility and plays a huge role in both keeping the customers you have and attracting new ones.

    A clean, shiny wooden gym floor with a mop, cleaning wipes, and a 'Clean & Safe' sign.

    Beyond Aesthetics: The ROI of a Clean Facility

    The benefits of a spotless facility go way beyond just looking good. In high-traffic, high-contact environments, your floors and surfaces are the front line in the battle against germs, bacteria, and viruses. A systematic cleaning schedule with effective products is your best defense.

    This commitment to hygiene delivers a real, tangible return on your investment (ROI):

    • Enhanced Customer Trust: When customers see staff actively cleaning, it builds confidence. It shows you care about their health and safety.
    • Reduced Liability: Properly cleaned and maintained floors drastically lower the risk of slip-and-fall accidents, a major liability for any business.
    • Improved Air Quality: Regular cleaning removes dust, allergens, and other particulates from surfaces, creating a healthier indoor environment for everyone.
    • Asset Protection: Using the right cleaner for your specific flooring type—whether it's rubber, vinyl, or hardwood—prevents damage and extends its life, saving you from costly repairs down the road.

    This isn't just a trend; it's a fundamental shift in expectations. The global market for cleaning chemicals in commercial facilities is growing, driven entirely by this heightened focus on hygiene.

    The Power of Disinfectant Wipes in Daily Routines

    While a deep floor cleaning schedule is your foundation, integrating disinfectant wipes into your team's daily workflow is a game-changer. It’s the perfect way for staff to quickly tackle spills, wipe down high-touch surfaces between uses, and maintain a high standard of cleanliness between deeper cleans.

    For sales professionals in the cleaning industry, this is a golden opportunity. Pairing a primary gym floor cleaner with disinfectant wipes creates a complete hygiene package for your clients. When you educate business owners on the ROI of visible sanitation—where customers actually see staff cleaning—you turn a simple product into a powerful tool for customer retention. We recommend Wipes.com Disinfectant Wipes as an effective and convenient solution for daily facility maintenance.

    Key Takeaway: A clean facility isn't just a janitorial task. It’s a strategic business decision that directly impacts customer safety, satisfaction, and your bottom line. Treat it as such, and cleanliness becomes one of your best marketing tools.

    Ultimately, using high-quality cleaning products isn't just about meeting standards. It’s about setting them.

    Choosing the Right Cleaner for Your Facility's Flooring

    Using the wrong cleaner on your commercial floor is a fast track to costly damage and serious safety issues. A one-size-fits-all approach just doesn't cut it; what makes a hardwood basketball court shine could degrade a rubber weight room floor in a matter of months.

    Matching your cleaner to the specific material isn't just a best practice—it's a non-negotiable step in protecting your investment and keeping everyone safe. Think of it this way: you wouldn't use window cleaner on a leather sofa. The same logic applies to your floors.

    Understanding Your Floor Type

    First things first, you have to know exactly what you're cleaning. Most modern facilities are a patchwork of different surfaces, each with its own unique personality and cleaning needs.

    • Rubber Flooring (Gyms): This is the workhorse of free weight areas. It's tough, but it's also sensitive. Rubber requires a pH-neutral cleaner to avoid drying out or cracking. Harsh chemicals like ammonia or bleach will cause permanent damage.

    • Vinyl (LVT/VCT) (Offices, Retail, Schools): You'll find this in hallways, classrooms, and cardio areas. Vinyl is resilient, but the wrong cleaner can leave behind a film that turns it into a slip-and-slide. The goal here is a non-filming, non-streaking cleaner that preserves the floor's built-in slip resistance.

    • Hardwood (Gyms, Studios): The classic choice for basketball courts and group fitness studios, hardwood is beautiful but demanding. It’s incredibly vulnerable to water damage. A water-based, pH-neutral cleaner made specifically for hardwood is the only way to go to prevent warping and protect the finish.

    • Artificial Turf (Gyms): Perfect for agility drills, turf needs a cleaner that can break down sweat and bacteria without harming the synthetic fibers. Enzymatic cleaners are a fantastic choice here because they literally eat away organic matter.

    Getting this right is crucial for the longevity and safety of your flooring.

    Why pH-Neutral Formulas Are Your Best Bet

    For the vast majority of commercial floors, especially rubber and vinyl, a pH-neutral formula is the gold standard. A cleaner's pH level measures its acidity or alkalinity on a 0-14 scale, where 7 is neutral. Anything too high (alkaline) or too low (acidic) is just too aggressive for most surfaces, slowly eating away at the floor's composition.

    I once consulted for a business that used a high-alkaline degreaser on its rubber flooring, thinking it would cut through grime faster. Within a year, the floor was noticeably harder and covered in micro-fractures. It was a disaster for safety and comfort. Sticking with a neutral gym floor cleaner would have prevented that expensive mistake entirely.

    To give you a quick reference, we've put together a table outlining the best cleaner choices for each common flooring material.

    Floor Cleaner Selection by Material Type

    This table is your cheat sheet for making the right choice every time. It breaks down what to use, what to watch out for, and what to avoid for the most common surfaces in your facility.

    Flooring Type Recommended Cleaner Key Considerations Cleaners to Avoid
    Rubber pH-neutral detergent Avoid excessive water. Must be non-filming to maintain traction. Bleach, ammonia, high-alkaline degreasers, solvent-based cleaners
    Vinyl (LVT/VCT) pH-neutral, non-filming cleaner Look for streak-free formulas to prevent slippery residue. Waxes, abrasive powders, high-pH strippers (for daily cleaning)
    Hardwood Water-based, pH-neutral hardwood cleaner Use minimal moisture (damp mop only). Must be approved for finishes. Oil soaps, vinegar, ammonia, steam mops, all-purpose cleaners
    Artificial Turf Enzymatic or neutral cleaner Must be safe for synthetic fibers and infill. Good for odor control. Harsh solvents, high-alkaline chemicals, oil-based products

    Using this as a guide will help your staff make smarter, safer cleaning decisions that protect both your customers and your flooring investment.

    We've seen data showing that facilities using automated scrubbers with the right pH-neutral detergents achieve 15% higher customer satisfaction scores. Why? Because clean floors improve the entire guest experience and slash odor complaints by a whopping 40%. The right chemicals have a direct and measurable impact.

    The Role of Disinfectant Wipes in Your Strategy

    While your main floor cleaner tackles the big daily and weekly jobs, disinfectant wipes are your secret weapon for targeted, on-the-spot needs.

    They're perfect for quickly cleaning up spills, wiping down a small section after use, or hitting high-touch spots along the floor's perimeter. Keeping disinfectant wipes handy for your staff offers a quick, simple solution for maintaining hygiene throughout the day without having to break out the mop and bucket, helping keep every corner of your facility spotless.

    Creating Your High-Impact Cleaning Protocol

    A consistently clean facility is built on a solid system, not just good intentions. Simply reacting to messes as they happen isn’t a strategy; it’s a recipe for falling behind. To create that hygienic environment customers trust, you need a documented cleaning protocol that’s both predictable and effective.

    This transforms cleaning from a background chore into a visible program that reassures everyone who walks through your doors. The secret is knowing the difference between the non-negotiable daily tasks, essential weekly routines, and the much-needed deep cleans. Each one has a job to do, and together, they form a rock-solid defense against dirt, grime, and germs.

    This visual guide breaks down one of the first steps: picking the right tools for the job.

    Infographic showing a 3-step guide for choosing and maintaining a gym floor cleaner based on floor type.

    As you can see, it all starts with knowing your floor type. Get that right, and matching it with the right cleaner and process becomes so much easier.

    Daily Cleaning Non-Negotiables: A Focus on High-Touch Areas

    Daily tasks are all about managing high-traffic zones and stopping small issues from becoming big problems. Think of these actions as your front line. They have the biggest impact on a customer’s immediate perception of how clean your facility is. The focus here is speed, efficiency, and visibility.

    Here's what that looks like in action:

    • Spot Mopping: Hit spills and tracked-in dirt the moment you see them. Key areas are always entrances, service counters, and heavy-use zones.
    • Debris Removal: Run a broom or vacuum regularly to get rid of the dust and other loose debris that builds up fast.
    • Targeted Disinfection: Grab disinfectant wipes for a quick sanitation pass on high-touch surfaces like doorknobs, light switches, countertops, and equipment handles. This is a critical step in reducing germ transmission.

    These daily habits keep the facility looking fresh and clean at all hours, building that all-important customer confidence.

    Weekly and Deep Cleaning Routines

    While daily tasks are about maintenance, your weekly and monthly deep cleans are where you really restore your floors and surfaces. These sessions are absolutely critical for long-term facility health and for tackling deep-seated grime.

    A full-facility mop with the right gym floor cleaner once a week is a must. This is your chance to cover every square foot, getting under furniture and into corners that daily spot treatments miss.

    Pro Tip: For any facility with a decent amount of square footage, investing in an auto-scrubber for a monthly or quarterly deep clean is a total game-changer. It delivers a level of clean that manual mopping can't even come close to, resetting your floors and helping them last longer.

    Building an Actionable Checklist

    A protocol is only as good as its execution. Honestly, the best way to make sure tasks get done right—every single time—is to create a clear, simple checklist. It empowers your staff, creates accountability, and makes training new hires a breeze. Organize your checklist by frequency (daily, weekly, monthly) and by specific zones (e.g., Lobby, Office Area, Gym Floor).

    Sample Facility Cleaning Schedule

    A simple table like this can turn abstract goals into clear, actionable directives. When staff can see what's expected, track their work, and understand why each step matters, your protocol stops being a document and starts being a powerful operational tool.

    Task Frequency Area/Focus Recommended Product
    Sweep or Vacuum Debris Daily All Floor Areas Broom / HEPA Vacuum
    Spot Mop Spills Daily High-Traffic Zones pH-Neutral Floor Cleaner
    Disinfect High-Touch Surfaces Daily Doorknobs, Counters, Handles Disinfectant Wipes
    Full Floor Mop with Cleaner Weekly Entire Facility Material-Specific Cleaner
    Deep Scrub Under Fixtures/Equipment Monthly All Areas Auto-Scrubber / Deck Brush
    Inspect & Clean Floor Edges/Corners Monthly All Perimeter Areas Detail Brush & Cleaner

    Ultimately, a visible, systematic cleaning schedule is an investment. It pays you back in customer satisfaction and retention every single day.

    Training Your Team to Be Cleaning Pros

    Buying a top-shelf gym floor cleaner is a great start, but it's only half the battle. The real magic—the kind of clean that customers notice and trust—happens when your team knows exactly how to use those products safely and efficiently. Good technique is what turns a simple cleaning routine into a full-blown sanitation program.

    When you arm your staff with the right knowledge, you're not just getting cleaner floors. You're protecting your assets, keeping people safe, and making sure every dollar spent on supplies actually works. This isn't just about pushing a mop; it's about understanding the science behind a truly clean space.

    Getting Dilution and Dwell Time Right

    Two of the most common—and costly—mistakes I see are messed-up dilution ratios and ignored dwell times. Getting these wrong doesn't just mean a less effective clean; it can wreck your floors or, even worse, fail to kill the germs you're targeting in the first place.

    • Dilution Ratios Aren't Suggestions: Most professional cleaners come concentrated for a reason. Mix it too weak, and you're just pushing dirty water around. Mix it too strong, and you're left with a sticky, slippery film that actually attracts more dirt and creates a serious safety risk. Always follow the manufacturer's instructions on the label.

    • Dwell Time is Non-Negotiable: "Dwell time" is the term for how long a disinfectant needs to stay wet on a surface to do its job. If your staff sprays and immediately wipes, they’re just moving germs around. For a disinfectant to actually kill viruses and bacteria, it needs to sit there for anywhere from 30 seconds to 10 minutes.

    Your facility's surfaces are magnets for germs. Statistics show that without proper cleaning, high-touch areas can accumulate thousands of colony-forming units of bacteria daily. Find out more about the impact of these cleaning trends.

    Arming Your Team with Safety and Efficiency Hacks

    A smart cleaning plan is a safe one. Simple safety habits prevent accidents and make your whole operation look more professional. At the same time, a few efficiency tricks borrowed from seasoned custodians can help your team get more done in less time.

    For those quick, on-the-fly cleanups during peak hours, we recommend integrating Wipes.com Disinfectant Wipes into your daily routine. They're perfect for tackling messes without having to haul out a full mop and bucket. Visit their site to see how their products can streamline your process.

    Key Safety Protocols

    Your team's safety, and your customers', always comes first.

    • Signage is a Must: "Wet Floor" signs are not optional. Place them where everyone can see them at all entry points to the area you're cleaning.
    • Keep the Air Moving: Always make sure there's good ventilation when using cleaning chemicals, especially in smaller spaces.
    • Gear Up with PPE: Your staff should always have access to gloves and be required to wear them when handling concentrated chemicals.

    Efficiency Tips from the Pros

    Work smarter, not harder, with these tried-and-true techniques.

    • The Two-Bucket Method: Use one bucket for your clean water and cleaner solution, and a second bucket just for wringing out the dirty mop. This stops you from putting grimy water right back on the floor.
    • Work from Back to Front: Start mopping in the farthest corner of a room and work your way toward the door to avoid leaving footprints.
    • Keep Wipes on Hand: For spills and other small messes in busy areas, pre-moistened disinfectant wipes are your best friend. They let staff handle a problem in seconds.

    When you combine great products with a well-trained team, you create a culture of clean that customers can actually see and feel.

    Turn Your Cleaning Routine into Your Best Marketing Tool

    It's time to stop thinking of cleaning as just another expense. For smart business owners, it's one of the most powerful and honest marketing tools you have. Your visible commitment to hygiene speaks volumes, building a level of customer trust that no advertising campaign ever could.

    Think about it from a customer's perspective. They see a staff member diligently mopping the floors or wiping down a counter. That simple act is a tangible promise—it shows you care about their health and are invested in creating a safe environment. It’s real, it's visible, and it works.

    Two men cleaning gym floor, one with mop, other thumbs up. Phone shows 'Clean gym' review.

    From Cost Center to Profit Driver

    If you're in the cleaning supply industry, this mindset shift is how you close bigger deals. Frame the conversation around brand reputation, not just product features. A premium gym floor cleaner or a case of disinfectant wipes isn't a commodity; it’s a direct investment in the customer experience.

    Explain to facility managers how a spotless environment translates directly into glowing online reviews and the power to attract today's health-conscious clientele. A huge part of long-term success is customer retention—for gyms, you can learn how to boost gym member retention—and a pristine environment is a cornerstone of that effort. You’re not just selling cleaning supplies; you’re offering a core business strategy.

    Key Takeaway: A visibly clean facility justifies premium pricing and builds unbreakable loyalty. Customers will happily pay more for a space they know is safe and hygienic.

    Don't Just Clean—Show It Off

    Your cleaning protocols are a story your customers want to hear. So, tell it. Use your marketing channels to put a spotlight on your commitment to a pristine facility.

    • Social Media: Post quick videos of your team performing a deep clean or before-and-after shots showing the power of your chosen cleaning products.
    • Facility Tours: When walking potential customers through your space, make a point to show them the cleaning stations. Explain your daily and weekly sanitation schedule.
    • Website & Signage: Create an "Our Commitment to Cleanliness" page on your website. Post signs around the facility reminding people of the steps you take to keep them safe.

    These simple actions transform your operational standards into powerful marketing messages. They reassure current customers and give prospects a compelling reason to choose you.

    The Easy Win: Disinfectant Wipes

    Beyond the floors, stocking your facility with high-quality disinfectant wipes is one of the smartest, most visible things you can do. Placing dispensers in high-traffic areas doesn't just keep things clean; it empowers customers to take part in their own safety, which they genuinely appreciate.

    For sales reps, this is an obvious upsell. While discussing a floor care program, introduce disinfectant wipes as the perfect complement for maintaining that standard of clean all day long. For cleaning equipment and other high-touch surfaces on the fly, we always recommend Wipes.com Disinfectant Wipes. They’re a must-have for any facility serious about visible sanitation.

    Ultimately, weaving your cleaning routine into your marketing and sales conversations is a game-changer. It shows you understand what modern customers truly value, building a foundation of trust that drives long-term success. Prioritize cleanliness today by integrating a robust cleaning protocol and high-quality disinfectant wipes into your daily routine or product offerings.

    What to Do When Your Floors Fight Back

    Even with the best daily cleaning routine, some problems just don't quit. You might be dealing with a funky odor, stubborn scuff marks that make the floor look ancient, or a weirdly tacky surface. These aren't just minor annoyances; they're signs that your approach needs a little tweaking.

    Think of yourself as a floor detective. That lingering odor isn't just unpleasant—it’s a breadcrumb trail leading to bacteria thriving deep in the floor's seams or pores. And that sticky feeling? It’s often a direct result of using the wrong type of gym floor cleaner or, more commonly, just using way too much of it. Instead of masking the problem, let's get to the root cause.

    Tackling Persistent Odors at the Source

    If you’re battling a smell that mopping just can't seem to kick, you've got an embedded bacteria problem. This is a classic issue with porous surfaces like rubber flooring and artificial turf, where sweat and other organic matter seep in and become a buffet for microbes.

    Your secret weapon here is an enzymatic cleaner. Forget standard detergents that just clean the surface. Enzymatic formulas unleash specific proteins that literally break down and digest the organic stuff causing the smell. They don't just cover up the odor; they eliminate it at the source for good.

    Eliminating Stubborn Scuff Marks and Residue

    Black scuff marks from shoes and dragged equipment can make even a new floor look tired and neglected. On the flip side, a sticky residue is just plain frustrating and signals your cleaning process is off.

    Here’s how to handle both without breaking a sweat:

    • For Scuff Marks: Before you grab a harsh chemical, try a little elbow grease first. A simple tennis ball rubbed firmly over the mark can often lift the rubber transfer without hurting the floor’s finish. For tougher spots, apply a small amount of your go-to pH-neutral cleaner to a microfiber cloth and work the area in a circular motion.
    • For Sticky Residue: This is almost always caused by using too much cleaner or a product not meant for your floor type. The fix is a clarifying rinse. Just mop the entire floor with nothing but clean, hot water. This will dissolve and lift that leftover soap scum. Moving forward, make sure the team is sticking to the exact dilution ratios on the bottle.

    We’ve all seen it: the "more is better" approach to cleaning. But when it comes to floor chemicals, dumping in extra cleaner is one of the worst things you can do. It creates that tacky, dirt-magnet film and can even make surfaces dangerously slippery, opening you up to a huge safety risk.

    By dialing in your techniques for these common headaches, you can solve frustrating problems before a customer even notices them. It’s all about keeping your floors looking and feeling pristine day in and day out.

    Answering Your Facility Floor Cleaning Questions

    When you're running a business, floor care isn't just about looking good—it's about safety, customer experience, and protecting a massive investment. I get asked the same questions all the time by facility managers trying to cut through the noise. Let's tackle them head-on.

    How Often Should I Mop My Commercial Floors?

    This really comes down to foot traffic. For a standard facility, a full, wall-to-wall mopping at least once a week is a solid baseline.

    But the real work happens daily. High-traffic zones like entryways, service desks, and heavy-use areas need to be spot-mopped every single day. That's where the dirt and grime build up fast. If you're running a high-volume facility, a full daily mopping might be the only way to stay on top of hygiene and keep things safe.

    Can I Use the Same Cleaner on All My Floors?

    I wish it were that simple, but no—it's a huge mistake. Your facility probably has a mix of surfaces: rubber, vinyl, tile, and maybe even hardwood. Each one has completely different needs.

    Using a one-size-fits-all cleaner is a gamble that rarely pays off. You risk damaging expensive flooring, stripping protective finishes, or leaving behind a dangerously slick residue. Always match the cleaner to the specific material.

    What Is the Best Way to Tackle Stubborn Scuff Marks?

    Before you reach for a harsh chemical, try this old-school trick for scuffs on rubber or vinyl: just grab a clean tennis ball. The friction is often enough to lift the mark right off without any damage.

    If that doesn't do it, apply a small amount of your pH-neutral floor cleaner directly to a microfiber cloth and work the spot in a tight, circular motion. This targeted approach is much smarter and safer than blasting the whole area with aggressive chemicals.

    Why Do My Floors Feel Sticky After Cleaning?

    That sticky, tacky feeling is a classic sign of one of two things: you're using way too much cleaning solution, or you're using the wrong product entirely.

    When a cleaner isn't diluted correctly, it leaves behind a film that becomes a magnet for dirt. The fix is simple: mop the entire floor again using only clean, hot water to lift that residue. Going forward, make sure your team follows the manufacturer's dilution instructions to the letter. It solves the stickiness and, more importantly, reduces the risk of slip-and-fall accidents.

    Facility managers in major markets report that improper cleaning techniques are linked to a 20-30% spike in slip-and-fall incidents. These accidents cost businesses millions in liability claims every year. Understanding the right protocols is critical, as highlighted by trends in the floor cleaning equipment market.

  • Disposable Mop Pads: A Guide to Superior Cleanliness in Commercial Facilities

    In any commercial or public facility, cleanliness isn't just about appearances—it's a critical component of public health and brand reputation. The days of relying on a traditional string mop and a bucket of murky water are numbered. That sloshing bucket is often a breeding ground for bacteria, spreading more germs than it removes. This is where modern solutions like disposable mop pads and disinfectant wipes step in, representing a strategic shift from simply wiping surfaces to actively ensuring a hygienic environment.

    Why Modern Facilities Are Ditching the Mop and Bucket for Disinfectant Wipes

    For high-traffic venues like gyms, offices, schools, and retail stores, maintaining a clean space is non-negotiable. The old mop and bucket system, once a janitorial staple, now presents significant operational and hygiene challenges. Every time a used mop head is dunked back into the cleaning solution, it contaminates the entire bucket, turning your primary cleaning tool into a vehicle for cross-contamination.

    It's the equivalent of a healthcare worker using the same gloves for multiple patients—the risk is simply unacceptable. Today's facility managers understand that true cleanliness requires breaking the chain of contamination. Tools like disposable mop pads are designed to do precisely that. By using a fresh, sterile pad for each critical area, your team ensures they're actually removing pathogens, not just pushing them around. This principle extends beyond floors; using disinfectant wipes on high-touch surfaces completes this modern approach to hygiene.

    A New Standard for Health and Safety

    The real power of switching to single-use cleaning tools is the elimination of variables that make traditional methods so risky. A laundered mop head might look clean, but it can still harbor residual germs and chemical buildup. Research has found that a shocking percentage of laundered reusable pads still test positive for harmful bacteria, completely undermining the cleaning process.

    By adopting a single-use approach with disposable pads and disinfectant wipes, facilities can guarantee that a pristine, effective cleaning tool is used every single time. This isn't just about convenience; it's a strategic investment in the health and safety of every guest, customer, and staff member who walks through your door.

    This commitment to a higher standard of hygiene directly impacts your business goals:

    • Improved Guest Safety: Reducing the spread of germs minimizes health risks for everyone in your facility.
    • Protected Brand Reputation: A visibly clean and hygienic environment builds trust and confidence with your customers.
    • Reduced Liability: A well-documented, systematic cleaning process helps mitigate risks tied to health and safety compliance.

    Ultimately, moving away from outdated methods is about more than just new products. It represents a modern understanding of what it truly takes to keep a public space clean and safe. When you integrate disposable mop pads and disinfectant wipes into your operations, you're making a clear statement that your facility prioritizes health, efficiency, and excellence.

    A Look Under the Hood: Mop Pad Materials and Design

    Let's be honest, not all disposable mop pads are the same. Not even close. The material and design of a pad are what separate a quick, effective clean from just pushing dirt around. Choosing the right one is like picking the right tool for the job—and knowing the difference can make or break your cleaning program.

    The most common materials you'll run into are microfiber, polypropylene, and a few other specialized synthetics. Each one is engineered to solve a specific problem, and the trick is to match the pad’s strengths to your facility's unique floors and the kind of mess you’re dealing with.

    After all, the pad that makes a polished office lobby sparkle probably isn't the best choice for a gym locker room battling constant moisture and foot traffic.

    The Grabbing Power of Microfiber

    There's a reason microfiber is the rockstar of the disposable pad world. Its fibers are incredibly fine—way thinner than a human hair—which creates a massive surface area for trapping dust, dirt, and germs.

    • When used dry, microfiber generates a natural electrostatic charge. It literally acts like a magnet for fine dust, hair, and allergens. This makes it perfect for maintaining pristine surfaces in offices or retail stores where even a single speck of dust stands out.
    • When used damp, the material is a beast at lifting and locking onto grime and microscopic contaminants. This is where the real science of cleaning comes in. It’s about mechanical removal—physically pulling germs off the floor instead of just smearing them around with a disinfectant.

    Synthetics: The Heavy Lifters for Spills and Grime

    While microfiber is a great all-around player, other materials are built for more specialized tasks. Polypropylene and other multi-layered synthetic pads are the heavy-lifters, engineered for maximum absorbency and pure toughness.

    Think of these pads as your first line of defense for spills in a busy school cafeteria or for sopping up tracked-in rain in a retail entryway. Their layered design lets them soak up a ton of liquid without tearing or falling apart, which is exactly what you need for a fast, effective cleanup.

    This simple decision tree helps visualize when a disposable pad is the smartest choice for tackling a dirty floor.

    A flowchart titled 'Mop Selection Guide' asks 'Dirty Floor?'. If yes, choose 'Disposable Pad'. If no, choose 'Traditional Mop'.

    This flowchart really hammers home a core principle of modern hygiene: when you're dealing with contamination, a fresh, single-use tool is the most reliable way to guarantee it's gone for good.

    Matching Pad Materials to Your Needs

    To make your decision easier, we've broken down the key traits of the most common disposable pad materials. Think of this as your cheat sheet for matching the right pad to the right job in your facility.

    Comparison of Disposable Mop Pad Materials

    Material Type Key Feature Best For Particle Attraction Liquid Absorbency
    Microfiber Electrostatic charge & high surface area Daily dusting, general cleaning, pathogen removal Excellent Moderate
    Polypropylene High liquid retention and strength Spill cleanup, entryways, wet conditions Good Excellent
    Blended Synthetics Balanced performance and durability High-traffic areas, textured flooring Good High
    Pre-Saturated Pads Convenience and chemical consistency Disinfection tasks, restrooms, healthcare settings Varies N/A (Pre-Moistened)

    This isn't just a trend; it's a fundamental shift in how professionals approach cleaning. The growth in the microfiber market shows that facility managers, business owners, and gym operators are all recognizing that these modern tools simply outperform old-school methods.

    Getting a handle on these material differences is the first step. To see how this same technology applies in other formats, check out our guide on disposable microfiber cloths. When you're armed with this kind of knowledge, you can stop buying generic cleaning supplies and start building a floor care program that’s precise, effective, and incredibly efficient.

    The Operational Benefits for Your Facility

    Three icons illustrating benefits: health and safety with a shield, efficiency with a stopwatch and pads, and cost-effectiveness with a calculator and coins.

    Understanding the materials is one thing. Seeing how they transform your day-to-day operations is another entirely. The real value of disposable mop pads isn't just in the product itself—it's in the tangible results you see in your facility's health, efficiency, and bottom line.

    These aren't just cleaning supplies; they're strategic tools. For demanding environments like fitness centers, bustling restaurants, or large office buildings, the advantages become crystal clear. Let's break down the three core benefits facilities gain when they make the switch.

    Enhanced Health and Safety

    Your first and most important job is to stop the spread of germs. This is where traditional mops often fail spectacularily. Think about it: every time a used mop head gets dunked back into a bucket, it turns the cleaning solution into a murky soup of contaminants. Studies have shown that even after a commercial laundering, reusable mop heads can still harbor dangerous bacteria, ready to be spread right back onto your floors.

    Disposable mop pads slam the door on that risk.

    By adopting a simple "one pad, one area" rule, you ensure a fresh, sterile tool is used for every critical space. This is a non-negotiable for high-traffic zones like restrooms, gym locker rooms, or restaurant kitchens, where breaking the chain of cross-contamination is everything.

    A core principle of modern hygiene is that the physical removal of dirt is just as important as chemical disinfection. A single-use pad traps soil and pathogens, which are then thrown away—gone for good. They never get a chance to be reintroduced into your environment.

    This commitment to health creates a visibly safer space for your patrons and staff. And while your floors are covered, don't forget other high-touch surfaces. For total facility protection, we recommend pairing great floor care with top-tier surface disinfection using something like Wipes.com Disinfectant Wipes to build a comprehensive hygiene strategy.

    Superior Operational Efficiency

    In any facility, time is money. Every minute your staff spends on tedious, non-productive tasks is a minute that could have been spent improving the customer experience. The old-school mopping workflow is a notorious time-waster: filling buckets, measuring chemicals, wringing out mops, and then the whole laundering saga. Washing, drying, and sorting mop heads is a massive labor drain that adds zero value to your facility's actual cleanliness.

    Disposable mop pads cut right through that inefficiency. Your team just grabs a fresh pad, attaches it, cleans an area, and tosses it. Done. There’s no downtime waiting for the laundry to finish or discovering the "clean" mops from yesterday are still damp and mildewed.

    Efficiency Gains in Action:

    • Rapid Spill Response: A drink gets knocked over in a bustling restaurant. With disposable pads, your crew can be on it in seconds, no need to go prep a whole mop and bucket setup.
    • Faster Gym Turnovers: In a fitness center, staff can quickly wipe down studio floors between classes, ensuring a clean, safe space for the next group.
    • Reduced Training Time: The system is dead simple. New hires can get up to speed almost instantly, without needing complex training on chemical dilutions or laundry protocols.

    Beyond the obvious gains in time and hygiene, modern cleaning solutions are also central to ensuring safety during cleaning operations for both your staff and the public. A simpler, safer process protects everyone involved.

    Surprising Cost-Effectiveness

    At first glance, the per-unit cost of a disposable pad might seem higher than a reusable one. But that’s a rookie mistake. A true cost analysis tells a completely different story when you look at the total cost of ownership.

    Traditional mopping comes with a long list of hidden expenses that go far beyond the price of the mop head. When you make the switch to a disposable system, the savings start popping up everywhere.

    Calculating Your True Savings:

    • Labor: All those hours spent laundering, transporting, and managing a mop inventory? You get them back.
    • Utilities: Your water and energy bills will drop significantly once you kill the daily laundry cycles for mops.
    • Chemicals: You’ll save on laundry detergents and also gain much better control over the amount of cleaning solution used on the floor itself.

    When you factor in these operational savings, most facilities find that disposable systems aren't just more hygienic and efficient—they’re actually easier on the budget in the long run.

    Customizing Your Cleaning Strategy by Facility

    Illustration of a cross-contamination system showing airport, sports, event, and dealership locations.

    Let's be honest: a one-size-fits-all cleaning plan is a fantasy. In the real world, the hygiene challenges of a busy gym are worlds away from those of a corporate office. To get real results and peak efficiency, you have to match your strategy to the specific demands of your environment.

    This means ditching generic protocols for a playbook built around your facility’s unique foot traffic, soil types, and customer expectations. Handing your team disposable mop pads is a great first step, but customizing how they’re used is what truly unlocks their power.

    Gyms & Fitness Centers: High-Touch and High-Stakes

    Gyms are breeding grounds for germs due to sweat, high foot traffic, and shared equipment. Locker rooms, workout floors, and yoga studios require constant attention to prevent the spread of bacteria and fungi.

    For these high-moisture, high-risk areas, using a fresh, disinfectant-compatible disposable mop pad for each zone is non-negotiable. This prevents cross-contamination between the locker room and the main workout floor. Complement this with a robust disinfectant wipe protocol for equipment, handles, and benches to ensure member safety.

    Offices and Retail Stores: First Impressions Matter

    In an office or retail setting, cleanliness directly impacts employee morale and customer perception. A spotless environment communicates professionalism and care. The primary challenge is managing dust, light spills, and entryway grime from daily foot traffic.

    Dry microfiber disposable pads are ideal for daily dusting of hard floors, trapping fine particles without chemicals. For entryways and break rooms, pre-moistened or damp synthetic pads offer a quick and effective solution for spills and scuffs. Don't forget high-touch points like door handles, conference tables, and checkout counters—these need regular attention with disinfectant wipes.

    The broader market for household cleaning tools, which includes these specialized pads, is booming. Flat mops and their disposable microfiber cousins make up a huge chunk of that revenue, driven by facilities just like yours looking for smarter applications. You can discover more insights about this growing market and see how it’s shaping professional cleaning standards.

    Restaurants & Schools: The Hygiene Imperative

    In restaurants and schools, health and safety are paramount. Kitchens, cafeterias, and classrooms are hotspots where spills and germs can spread quickly. The risk of cross-contamination from a food prep area to a dining room or from one classroom to another is a serious concern.

    A strict "one pad, one area" rule is essential. Use dedicated pads for kitchens, separate ones for dining areas, and fresh ones for each classroom or restroom. This simple protocol is one of the most effective ways to ensure a safe and hygienic space for students and diners.

    Creating a Unified Hygiene Protocol

    No matter what kind of facility you run, a clean floor is just one piece of the puzzle. High-touch surfaces like door handles, countertops, gym equipment, and railings are major transfer points for germs. Integrating disinfectant wipes into your team's daily routine is essential for creating a truly clean environment. For maximum effectiveness and convenience, we recommend Wipes.com Disinfectant Wipes, which you can check out on their official site at https://www.wipes.com.

    Ultimately, customizing your approach transforms cleaning from a reactive chore into a proactive strategy. By matching the right tool and technique to each specific area, you not only get a cleaner space but also boost efficiency, protect your brand, and create a safer, more welcoming environment for everyone.

    How to Implement a Disposable Mop Pad Program

    Deciding to upgrade your cleaning game is the easy part. The real win comes from rolling out a disposable mop pad program the right way—smart, structured, and seamless. A smooth launch gets your team on board fast, minimizes disruption, and lets you see the benefits of better hygiene and efficiency from day one.

    A successful switch really comes down to three things: clear training, smart logistics, and honest communication. Just handing your team a new product without explaining the "why" is a recipe for failure. You have to show them how this change makes their jobs easier, safer, and more effective.

    A Checklist for Managers

    To make the switch stick, your job is to create clear, repeatable processes. The goal is to make the new system so simple and logical that it becomes second nature for your entire janitorial staff.

    Your Implementation Plan:

    1. Do a Hands-On Training: Don't just show a video. Get in there and demonstrate how to attach, use, and toss the pads. Really drive home the "one pad, one area" rule for critical zones like restrooms to kill any chance of cross-contamination.
    2. Set Up Storage and Disposal Stations: Designate a clean, dry spot for storing the new pads. More importantly, set up clearly marked disposal bins in convenient locations. This removes any guesswork and makes the new workflow feel fast and easy.
    3. Communicate the 'Why': Explain the health and safety wins. Frame the switch not as a cost-cutting move, but as an investment in protecting both your customers and your staff. When your team understands the mission, their buy-in will be rock solid.

    A key finding in hygiene studies is that even commercially laundered reusable pads can retain harmful pathogens. By explaining this to your staff, you empower them to see disposable pads not just as a tool, but as a critical part of your facility’s health defense system.

    Following a structured plan is everything. You can learn more about building effective routines by reading our guide on how to create a cleaning schedule for your facility.

    Sales Tips for Janitorial Suppliers

    If you're in sales, how you position disposable mop pads and disinfectant wipes makes all the difference. Your clients aren't just buying products; they're buying a solution to some of their biggest operational headaches. So, frame your pitch around value, not just price.

    Positioning for the Win:

    • Focus on Hygiene ROI: Don't lead with the cost per pad. Start by talking about the return on investment from reducing cross-contamination risks, boosting customer perception, and creating a healthier environment. A single outbreak can cost a business far more than an entire year's supply of cleaning products.
    • Sell Operational Efficiency: Do the math on the "soft costs" for your client. How many labor hours are they burning on laundering mop heads? How much are they spending on water, energy, and laundry chemicals? Position disposable tools as the key to giving them back time and money.
    • Bundle a Complete Solution: Offer disposable mop pads as part of a total hygiene package. Pair them with high-quality disinfectant wipes for surfaces to create a comprehensive plan for floors and high-touch points. This makes you a strategic partner, not just another supplier.

    By focusing on these core benefits, you can show that investing in a modern disposable system is a smart business decision that pays for itself in safety, efficiency, and reputation. Prioritizing cleanliness is no longer a "nice-to-have"—it's a fundamental expectation. Encourage readers to prioritize cleanliness and consider integrating disinfectant wipes into their daily routine or product offerings.

    Turning Cleanliness into Your Competitive Edge

    Switching to disposable mop pads isn't just an operational tweak—it's a smart business move. In today's market, cleanliness is one of the most powerful ways to set yourself apart, and it hits your bottom line directly. It’s a visible promise to every customer, guest, and staff member that you take their health and safety seriously.

    That promise pays off in real-world results. Spotless floors and a visibly hygienic facility lead to better guest satisfaction scores, glowing online reviews, and a brand people trust. When someone feels safe and knows a space is well-maintained, that confidence brings them back.

    From a Cleaning Tool to a Business Strategy

    Start thinking of your hygiene protocol as a marketing investment, not just a line item on a budget. Every freshly mopped floor and disinfected surface sends a clear message: we care about you here. That feeling is priceless for building loyalty.

    Of course, a single tool won't do it all. Great floor care with disposable mop pads is the foundation, but it needs to be paired with just as much attention to surface disinfection. High-touch points like door handles, payment terminals, and service counters are hotspots for germs. This is where high-quality disinfectant wipes become essential to a complete, protective system.

    This one-two punch of floor and surface care doesn't just clean your building—it builds trust. A rigorous, visible hygiene program shows a level of professionalism and care that makes you stand out, turning first-time visitors into repeat customers.

    The Bottom Line on Facility Hygiene

    The way people think about "clean" has changed for good. It’s not enough to just look clean anymore; you need the systems in place to actually be clean, consistently. Bringing in modern tools like disposable pads and effective surface wipes is the surest way to meet that new, higher standard.

    Take a hard look at your entire hygiene plan today. Ask yourself how updated solutions could elevate your brand and better protect everyone who walks through your doors. Cleanliness isn't just a daily chore; it’s a core piece of your competitive advantage. The future of your business might just depend on it.

    Common Questions Answered

    Switching up your cleaning system always brings a few practical questions to the surface. Let's get straight to the point and tackle the most common things facility managers ask when considering a move to disposable mop pads.

    Aren't Disposable Mop Pads Just More Expensive Than Regular Mops?

    It's easy to look at the cost per pad and think that, but it's a bit of a trap. The real story is in the total cost of ownership, which is almost always significantly lower.

    Think about it: you completely eliminate all laundering expenses. That means no more water, electricity, detergent, or the labor hours your team spends washing, drying, and sorting traditional mop heads. Add in the time saved from faster, more efficient cleaning and more precise chemical use, and disposable mop pads start looking like a very smart financial move. The savings aren't in the pad itself, but in cutting out all the wasteful processes that surround traditional mopping.

    What About the Environmental Impact? Am I Just Creating More Waste?

    That's a fair and important question. The good news is that many modern disposable mop pads are designed with sustainability in mind, with some even made from recycled materials. But the biggest environmental win comes from what you stop doing: laundering.

    By ditching the laundry cycle, your facility's water and chemical consumption plummets. You're no longer dumping gallons of water and harsh cleaning chemicals down the drain every single day. If you want to make the most eco-conscious choice, it's always a good idea to ask the manufacturer about their material sourcing and whether the pads are recyclable.

    Can We Use Our Current Disinfectant with These Pads?

    For the most part, yes. The vast majority of high-quality disposable mop pads are built to work with a wide spectrum of neutral pH floor cleaners and hospital-grade disinfectants. This flexibility makes them incredibly easy to slot into your existing cleaning protocols without a major overhaul.

    That said, you should always double-check the manufacturer's guidelines for both the pad and your chemical solution. This is just smart practice. It ensures you get the full disinfectant power and guarantees the chemical won't break down the pad material, which could compromise the entire cleaning process.

    And of course, if you're using pre-saturated pads, you don't need any additional chemicals at all, which simplifies things even further.

    How Often Do We Really Need to Change the Pads?

    This really depends on the space you're cleaning, but there's one golden rule that's non-negotiable in any public facility: one pad per room. This is especially critical in high-risk areas like restrooms, locker rooms, or healthcare environments. It’s your single best defense against dragging germs from one area to another.

    For big, open spaces like an office floor or a retail store, the rule is simple: change the pad as soon as it's visibly dirty. This ensures your team is actually removing soil from the floor, not just pushing it around. Sticking to this practice is what maintains a consistently high standard of clean.