In any commercial facility, from a bustling corporate office to a high-traffic gym, the appearance of your floors speaks volumes. Clean, well-maintained porcelain tile does more than just look good—it projects professionalism, enhances safety, and shows a genuine commitment to the health of everyone who walks through your doors. A smart cleaning strategy isn't a cost; it's an investment in customer confidence and operational excellence.
This guide provides a practical framework for facility managers, janitorial staff, and cleaning industry sales professionals. We'll cover everything from daily maintenance with the right pH-neutral cleaners and the strategic use of disinfectant wipes to periodic deep cleaning that restores tile and grout to its original brilliance. Get this right, and your floors will not only look fantastic but will also contribute to a safer, healthier environment.
Why Proper Porcelain Floor Care is a Business Imperative

For business owners and facility managers, the condition of the floor is a direct reflection of the business itself. A gleaming porcelain tile floor communicates a high standard for quality and hygiene, building immediate trust with clients, customers, and employees. In today's health-conscious world, visible cleanliness is a powerful tool for customer retention and brand reputation.
Porcelain's popularity in commercial settings is due to its incredible durability. Its dense, non-porous surface resists stains, moisture, and heavy foot traffic, making it an ideal choice for demanding environments. This resilience has driven significant market growth, with the global ceramic and porcelain tile market valued at $449.86 billion in 2025 and projected to expand. You can explore more market data on Dataintelo.com. But this toughness demands a specific, structured approach to cleaning to maintain its integrity and appearance.
Developing a Multi-Level Cleaning Strategy
Exceptional porcelain floors are the result of a planned, multi-level cleaning program, not sporadic mopping. An inconsistent approach can lead to dulling residue from soap buildup or, worse, create hazardous slip-and-fall conditions.
A successful strategy is built on three pillars:
- Daily Maintenance: This is your first line of defense. It involves removing daily dust, dirt, and debris before it can be ground into the floor's surface. A quick sweep and mop manages fresh spills and foot traffic, preventing larger issues from developing.
- Periodic Deep Cleaning: Performed weekly or monthly depending on traffic, this is a more intensive clean designed to lift the stubborn grime and soil that daily mopping can't resolve, paying special attention to grout lines.
- Restorative Care: This is the heavy-duty intervention performed as needed to tackle deep-set stains, heavy buildup, or significant grout discoloration, effectively returning the floor to a like-new state.
For facility managers and cleaning professionals, this structured approach elevates floor care from a routine chore to a critical asset management function. Proper maintenance protects the flooring investment, mitigates liability from slip-and-fall incidents, and upholds the professional image of the facility. It's an operational imperative with a clear return on investment.
Porcelain Tile Cleaning At a Glance
Here’s a quick overview to help you visualize how these cleaning tasks fit together in a typical maintenance schedule.
| Cleaning Task | Recommended Frequency | Primary Goal |
|---|---|---|
| Dust Mopping/Sweeping | Daily | Remove loose dirt, dust, and debris. |
| Routine Damp Mopping | Daily or as needed | Clean up spills and light soiling. |
| Deep Cleaning/Scrubbing | Weekly to Monthly (traffic-dependent) | Remove accumulated grime and restore grout appearance. |
| Stain & Grout Treatment | As needed | Address specific spots, discoloration, and buildup. |
| Restorative Cleaning | Annually or as required | Return tile and grout to their original condition. |
This table serves as a great starting point for building a custom cleaning schedule that fits your facility's specific needs and traffic patterns.
Choosing Your Tools and Cleaning Solutions
Keeping porcelain tile floors in top shape is less about brute force and more about having the right gear. The right tools and solutions don't just make the job faster; they protect the floor itself from damage caused by harsh chemicals or the wrong kind of scrubber. Think of it as having two distinct toolkits: one for the daily grind and another for those necessary deep cleans.
For the day-to-day stuff, your mantra should be efficiency and gentleness. This is where high-quality microfiber becomes your best friend.
Assembling Your Daily Cleaning Kit
Your daily equipment is all about getting rid of fine dust and light messes before they turn into bigger headaches. It's time to ditch the old cotton string mop—it mostly just sloshes dirty water around. Modern tools give you a much better result.
- Microfiber Dust Mop: A wide, flat microfiber dust mop is an absolute must-have. Its electrostatic charge is a magnet for the fine dust, hair, and grit that can put tiny scratches in your tile's finish over time.
- Two-Bucket Mop System: This is such a simple concept, but it makes a world of difference for damp mopping. One bucket is for your cleaning solution, the other for clean rinse water. This setup stops you from putting dirty water right back on the floor you just cleaned, which is the secret to a streak-free finish.
- pH-Neutral Cleaner: For any routine cleaning, this is the safest and most effective choice you can make. It cleans well without leaving behind a dull film or slowly eating away at your grout.
Selecting the Right Cleaning Chemistry
The cleaning solution you pick is just as crucial as the mop you use. The chemical makeup of your cleaner has a direct effect on how your porcelain tile—and especially its grout lines—looks and lasts.
The single most important thing to look for in a daily cleaner is its pH level. The pH scale goes from 0 (very acidic) to 14 (very alkaline), with 7 being neutral. For regular mopping, you want a product that lives right in that neutral zone.
A pH-neutral cleaner is your go-to for routine porcelain tile care. It’s tough enough to lift everyday dirt but gentle enough that it won’t strip grout sealants or etch the tile surface. It preserves both the look and the life of your floors.
If you consistently use cleaners that are too acidic or alkaline for daily tasks, you'll see your grout slowly degrade. It becomes more porous and starts soaking up stains like a sponge. It’s worth taking a moment to understand the science behind why pH-neutral cleaners work so well.
Gear for Deep Cleaning and Large Areas
When it’s time for a deep clean or you're tackling a massive space like a school corridor or a retail floor, a simple mop and bucket just won't cut it. This is where you call in the cavalry.
- Auto Scrubber: For any large facility, an automatic floor scrubber is a total game-changer. In one smooth pass, it lays down cleaning solution, scrubs the floor with brushes, and vacuums up the dirty water. It delivers a level of clean that’s just not possible by hand over big areas.
- Rotary Floor Machine: You might know this as a "swing machine" or "buffer." It's an incredibly versatile piece of equipment for intensive scrubbing. When you fit it with the right brush, it can power through stubborn, built-up grime on both tile and grout, bringing them back to life.
Dilution Ratios and Product Selection
Getting the dilution right is the key to cleaning that is both effective and budget-friendly. A common mistake is thinking that more cleaner equals a better clean. It doesn't. Using too much just leaves behind a sticky, hazy film that actually attracts more dirt. Always, always follow the manufacturer's instructions on the label.
A good rule of thumb is to use a lighter dilution for daily mopping and a slightly stronger—but still correct—mix for heavily soiled areas. It's also worth looking into some of the excellent natural floor cleaning solutions available today. Many plant-based, biodegradable options perform just as well as traditional chemicals. When your team knows how to choose and mix products correctly, they clean more effectively, safely, and without wasting money.
Your Daily Porcelain Floor Maintenance Routine
The secret to keeping porcelain tile floors looking sharp isn't about marathon scrubbing sessions. It's all about a consistent daily routine, especially in busy commercial spaces. This preventative maintenance stops minor dirt from escalating into a major cleaning headache. Your primary enemy is the fine, abrasive grit tracked in from outside, which acts like sandpaper under foot traffic, slowly dulling the tile’s finish.
Before any liquid touches the floor, you must remove dry soil. A high-quality microfiber dust mop is indispensable here. Its electrostatic properties excel at capturing fine dust and particles that a traditional broom simply pushes around.
Mastering the Two-Bucket Mopping Technique
After clearing loose debris, it's time for a damp mop. For a professional, streak-free result, the two-bucket system is non-negotiable. One bucket holds your properly diluted pH-neutral cleaning solution, and the other holds clean rinse water. This simple separation is key to preventing cross-contamination and the common mistake of reapplying dirty water to the floor.
The process is straightforward but delivers superior results:
- Dip your clean mop head into the cleaning solution.
- Wring it out thoroughly until it is damp, not dripping.
- Mop a manageable section of the floor using a figure-eight pattern for even coverage.
- Rinse the dirty mop in the clean water bucket.
- Wring it out completely before returning to the cleaning solution for the next section.
This cycle ensures dirt remains in the rinse bucket, keeping your cleaning solution effective longer. A critical pro tip: change both the solution and rinse water as soon as they appear cloudy. Pushing dirty water is the number one cause of hazy, streaky floors.
This simple workflow shows how daily tasks build the foundation for more intensive cleaning when needed.

As you can see, daily dust and damp mopping are the bedrock of any solid floor care program. The heavier machinery, like auto scrubbers, is reserved for more periodic, deep-cleaning jobs.
Integrating Disinfectant Wipes for Targeted Hygiene
While daily mopping maintains overall floor cleanliness, it often misses specific areas that require true sanitation. This is where disinfectant wipes become an invaluable tool. They are perfect for quickly sanitizing high-touch, low-level areas and responding instantly to spills, ensuring hygiene standards are met without a full mopping procedure.
In the post-pandemic era, public health awareness has skyrocketed, driving significant growth in the cleaning industry. The global floor cleaner market was valued at $5.49 billion and is expected to climb to $9.41 billion by 2033, a testament to the heightened demand for cleanliness. You can explore the data in the full Grandview Research report.
A Note for Sales Professionals: Position disinfectant wipes not as a standalone product, but as an essential component of a comprehensive hygiene system. Educate clients on the ROI of visible cleanliness—a modest investment in wipes can significantly boost customer confidence, reduce health risks, and demonstrate a commitment to safety.
Facility-specific needs dictate frequency. In a restaurant, any spill should be cleaned and disinfected immediately. In a gym, the floor around weight benches and equipment should be wiped down multiple times a day. In an office, high-touch zones like door kick plates or the floor beneath water coolers are germ hotspots that benefit from targeted disinfection.
Sales Tips and Efficiency Hacks
For cleaning supply sales professionals, bundling disinfectant wipes with standard floor cleaning packages is a smart strategy. Propose a "Daily Hygiene Starter Kit" that includes a microfiber mop, two-bucket system, neutral cleaner, and a bulk supply of disinfectant wipes. This approach provides a complete solution, positioning you as a knowledgeable partner rather than just a supplier.
For janitorial teams, here are proven efficiency hacks:
- Zone Cleaning: Assign one team member to dust mop an area while another follows with damp mopping. This assembly-line approach is significantly faster than one person performing all tasks.
- Spot Treatment Protocol: For small spills, using a disinfectant wipe is far more efficient than deploying a full mop and bucket, saving time, water, and solution.
- Proactive Placement: In retail stores, gyms, or schools, strategically placing wipe dispensers empowers staff and even customers to handle minor cleanups instantly, maintaining a higher standard of cleanliness throughout the day.
By combining a disciplined daily mopping routine with the smart, targeted use of disinfectant wipes, you create a powerful, multi-layered approach that keeps porcelain tiles immaculate while actively promoting a healthier, safer environment.
Deep Cleaning Porcelain Tile and Reviving Grout

Daily maintenance is the backbone of any solid floor care program, but let's be honest—there comes a point where it just isn't enough. Over weeks and months, high foot traffic grinds in grime that a simple damp mop can't touch. You’ll see it first in the grout lines as they start to darken, and then the tile itself loses its original pop. That's your cue for a deep clean.
This isn't just about looks; it's about hygiene. Grout is far more porous than tile, making it a magnet for dirt, grease, and bacteria. In a restaurant kitchen, that’s a greasy buildup from cooking oils. In a gym locker room, it’s a mix of body oils and soap scum creating a perfect breeding ground for germs. A proper deep clean is what truly eradicates these stubborn soils and restores the floor.
Preparing for a Restorative Clean
Before you even think about mixing a cleaning solution, proper prep work is non-negotiable. It makes the job safer, faster, and much more effective. First things first, clear the area completely. Get all the furniture, mats, and equipment out of the way so you have total access to the floor.
Next, get rid of all the dry soil. A good-quality dust mop or a vacuum with a hard floor attachment is essential here. If you skip this, all that loose dirt just turns into mud the second you add liquid, creating a bigger mess and a lot more work for your team.
Finally, get some air moving. Open doors, set up fans—whatever it takes to ventilate the space. It’s just a smart, professional practice, even when you're using modern, safer cleaning chemicals.
The Power of Alkaline Cleaners for Grout
When you're up against tough, greasy grime embedded in grout, a pH-neutral cleaner just doesn't have the muscle. This is where an alkaline-based cleaner, typically with a pH of 9-12, becomes your best friend. Alkaline solutions are fantastic at breaking down and emulsifying organic soils like grease, oil, and caked-on dirt.
Unlike acidic cleaners, which can actually damage grout if you're not careful, alkaline cleaners are generally much safer for this kind of deep cleaning on porcelain. They go after the grime without eating away at the grout itself.
My Two Cents: For a true deep clean, an alkaline-based cleaner is your go-to. It provides the chemical muscle needed to dissolve the oily, greasy stuff that discolors grout and brings a floor back to life.
Always follow the manufacturer's dilution ratios to the letter. Apply the solution generously and let it sit on the floor for 5-10 minutes. This dwell time is critical—it’s when the chemistry does the heavy lifting, penetrating the grout and loosening the soil so you can scrub it away.
Agitation: The Key to a Perfect Finish
Once the cleaner has had time to work its magic, it’s time for some old-fashioned elbow grease—or, better yet, machine power. This mechanical scrubbing is what physically lifts the loosened grime out of the porous grout and the tile's surface texture. Your approach will depend on the size of the job and the tools you have.
- Grout Brush: For tight spots or small areas, nothing beats a stiff-bristled grout brush. It gets right into the lines for focused scrubbing.
- Deck Brush: When cleaning larger areas by hand, a long-handled deck brush lets you cover more ground while standing, saving your back and knees.
- Rotary Floor Machine: In any large commercial space, a rotary floor machine with a grout-appropriate brush is the most efficient tool by a mile. It delivers consistent, powerful agitation that you just can't replicate manually, ensuring a uniform clean across the entire floor.
After scrubbing, you've got to get that dirty slurry off the floor. Use a wet/dry vacuum to extract every bit of the liquid. This step is absolutely essential for a pristine, residue-free finish. Follow up with a thorough clean-water rinse and a second pass with the vac to ensure no chemical residue is left behind to attract new dirt.
For particularly challenging jobs, it's sometimes best to call in the experts. You might find that professional tile and grout cleaning services have the advanced equipment and experience to tackle what you can't.
Implementing Safety and Maintenance Schedules
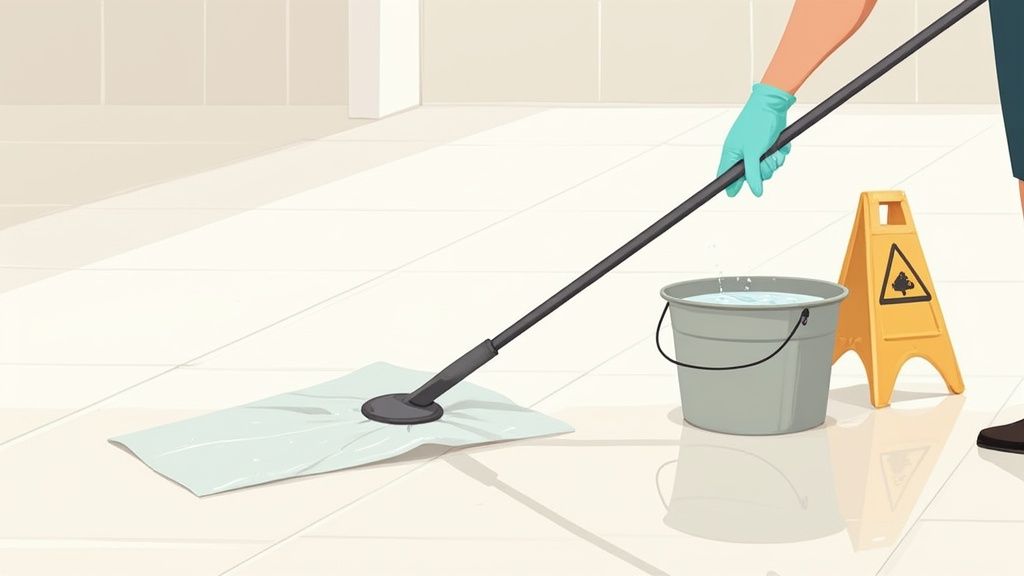
A clean floor is only half the job. Honestly, the real goal is a safe floor. Once you’ve finished any cleaning, especially a deep clean, your entire focus needs to pivot to preventing slips and falls. This isn’t just about following safety protocols; it’s a non-negotiable part of managing a facility that protects your staff, your customers, and your business from serious liability.
The most obvious part of this is using 'Wet Floor' signs, but just dropping a sign down isn’t enough. Where and when you place them is what actually makes them work.
Mastering Wet Floor Signage and Rinsing
You need to place signs at every single entrance to the area you're cleaning. The goal is to make it impossible for someone to step onto that wet surface without seeing a clear warning first. For long hallways or big open spaces, don't be shy—place extra signs every 20-30 feet.
Those signs must stay put until the floor is completely, 100% dry to the touch. Not "mostly dry" or "almost dry." Pulling signs too soon is one of the easiest ways to create a dangerous, and totally avoidable, hazard.
Just as crucial is that final rinse. Any leftover cleaning solution, even a tiny bit, can leave a slippery, invisible film on the tile. Rinsing thoroughly with clean water and then making sure the floor is bone-dry is the only way to get back the tile’s natural slip resistance. You just can't skip this step.
I’ve seen it happen too many times: people assume a floor is safe once the visible puddles are gone. The real danger is the invisible chemical residue left behind. A final, meticulous rinse with clean water is your best defense against a slip-and-fall incident that never should have happened.
Creating a Sustainable Maintenance Schedule
When it comes to floor care, consistency is everything. Having a documented maintenance schedule takes all the guesswork out of the process, creates accountability, and ensures every task gets done right and on time. A solid plan stops that slow, gradual decline in appearance that always ends with you having to spend a ton of money on restorative cleaning.
Of course, the frequency of these tasks will change drastically depending on your facility. A low-traffic corporate office has completely different needs than a chaotic retail store or a humid gym locker room. Your goal is to build a custom plan that fits the real-world demands of your space. This is a core principle of any effective program for floor cleaning and maintenance.
Sample Porcelain Tile Maintenance Schedule by Facility Type
To get you started, here’s a guide showing how cleaning frequencies might look across different commercial settings. Use this as a starting point to build a schedule that truly works for your building.
| Facility Type | Daily Tasks | Weekly Tasks | Quarterly Tasks |
|---|---|---|---|
| Corporate Office | Dust mop all tile. Spot clean spills. Damp mop the main lobby and reception. | Damp mop secondary areas like hallways and breakrooms. Check grout in high-traffic zones. | Deep clean and scrub all tile and grout. Assess if professional restoration is needed. |
| Retail Store | Dust mop the entire sales floor. Damp mop the entrance, checkout lanes, and main aisles. | Deep clean high-traffic aisles. Spot treat any noticeable grout discoloration. | Machine scrub the entire sales floor. Inspect and clean grout in restrooms and service areas. |
| School/University | Dust and damp mop all hallways, cafeterias, common areas. Disinfect restroom floors. | Scrub high-traffic corridors. Deep clean cafeteria floors to cut through food soil buildup. | Machine scrub all major tile surfaces during school breaks. Perform detailed grout cleaning. |
| Gym/Fitness Center | Dust/damp mop workout areas & lobby. Disinfect locker room & shower floors multiple times daily. | Deep clean locker rooms with an alkaline cleaner to break down body oils and soap scum. | Machine scrub all tile, focusing heavily on grout in wet areas like poolsides and showers. |
Taking the time to set up this kind of structured approach turns floor care from a reactive chore into a proactive system. It makes sure every team member knows exactly what’s expected, which ultimately leads to a consistently safer and more welcoming facility for everyone.
Common Questions About Cleaning Porcelain Tile
Even with a perfect maintenance plan, you're bound to run into some unique challenges. It just comes with the territory of managing a facility. Over the years, I've heard the same questions pop up time and again from teams learning the ropes of porcelain tile care.
Getting these common issues sorted out from the start saves a ton of time, prevents some seriously costly mistakes, and keeps your floors looking their best. Let's tackle a few of the most frequent ones.
What Is the Best Daily Cleaner for Porcelain Tile?
For your day-to-day mopping, nothing beats a pH-neutral, no-rinse cleaner. It’s the safest and most effective choice, hands down. This type of cleaner sits right at 7 on the pH scale, which means it's gentle enough to clean the tile without causing any harm to the grout. That last part is crucial.
You see, if you consistently use a cleaner that's too acidic or too alkaline, you’re setting yourself up for trouble down the line. Acidic cleaners will literally eat away at cement-based grout, making it weak and susceptible to stains. On the flip side, highly alkaline cleaners—while great for a periodic deep scrub—can leave a sticky residue that dulls the tile's finish and attracts more dirt.
When you're looking at product labels, keep an eye out for these phrases:
- "pH-neutral" or "neutral pH"
- "Safe for all hard surfaces"
- "No-rinse formula"
- "Leaves no film or residue"
Stick with a neutral cleaner for your daily routine, and you’ll protect your grout and keep that streak-free shine without damaging the tile's glaze.
How Can I Remove Tough Stains Like Rust or Ink?
When you’re up against a stubborn stain, your daily cleaner isn't going to cut it. This is where you need a more targeted game plan. The trick is matching the right chemical to the stain, but you have to be careful. The number one rule here is to always test your spot treatment on a small, hidden area first. Think behind a door, in a closet, or under a piece of furniture that never moves.
For organic stains—things like ink, marker, or spilled dye—a solvent-based spot remover usually does the trick. Just put a small amount on a clean cloth and blot the stain gently. Always work from the outside edge of the stain inward to keep it from spreading.
Rust is a completely different animal. It requires a specially formulated, mild acidic cleaner designed to dissolve mineral deposits. Apply it right on the stain, let it sit for a few minutes (follow the label's instructions), and then give it a gentle scrub with a soft-bristled brush.
Key Takeaway: These are specialized treatments, not your everyday products. Once the stain is gone, you absolutely must rinse the area thoroughly with clean water to neutralize any leftover chemicals. Then, dry it completely.
Can I Use a Steam Cleaner on My Porcelain Tile Floors?
A steam cleaner can be a fantastic tool, especially for sanitizing unglazed porcelain and getting deep into grimy grout lines without using harsh chemicals. The high heat is great for killing germs and loosening caked-on dirt. But—and this is a big but—you need to know the risks to avoid damaging your floors.
High heat can cause a couple of major problems if you're not careful.
- It can destroy grout sealants. If your grout has been sealed, the intense heat from a steam cleaner can break down that protective layer, leaving the grout exposed to moisture and future stains.
- It might weaken tile adhesives. This is less common, but it’s possible. Extreme, prolonged heat could potentially soften the adhesive holding the tile to the subfloor, especially if the initial installation wasn't flawless.
So, if you're going to use steam, do it safely. Keep the machine moving constantly—never let it sit in one spot for more than a couple of seconds. Use a lower steam setting if your machine has one, and make sure the room has good ventilation. Once you're done, let the floor air dry completely. This way, you get all the sanitizing benefits of steam without putting your beautiful porcelain floors at risk.
Don't just clean—create a safe, welcoming, and professional environment. Prioritize a structured cleaning schedule and consider integrating disinfectant wipes into your daily routine or product offerings. A commitment to cleanliness is a direct investment in your business's success and reputation.
Leave a Reply