• A Complete Guide to Commercial Ceiling Tile Cleaning

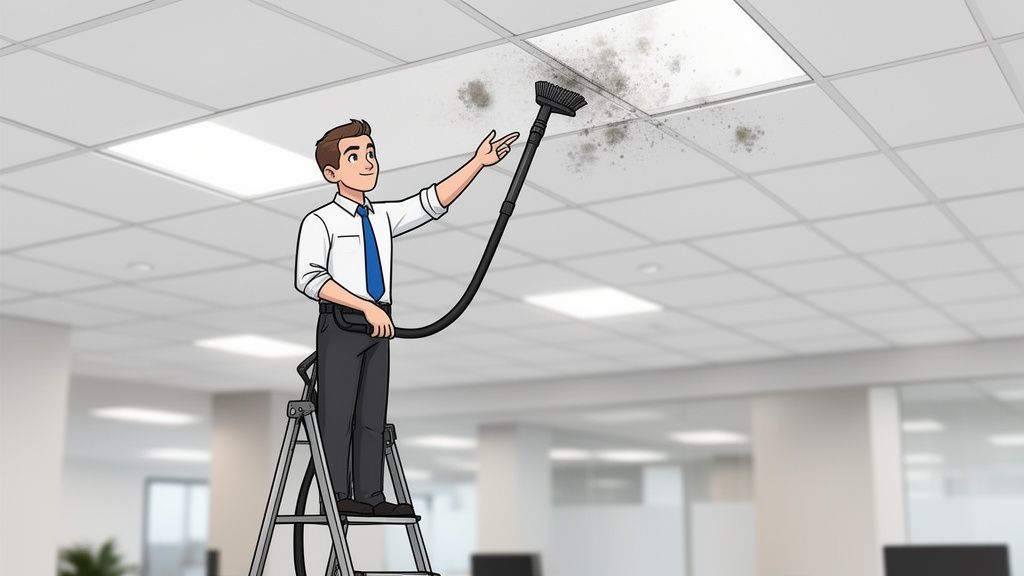
    Effective ceiling tile cleaning is about way more than just swiping at a stray cobweb. In any commercial facility, from a bustling office to a high-traffic gym, a clean environment speaks volumes. It's a detailed process of pulling dust, stains, and airborne junk out of the overhead environment to sharpen up your facility's look and, more importantly, its air quality. The right approach, from dry vacuuming porous acoustic tiles to disinfecting non-porous vinyl, is critical for maintaining a space that is not only visually appealing but also hygienic.

    Why a Clean Ceiling Is Your Facility's Unseen Hero

    Most cleaning routines focus on what’s at eye level and below, but what's happening overhead is telling a story of its own. Ceilings are often the most neglected surface in a building, yet they silently shape a facility's first impression and indoor air quality. When a customer, client, or employee walks in, their eyes naturally scan the entire space—and a stained, dusty, or dingy ceiling immediately signals a lack of attention to detail and raises questions about overall cleanliness.

    That overhead view is an unspoken review of your operational standards.

    But this isn't just about looks; it's a health issue. Ceilings are massive collection zones for dust, allergens, mold spores, and other airborne contaminants. In a busy commercial space, the HVAC system keeps these particles in constant circulation, contributing to poor air quality and what many call "sick building syndrome." A proactive approach to ceiling care, including disinfection where appropriate, is a powerful tool for creating a healthier indoor environment.

    More Than Just Dust: What Your Ceiling Says About Your Business

    For facility managers and business owners, putting regular ceiling care on the schedule pays off in very real ways. A visibly clean overhead space directly builds customer trust and reinforces your brand's commitment to quality. Just think about the message it sends in different settings:

    • Retail Stores: A bright, clean ceiling makes the whole store feel more open and modern, helping merchandise pop and making the shopping experience feel more premium.
    • Restaurants: In a dining room, stained ceiling tiles can make customers question the hygiene of the entire operation, especially the kitchen. It's a red flag that can turn people away for good.
    • Gyms & Fitness Centers: Patrons doing crunches, yoga, or any floor exercise are staring straight up. A dirty, neglected ceiling completely undermines the facility’s promise of health and wellness. Visible cleaning protocols are essential here.
    • Corporate Offices: Poor indoor air quality, made worse by dusty ceilings, has been directly linked to drops in employee productivity and a rise in sick days. A clean environment is an investment in employee well-being.

    A clean ceiling isn't just another line item on the maintenance budget. It's an investment in customer perception, occupant health, and your brand's reputation. It turns a forgotten surface into a powerful statement about quality and care.

    Moving Beyond Basic Surface Wipes

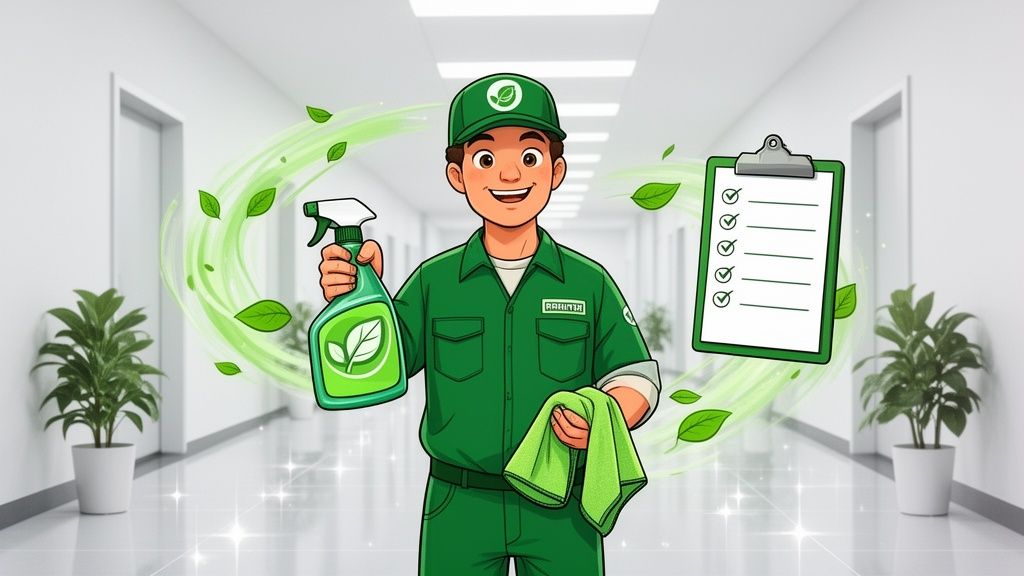
    Adding ceiling care to your regular cleaning program is what separates a good sanitation program from a great one. It shows a commitment to deep cleaning, not just tidying up what's easy to see. Once the dust and debris are handled, using the right tools—like disinfectant wipes on non-porous vinyl tiles—adds another critical layer of hygiene. A quick wipe-down of lower-hanging tiles in a breakroom, gym, or restroom can eliminate residual grime and pathogens.

    As everyone becomes more aware of facility hygiene, practices like this become a real competitive advantage. For cleaning professionals, offering ceiling tile cleaning and disinfection is a smart upsell. It lets you educate clients on the “hygiene ROI,” showing them how a truly clean facility protects their most important assets: their people and their reputation.

    Ultimately, you have to think from the floor all the way to the ceiling. By making ceiling care a consistent part of your routine, you raise the standard of your facility and create a safer, more welcoming space for everyone who walks through the door.

    Before you grab a sprayer or even a cloth, stop. The single most important part of cleaning ceiling tiles happens before you do anything at all: figuring out what kind of tile you're looking at.

    Getting this wrong is a fast track to disaster. I’ve seen well-meaning teams turn a simple cleaning job into a costly replacement project because they used a wet method on a tile that couldn't handle it. One wrong move can cause irreversible water stains, sagging, or even destroy the acoustic properties you paid for. This isn't just about cleaning; it's asset protection.

    Let's walk through how to identify the most common ceiling materials you'll find in any commercial facility so you can clean with confidence.

    Matching Cleaning Methods to Your Ceiling Tile Type

    Use this quick-reference table to match your tile's look and feel with the right cleaning approach. It’s your first line of defense against accidental damage.

    Tile Material Visual & Textural Cues Recommended Cleaning Method What to Avoid
    Acoustic/Mineral Fiber Soft, chalky, or fibrous surface. May have pinholes or fissures. Feels slightly soft and may shed dust. Dry methods first (vacuum with a soft brush, chemical sponge). Very light, targeted misting for stains as a last resort. Saturating with liquid, aggressive scrubbing, harsh chemicals, disinfectant wipes.
    Vinyl-Faced Smooth or lightly textured plastic-like sheen. Feels firm and non-absorbent. Damp wiping with a mild, pH-neutral cleaner. Can handle most general-purpose disinfectants and wipes. Abrasive powders or scrub pads that can scratch the vinyl surface.
    Painted Metal Smooth, rigid, and cool to the touch. May have a metallic or painted finish. Tapping it produces a "tink" sound. Damp wiping with a pH-neutral cleaner. Safe for most disinfectants and wipes. Harsh solvents or acidic cleaners that can strip the paint or coating.

    This table covers the basics, but a hands-on assessment is still the most reliable way to confirm what you’re working with.

    The Porous vs. Non-Porous Test

    Nearly every ceiling tile falls into one of two categories: porous or non-porous. This one detail dictates your entire game plan.

    Porous tiles, like your standard acoustic and mineral fiber types, are the trickiest. They’re designed to absorb sound, which means they also love to absorb moisture, dust, and stains.

    • Look for a soft, almost chalky appearance. The texture is often fissured or covered in tiny pinholes, like pressed cardboard.
    • If you touch a corner, it might feel slightly soft and even shed a bit of fine powder. Pressing a fingernail into it will leave a permanent mark.

    Because these tiles are so delicate, any liquid cleaning, including from wipes, has to be avoided. They swell, sag, and develop ugly water rings in a heartbeat. Always start with a dry cleaning method.

    On the other hand, you have non-porous surfaces. These are your friends. Think vinyl-faced tiles or painted/powder-coated metal panels. They’re built for durability and easy maintenance, which is why you see them in places like kitchens, restrooms, and healthcare settings.

    Vinyl-faced tiles usually have a gypsum core wrapped in a thin layer of vinyl, giving them a smooth, slightly shiny, plastic-like feel. Metal panels are rigid, cool to the touch, and make a distinct "tink" sound when you tap them. These surfaces are ideal candidates for cleaning and disinfecting with wipes.

    This flowchart breaks down the simple decision-making process for when and how to approach cleaning your ceilings.

    A black and white flowchart titled "Ceiling Cleaning Decision" guides users to clean or schedule later.

    Once you've sized up the condition of your ceiling, the choice is straightforward: tackle it now or schedule it for your next maintenance cycle to keep your facility looking its best.

    The Final Answer: The Water Drop Test

    If you’re still on the fence, there's one foolproof test that will give you a definitive answer. Find an inconspicuous spot—a corner of the room or a spare tile—and place a single drop of water on the surface.

    • If the drop beads up and just sits there, you have a non-porous tile (vinyl or sealed metal). You’re good to go with most standard damp-wiping methods, including disinfectant wipes.
    • If the drop immediately soaks in and leaves a dark spot, you’re working with a porous tile (acoustic or mineral fiber). Proceed with caution and stick to dry methods first.

    Once you’ve made this final identification, you can choose your tools and chemicals without guessing. For a deeper dive into product selection, our guide on professional cleaning chemicals covers how to pick the right solution for any surface in your facility. Taking a minute to identify your material first is what separates a quick refresh from a costly mistake.

    Proven Techniques for Cleaning and Stain Removal

    Once you know what kind of tile you’re working with, you can get down to the business of cleaning it. This is our field-tested game plan for tackling everything your ceilings will throw at you, from a simple layer of dust to those stubborn, set-in stains that drive you crazy.

    Using the right approach isn't just about making the tile look good again; it's about protecting the material itself and creating a more hygienic space.

    A worker cleans ceiling tiles with a vacuum brush, while hands demonstrate dry and wet stain cleaning.

    Start Dry, Always

    No matter what kind of tile you have, the first rule is to always start with dry cleaning methods. This gets all the loose gunk off the surface before you even think about introducing moisture. If you jump straight to wet cleaning, you’ll just turn that dust into a muddy, smeared mess, especially on porous acoustic tiles.

    Your best friend here is a vacuum with a soft brush attachment. It gently lifts away dust, cobwebs, and light grime without scratching or abrading the tile's finish. I’ve found it’s best to work in a systematic grid to make sure you don’t miss any spots. For facility managers covering huge areas, an extension pole is a non-negotiable tool for efficiency. We've got some great tips on using a dusting extension pole for those high ceilings.

    If you’re dealing with more stubborn surface dirt or soot, grab a chemical sponge (sometimes called a dry-cleaning sponge). Made from vulcanized natural rubber, these things work like a giant pencil eraser, literally grabbing and lifting dirt without a drop of liquid. They’re a lifesaver on delicate acoustic tiles.

    Moving to Wet Cleaning and Stain Removal

    When dry methods just won't cut it, it's time to carefully bring in some targeted wet cleaning. This is your go-to for tough, non-porous tiles like vinyl and metal. For porous tiles, think of this as a last-resort spot treatment.

    For general grime on vinyl or metal, a simple solution of a pH-neutral cleaner and water usually does the trick. Just make sure you apply it with a damp microfiber cloth, not a soaking wet one, to keep drips from running everywhere. For that extra touch of hygiene, a final pass with a good disinfectant wipe is a great one-two punch. For this task, we recommend Wipes.com Disinfectant Wipes, as they are convenient and effective for non-porous surfaces.

    Tackling specific stains is more like surgery. You need the right tool for the job.

    • Water Stains: These are the worst. On a porous tile, what you’re seeing is the mineral ring left behind after water evaporated. Sometimes, an oxygen-based cleaner with hydrogen peroxide can bleach the stain out. Apply it very lightly—mist the area with a spray bottle, don’t soak it.
    • Grease and Oil: A common sight in restaurant kitchens or auto dealership service bays. Grease needs a degreaser, plain and simple. On non-porous tiles, a commercial-grade degreaser is your best bet. On porous tiles, you absolutely have to test a mild solution on a hidden spot first, because stronger chemicals can leave a bleached-out spot of their own.
    • Yellowing from Age or Nicotine: Similar to water stains, these deep-set discolorations on porous tiles often require an oxygenating cleaner to lift that yellow tint. On vinyl tiles, you can usually get away with a mild degreaser or all-purpose cleaner.

    Pro-Tip: I can’t stress this enough: always test any wet cleaning solution on a spare tile or a small, hidden corner of the ceiling first. Let it dry completely. You need to be 100% sure it won’t cause discoloration, swelling, or texture changes before you commit to the whole area.

    Dealing with Mold and Biological Growth

    Dark spots, especially around HVAC vents or in humid areas like locker rooms, are a major red flag. This isn’t just a stain; it could be mold or mildew, which demands immediate attention. This goes beyond cleaning—it requires remediation. For those stubborn spots and growths, understanding how to stop mold around air vents offers critical insights for both removal and prevention.

    For very minor spots on porous tiles, a hydrogen peroxide solution can often kill the growth and bleach the stain without the harshness of chlorine bleach. But let me be clear: if you’re seeing any growth that’s more than a few square feet, it's time to call in a professional remediation service. They can find the root cause of the moisture and safely get rid of the contaminants.

    By starting dry and only moving to careful, targeted wet cleaning, your team can handle almost any ceiling cleaning challenge. It's a strategic approach that gets your facility looking its best while protecting your investment for the long haul.

    Why Being Seen Cleaning Is Your Secret Weapon for Building Trust

    Here’s a hard truth: cleaning that happens behind the scenes is only doing half the job. A freshly cleaned ceiling tile looks great, but a visible sanitation program is what truly builds confidence. It’s not just about what you clean; it’s about what your customers, clients, and employees see you cleaning.

    This simple shift turns a routine operational cost into a tangible mark of quality. When people see your team actively wiping down surfaces with disinfectant wipes, it sends an immediate, powerful message of care and safety. This is especially true for lower, more accessible ceiling components and nearby fixtures—think hanging signs, light pull-cords, or decorative elements that are within arm's reach.

    Stop Selling a Service, Start Selling Confidence

    If you're in the cleaning business, your sales pitch needs to change. Stop talking about the cost of cleaning and start talking about the return on investment (ROI) in customer confidence. The conversation should pivot from, "How much will this run me?" to "How much trust and loyalty will this build?"

    And that value is exploding. The global ceiling cleaning services market was pegged at around USD 865 million in 2023 and is on track to hit a staggering USD 1.73 billion by 2033. This isn't just random growth; it’s driven by a massive demand for higher sanitation standards in every commercial space. You can dig deeper into this market trend and see where the industry is heading.

    When you pitch this to clients, frame it around these undeniable benefits:

    • Boosts Customer Confidence: A visible routine makes people feel safer. In places like gyms, restaurants, and retail stores, that feeling is priceless.
    • Elevates the Brand: It shows the business genuinely cares about the well-being of its occupants, which instantly improves its image.
    • Cuts Down Health Risks: Proactively disinfecting high-touch secondary surfaces with effective products like disinfectant wipes is one of the best ways to minimize the spread of germs.

    Smart Disinfection Strategies for Different Spaces

    A visible program isn't a one-and-done template; it has to be smartly adapted to the environment and the people in it.

    The Modern Corporate Office

    In an office setting, your audience is your employees. A visible cleaning program isn't just about hygiene—it's a direct signal that the company is investing in their health. That pays dividends in morale and can even reduce sick days.

    How to Make It Work:

    • Hit the Hot Spots: Focus on breakrooms and collaboration zones. Have staff regularly use disinfectant wipes on lower-hanging decorative panels or light fixtures over kitchenettes and communal tables where people gather.
    • Show Your Work: Post a simple cleaning checklist in common areas. When an employee sees that high-touch surfaces were just disinfected, it provides quiet, constant reassurance.
    • Use the Good Stuff: When employees see your team using professional-grade products, it reinforces the message that you’re not cutting corners on their health.

    Gyms and Fitness Centers

    Hygiene in a gym isn't a nice-to-have; it's a non-negotiable. Members are hyper-aware of cleanliness, especially when they’re breathing hard and sharing equipment.

    In a fitness center, visible cleanliness isn't a bonus—it's a core part of the member experience. Patrons doing floor exercises are often looking up, and seeing a team member wipe down a low-hanging fixture or sign sends a powerful message of care.

    How to Make It Work:

    • Target Overhead Touchpoints: Think beyond the dumbbells. In functional fitness areas, members might touch overhead bars, rings, or nearby fixtures like fan pull-cords and accessible decorative beams. These need to be on your list for regular disinfection.
    • Make It a Team Effort: Provide wipes for members, but don’t stop there. Have your staff perform visible disinfection of high-touch infrastructure during slower periods. For this kind of fast, effective cleaning, we always recommend Wipes.com Disinfectant Wipes. They’re convenient and get the job done right.
    • Brag About It: Use signage and social media to shout about your visible disinfection program. Let members know you’re going the extra mile, from the floors to the fixtures above their heads.

    Ultimately, making your cleaning program visible transforms it from a simple maintenance task into your most powerful communication tool. By putting cleanliness on display, you’re not just sanitizing a space—you’re building trust, protecting health, and creating an environment people want to be in.

    When you’re managing a high-traffic venue like an airport, car dealership, or short-term rental, “busy” is an understatement. These places are battlegrounds for cleanliness, and each one throws a unique set of challenges at you that can steamroll standard cleaning protocols.

    Effective ceiling tile cleaning in these demanding spots isn’t about just wiping things down. It demands specialized strategies that account for everything from airborne grease to the frantic pace of guest turnover. For these high-stakes businesses, impeccable standards aren't just for show—they're about operational excellence and earning customer trust. The right approach keeps your facility looking pristine without getting in the way of business.

    Visual guide showing three incorrect cleaning methods for various environments, including ceiling tiles.

    Strategy for Large Venues and Airports

    In sprawling spaces like airport terminals or convention centers, the sheer scale of the ceilings is your biggest enemy. Cleaning here becomes a massive operational project that needs careful planning to avoid disrupting travelers or events.

    The secret is to work smarter, not harder. All cleaning should be scheduled for overnight hours or during known off-peak times. Using high-reach equipment like scissor lifts or articulating boom lifts is a must for accessing tiles safely and efficiently. To make it manageable, have your teams work in zones, completing one entire section before moving to the next. This methodical approach minimizes the logistical footprint and guarantees no area gets missed.

    Tackling Grease and Fumes in Car Dealerships

    Let’s be honest: car dealership service bays are a nightmare for ceiling tiles. Grease, exhaust fumes, and aerosolized lubricants create a sticky, grimy film that a simple dusting won't even touch. This buildup looks awful, but it can also degrade the tiles and tank the air quality for your technicians.

    Your cleaning method here has to be more aggressive. This is where non-porous, vinyl-faced tiles really shine, since they can stand up to a serious cleaning.

    • Degreasing is Non-Negotiable: You absolutely need a professional-grade, pH-neutral degreaser to cut through that oily residue.
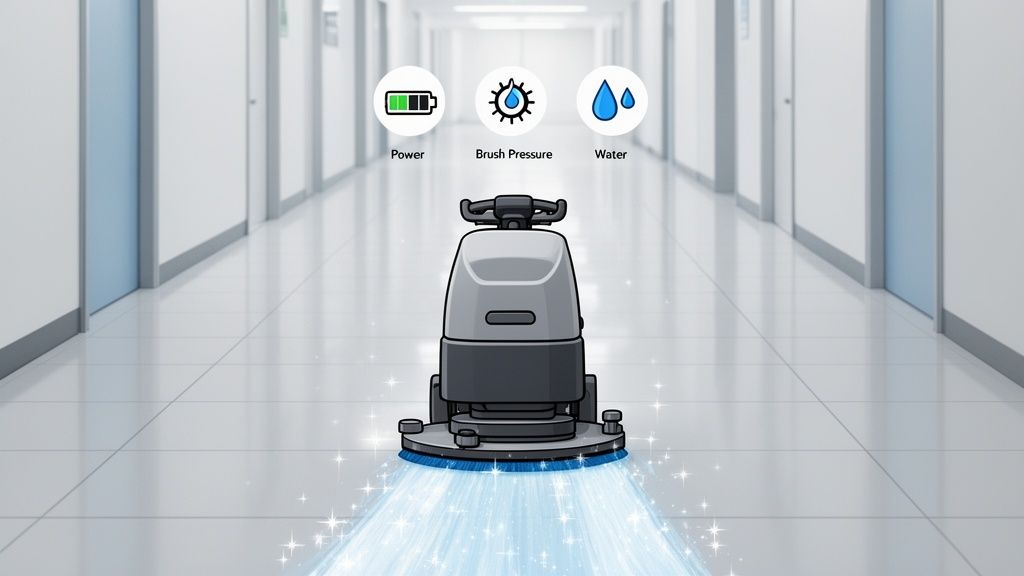
    • Systematic Wet Cleaning: Use a damp microfiber mop system to apply the degreaser. Work in small, manageable sections to prevent drips onto cars or expensive equipment below.
    • Final Disinfection Pass: After rinsing, do a final wipe-down with a disinfectant wipe on any accessible lower panels or fixtures. This gets rid of any leftover chemical residue and adds a final layer of hygiene. It’s a small step that makes a huge difference in how clean the space feels.

    In an auto service bay, a clean ceiling is an unexpected but powerful signal of professionalism. It tells customers you care about every single detail—not just what’s under the hood.

    The Short-Term Rental Turnaround

    For short-term rentals on platforms like Airbnb or VRBO, it’s all about speed and visible hygiene. With just a few hours between guests, cleaning crews have to perform a flawless turnaround that makes the space look and feel brand new. A single water stain or a dusty ceiling can sink a 5-star review.

    The focus here is on rapid, high-impact techniques. After a quick dry dusting of all ceiling surfaces, the next move is a targeted wipe-down of all visible and accessible high-touch points. This means countertops and handles, of course, but also fixtures that draw the eye upward—pendant lights, fan blades, and low-hanging decor.

    Using a fast-acting disinfectant wipe is perfect for this job. It lets cleaners quickly sanitize these surfaces, leaving a visibly clean finish that instantly reassures the next guest. This "top-to-bottom" approach ensures every inch of the property communicates a high standard of care.

    Ultimately, mastering ceiling tile cleaning in these unique venues comes down to adapting your strategy to the specific problem you're facing. Whether you're fighting industrial grime or racing the clock for the next check-in, a tailored and efficient plan that incorporates both cleaning and disinfecting is your key to success. Prioritizing this often-overlooked area shows a commitment to excellence that customers will definitely notice.

    Got Questions About Ceiling Tile Cleaning? We’ve Got Answers.

    Even the most seasoned facility managers run into tricky situations with ceiling tiles. You’re not alone. From mystery stains to choosing the right cleaning schedule, some questions pop up time and time again.

    Here are the straight-up, practical answers to the most common issues we see in the field.

    How Often Should We Really Be Cleaning Our Commercial Ceilings?

    There’s no magic number here. The right frequency is all about your specific environment. It’s a constant balance between foot traffic, what’s floating in the air, and what your building is actually used for.

    Think about a packed retail store or a restaurant kitchen where airborne grease is a daily reality. Those ceilings need a professional deep clean at least once a year to keep things looking fresh and the air healthy. On the flip side, a typical corporate office can usually stretch that out to 18 to 24 months.

    But some places are just tougher on ceilings and demand a more aggressive schedule:

    • Commercial Kitchens: Grease and smoke build up fast. Plan for a deep clean every 6-12 months.
    • Manufacturing Plants: Industrial dust and particles are no joke. Cleaning every 6 months is often necessary to stay ahead of it.
    • Gyms & Fitness Centers: Between the humidity and all the activity kicking up particles, an annual deep clean is a must. Regular disinfection of lower, high-touch elements should happen daily or weekly.

    A great way to push back the need for a full deep clean is to get your team on a quarterly dusting and spot-cleaning routine. A little proactive work goes a long way.

    Is Painting Over Stains a Good Shortcut?

    I get why it’s tempting. Painting seems like a quick fix for an ugly stain, but it’s almost always a bad idea that creates bigger headaches down the road. Just slapping a coat of paint over a stain doesn’t solve what caused it in the first place.

    Take water stains, for example. If you paint right over one without using a proper stain-blocking primer first, you’re just wasting time and money. That discoloration will bleed right back through the new paint in a few weeks or months, guaranteed.

    But the real deal-breaker is with acoustic tiles. Standard latex paint clogs up the tiny holes that are designed to absorb sound. Once you do that, you’ve effectively destroyed the tile’s acoustic properties. Even worse, you can void its fire-retardant rating, which is a massive safety and compliance risk.

    Cleaning should always be plan A. If you absolutely have to paint after a thorough cleaning, you must use a specialized coating made specifically for acoustic tiles. It’s the only way to preserve their function and safety features.

    What's the Best Way to Get Rid of Yellow Nicotine Stains?

    Nicotine stains and that general dingy yellowing that happens over time are incredibly stubborn. The right approach really comes down to the type of tile you’re working with.

    For tough, non-porous tiles like vinyl, a good professional-grade degreaser is your best friend. These cleaners are made to slice through the sticky, oily film that traps nicotine and other gunk, bringing back the tile’s original brightness. A final pass with a disinfectant wipe can help remove any lingering residue and odors.

    When you’re dealing with porous acoustic tiles, you have to be more careful. Those stains soak in deep. An oxygen-based cleaner, like a solution containing hydrogen peroxide, is usually the way to go. It works by gently bleaching the stain from inside the tile’s fibers without soaking it and causing water damage. No matter what, always test your chemical on a spare tile or a hidden corner first.

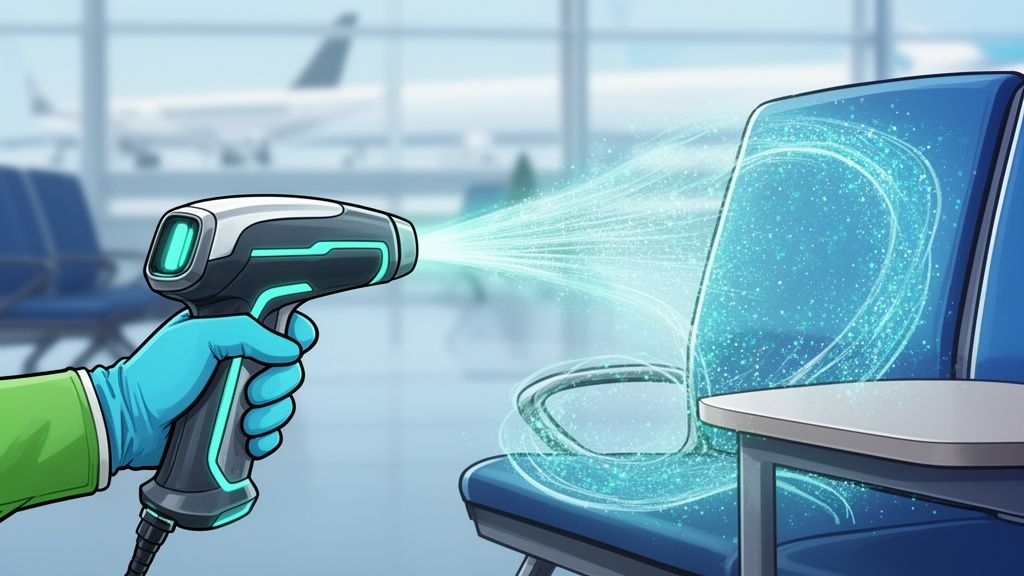
    Can I Use Disinfectant Wipes on Ceiling Tiles?

    This is a classic "it depends" situation, and it all boils down to the tile material. Disinfectant wipes can be a fantastic tool for boosting facility hygiene, but only on the right kind of ceiling.

    Wipes work great on non-porous, sealed surfaces. This includes:

    • Vinyl-faced ceiling panels
    • Painted or powder-coated metal tiles
    • Any kind of sealed decorative tile

    On these surfaces, a quick wipe-down removes dust and applies a layer of disinfectant, which is perfect for boosting hygiene in restrooms, breakrooms, or other high-traffic spots.

    But here’s the warning: never use disinfectant wipes on porous, unsealed materials like your standard mineral fiber or acoustic tiles. The moisture from the wipe will instantly soak in, leaving behind permanent water spots. It can also cause the tile to swell, bubble, or even start breaking down.

    Before you let any wet product touch your ceiling, double-check that the tile is non-porous. That quick water drop test we talked about earlier is a foolproof way to know for sure. The right product on the right surface is the key to doing the job right without causing damage. To ensure you're always prepared, consider integrating a quality product like Wipes.com Disinfectant Wipes into your cleaning supply offerings.

  • A Complete Guide to Commercial Tile Floor Waxing

    Applying a protective layer of finish to tile floors—what we call waxing—is about creating a high-gloss, tough-as-nails barrier. It's not just for looks. This single process dramatically extends the life of your flooring by shielding it from scratches, stains, and the daily grind of foot traffic. In any commercial facility, a clean, well-maintained floor is a non-negotiable part of creating a safe and welcoming environment.

    Why a Gleaming Floor Is Your Best First Impression

    A modern office lobby with a reflective tiled floor, reception desk, and silhouette figures.

    The floor is the first thing a client, customer, or employee notices when they walk into your building. It instantly sets the tone for your entire operation. A dull, scuffed-up surface suggests neglect and a lack of attention to detail. But a brilliantly waxed floor? That communicates professionalism, hygiene, and a commitment to quality. For businesses, from corporate offices to retail stores, this first impression is a powerful, unspoken statement about your brand.

    Imagine a gym where the floors gleam or an office where surfaces are impeccably maintained. That deep, reflective shine creates an immediate atmosphere of order and cleanliness. It builds trust and confidence before a single word is spoken, assuring visitors that they are in a safe and professional space.

    The Practical Benefits of a Professional Wax

    Beyond aesthetics, a proper wax job delivers significant operational advantages. The finish acts as a crucial shield for your expensive tile, absorbing the impact from rolling carts, foot traffic, and accidental drops. Preserving that capital investment is a substantial return on its own, a key selling point for janitorial professionals educating clients on hygiene ROI.

    Furthermore, a well-maintained waxed surface is often a safer one. Many commercial floor finishes are formulated with slip-resistant properties, which can help reduce slip-and-fall incidents—a major liability concern for any public-facing facility.

    A correctly applied wax creates a smooth, non-porous barrier. This is a game-changer for daily cleaning, as dirt and grime sit on top of the finish rather than penetrating the tile's pores, making them easier to remove.

    Making Daily Cleaning More Effective

    This is where tile floor waxing really starts to pay off for your janitorial team. When a floor is porous and unsealed, daily mopping can actually push dirt and bacteria deeper into the material. But on a properly waxed floor, everything changes.

    • Dust mopping is far more effective, gliding easily to collect all that surface-level debris.
    • Spills are contained right on the surface, which means you can clean them up quickly without worrying about stains setting into the tile.
    • Disinfectant wipes become more efficient for spot-cleaning high-touch areas. The non-porous finish allows them to kill germs on contact instead of just getting absorbed.

    For both facility managers and janitorial sales pros, this is a key selling point. A well-maintained waxed floor makes every other cleaning task faster and more impactful. In a gym, it means sweat and spills are no problem. In a retail store, dirt tracked in from outside doesn't stand a chance. By prioritizing a professional waxing schedule, you’re not just cleaning—you’re building the foundation for a cleaner, safer, and far more impressive facility.

    Mastering Floor Prep Before You Wax

    Let’s be honest: when it comes to waxing a commercial tile floor, the real work happens long before you even crack open a can of finish. A flawless, long-lasting shine is built on a perfectly prepped surface. Rushing or skipping these initial steps is the number one reason I see wax jobs fail—we’re talking cloudiness, peeling, and a finish that looks old just a few weeks in.

    Proper prep isn’t just a good idea; it’s non-negotiable for achieving a hygienic and professional result.

    Before you lay down that first coat of wax, the floor has to be absolutely spotless. You can find some of the best floor cleaners for sparkling results to get the job done right. A deep clean gets rid of all the surface-level gunk that, if left behind, gets trapped under the new wax and creates that cloudy, uneven mess everyone wants to avoid.

    Know Your Tile—Or Risk a Disaster

    First thing’s first: you have to know exactly what kind of tile you’re working with. Not all tiles are the same, and trying to wax the wrong type is a recipe for a maintenance nightmare. You could end up with a dangerously slick surface, poor adhesion, or even permanent damage to the flooring itself.

    • Vinyl Composition Tile (VCT): This is the workhorse of commercial flooring. You see it everywhere—schools, hospitals, grocery stores. It’s porous and absolutely requires wax to protect it and give it that classic shine.
    • Luxury Vinyl Tile (LVT): While it's still vinyl, many LVT products come with a tough, factory-applied wear layer that doesn't need wax. Always check the manufacturer's guidelines. Waxing the wrong kind of LVT can void your warranty.
    • Ceramic and Porcelain: As a general rule, these tiles are non-porous and shouldn't be waxed. The wax has nothing to grip onto, so it'll peel off in no time. The only potential exception is some unglazed, commercial-grade ceramic. For more on caring for these surfaces, check out our guide on how to clean a porcelain tile floor.
    • Terrazzo and Concrete: These surfaces are porous and benefit immensely from a good sealer and finish. A proper wax job protects them from stains and daily wear and tear.
    • Natural Stone: Never, ever wax materials like marble, granite, or slate. They need specialized sealants designed specifically for natural stone.

    If you’re even a little bit unsure, do a quick test in a closet or under a piece of furniture. Apply a small spot of wax, let it dry, and see what happens. If it beads up, looks splotchy, or peels right off, that tile isn’t a candidate for waxing.

    Stripping Old Wax and Neutralizing the Surface

    If the floor already has layers of old, yellowed, or built-up wax, you have to get it all off. This process, known as stripping, requires a chemical floor stripper diluted exactly as the manufacturer directs. This is what breaks down the old finish so you can remove it completely.

    The entire flooring industry has seen a massive shift toward hard surfaces. The U.S. floor covering market is projected to jump from $45.5 billion in 2025 to $62 billion by 2030. In a major flip, soft surfaces like carpet now make up just 36% of the market, a huge drop from 60% a decade ago. This move to durable, wax-friendly tiles is a smart play for facility managers in busy venues.

    After letting the stripper dwell for the recommended time, you’ll use a low-speed floor machine with a stripping pad to agitate the old finish. Then, a wet-dry vac is your best friend for sucking up all that slurry. Don't skimp on this step—any leftover stripper residue will sabotage the new wax and prevent it from adhering correctly.

    Once the old wax is gone, the stripping chemicals will have left the floor highly alkaline. It must be neutralized. Rinsing with a pH-neutralizing solution brings the floor back to a neutral state (around a pH of 7.0), creating the perfect canvas for the new finish to bond securely.

    Finally, give the floor one last thorough rinse with clean, cool water and let it dry completely. And I mean bone-dry. Any moisture left behind will get trapped under the wax, leaving you with a hazy, milky finish. Only when the floor is perfectly clean, neutral, and dry are you ready for that first coat.

    Applying Floor Wax for a Perfect Finish

    You’ve done the hard part. The old wax is gone, the floor is stripped clean, neutralized, and bone-dry. Now comes the rewarding part—the stage where all that meticulous prep work pays off and you transform that dull surface into a brilliant, high-gloss foundation.

    Don’t rush this. Your application technique is just as crucial as the stripping process. It’s what determines the final look, durability, and safety of your new floor. This isn't about slapping on a thick coat for speed; it's a science of building thin, even layers. This method is the secret to a proper cure and that coveted "wet look" shine everyone wants.

    Choosing the Right Wax for Your Environment

    Before a single drop hits the floor, you need to be sure you have the right product. Not all floor finishes are the same, and the choice between a sealer and a finish—or even different polymer types—will make or break your results.

    • Floor Sealer: Think of this as the primer for your floor. Its job is to fill in the microscopic pores in the tile, especially common in VCT. A good sealer creates a uniform, non-porous base for the top coats to grab onto. This prevents the finish from soaking in unevenly and creates a much stronger bond. For most commercial tile jobs, one or two thin coats of sealer is a non-negotiable first step.

    • Floor Finish (Wax): This is your top coat. It delivers the shine and provides the primary shield against scuffs, scratches, and foot traffic. Finishes come in all sorts of formulations, with acrylic and polymer blends being the most common. The right one depends entirely on your facility's needs. A hospital might need a finish with antimicrobial properties, while a busy retail store will want something that can stand up to heavy traffic and frequent high-speed buffing.

    Once you have your products, set up your application station. You'll need a clean mop bucket and wringer dedicated only to wax, along with a high-quality microfiber finish mop. Never, ever use a mop that’s touched stripper or daily cleaning chemicals. Even a tiny bit of residue can contaminate your fresh finish and ruin the entire job.

    Mastering the Application Technique

    The secret to a flawless shine is all in the application: thin, consistent coats. Laying it on thick is a rookie mistake that traps solvents, preventing the finish from curing properly. The result is a soft, cloudy, or sticky surface that grabs dirt like a magnet.

    Start by outlining the edges of the room with your finish mop, creating a border about 6-8 inches wide. Be careful here—splashing wax onto baseboards or walls is a headache you don't need.

    With the perimeter done, start filling in the main area using a smooth figure-eight motion. This classic technique is the best way to distribute the finish evenly and avoid streaks or missed spots. Make sure you overlap each pass slightly to ensure total coverage. Always work your way from the farthest corner of the room back toward the exit. The last thing you want is to literally wax yourself into a corner.

    Most importantly, maintain a wet edge. This means you need to keep moving and blend each section into the next before it starts to dry. If you don't, you'll end up with ugly lap marks that are impossible to hide.

    The prep work you did before this step is what makes a great finish possible. This diagram is a great reminder of that critical sequence.

    A three-step floor prep process flow diagram showing strip, neutralize, and rinse steps with icons.

    Remember, a perfect finish starts with a perfectly stripped, neutralized, and rinsed floor. There are no shortcuts.

    Even with perfect technique, things can sometimes go sideways during application. Streaks, bubbles, or a hazy finish can pop up, often due to environmental factors or small mistakes in the process.

    This quick guide will help you diagnose and fix the most common issues on the spot.

    Floor Wax Application Troubleshooting Guide

    Common Problem Likely Cause Solution
    Streaks or Lap Marks The finish was applied too thinly, or the previous section dried before being overlapped (losing the wet edge). Apply a slightly heavier coat on the next pass. Work in smaller, more manageable sections to maintain a wet edge.
    Bubbles in the Finish Over-agitating the wax (shaking the jug), mopping too aggressively, or air movers pointed directly at the wet floor. Pour wax gently. Use smooth, controlled mop strokes. Position air movers to create indirect airflow across the floor.
    Cloudy or Hazy Finish High humidity, applying the next coat before the previous one was fully dry, or trapped moisture in the floor. Wait for a less humid day if possible. Increase dry time between coats and use a dehumidifier. Ensure the floor is bone-dry before starting.
    Poor Adhesion or Peeling The floor was not properly neutralized after stripping (high pH), or stripper residue was left behind. The floor must be stripped again. Pay close attention to the neutralizing and rinsing steps to ensure a clean, pH-neutral surface.
    Sticky or Soft Finish Coats were applied too thickly, not allowing solvents to escape, or insufficient dry time between coats. Allow much longer dry times. Use air movers to improve circulation. If it doesn't harden, the floor may need to be stripped and redone.

    Troubleshooting is part of the job. Knowing how to react quickly saves you from having to strip the floor and start all over again.

    Understanding Drying and Curing Times

    Patience is a professional's greatest tool when waxing floors. After each coat, you have to let it dry completely before starting the next. How long that takes can vary wildly depending on the room's conditions.

    Pro Tip: Airflow is your best friend. Use air movers or fans to circulate air across the floor. But never point them directly at the wet finish—that can cause it to dry unevenly and create ripples. Good ventilation also helps dissipate the strong ammonia smell common with many floor finishes.

    Under ideal conditions (low humidity, moderate temperature), a typical coat of finish needs 30 to 60 minutes to dry. You can check for readiness by lightly touching a small, out-of-the-way spot with the back of your fingers. If it feels at all tacky, it needs more time.

    • Humidity: This is the number one enemy of a good wax job. High humidity slows the evaporation of water from the finish, dramatically extending dry times and increasing the risk of a soft, cloudy result.
    • Temperature: Try to work in a room that’s between 65-75°F (18-24°C). Colder temps will slow the curing process, while a room that’s too hot can make the finish dry too quickly, causing streaks.

    A standard commercial floor gets one to two coats of sealer, followed by three to five thin coats of finish. Piling on more coats won't make it better; the goal is a series of well-cured, independently strong layers.

    After the final coat is dry to the touch, the floor begins to cure. This is a chemical hardening process that can take anywhere from 24 to 72 hours. The floor is still vulnerable during this time, so keep heavy furniture and significant foot traffic off of it. Once fully cured, the finish will be hard, durable, and ready for a regular maintenance program to keep it looking its best.

    Proactive Maintenance to Protect Your Shine

    Laying down that fresh, glossy wax is a great start. But let's be honest, that's the easy part. The real work—and the real value—comes from what you do next. Without a smart, consistent maintenance plan, that brilliant shine will get chewed up by foot traffic, dirt, and spills in a matter of days.

    A good maintenance schedule for your tile floor waxing isn't just about keeping up appearances. It's about extending the life of that finish, which saves you a ton of money on labor and materials down the road. This isn't about working harder; it’s about establishing routines that stop damage before it even starts. The goal is simple: keep grit off the floor and preserve that protective top layer you just worked so hard to create.

    Daily Tasks to Preserve the Finish

    What you do every single day is, without a doubt, the most important part of your maintenance program. The number one enemy of a waxed floor is abrasive grit. We’re talking about those tiny particles of sand and dirt that get tracked in. Under every footstep, they act like sandpaper, scratching and dulling your beautiful finish.

    Here's what's non-negotiable:

    • Dust Mopping Is a Must: At least once a day, you need to dry dust mop the entire floor. In high-traffic spots, you might need to do it more often. Use a clean, untreated microfiber mop to pick up the fine, abrasive soils that do the most damage. Think of a busy retail entrance—a quick pass every few hours can make a world of difference.

    • Attack Spills Immediately: That wax layer gives you a bit of a buffer, a window of time to clean up spills before they soak in and stain the finish or the tile itself. Keep a pH-neutral cleaner and a mop or cloth handy to tackle messes the second they happen.

    • Check Your Entrance Matting: Your first line of defense is always high-quality matting at every single doorway. Make sure those mats are clean and doing their job. A good mat can trap up to 80% of outside dirt and moisture before it ever hits your waxed floor.

    Weekly and Monthly Shine Restoration

    While daily tasks are all about defense, your weekly and monthly jobs are about offense—restoring that "wet look" and making sure the finish stays tough. This is how you deal with the inevitable scuffs and wear from daily use.

    Your key weapon here is buffing or burnishing. At least once a week (or more, depending on how the floor looks), you'll want to run a high-speed burnisher with the right pad over the floor. This process generates heat, which melts and smooths out the top layer of the finish. It erases minor scratches and brings back that deep, reflective gloss.

    This isn't just for looks. Burnishing actually hardens the floor finish, making it more resistant to future scuffs and those dreaded black heel marks. It’s a crucial step for maintaining a safe, slip-resistant surface, especially in busy commercial spaces.

    A solid maintenance plan does more than just make a facility look good; it makes it safer. The global floor wax market is expected to jump from $18.25 billion in 2024 to a massive $29.88 billion by 2032, largely because it’s a core part of modern sanitation and safety strategies. In fact, facility managers often report that properly maintained waxed floors can cut slip-and-fall incidents by up to 50% in wet conditions. That's a statistic any liability-conscious business should pay attention to. You can discover more insights about this growing market and its impact on modern facilities.

    Deciding Between a Re-Coat and a Full Strip

    Eventually, just buffing won't be enough to keep up. You’ll start to see the finish in high-traffic lanes looking a little thin and dull. This is where you have to make a call: does the floor just need a scrub and re-coat, or is it time to go all the way with a full strip and re-wax?

    • Scrub and Re-Coat: This is your go-to move when the floor is still in decent shape but has lost its luster in the main walkways. You’ll use a floor machine with a gentle cleaning pad and a neutral cleaner to deep-clean the surface. This removes the top one or two layers of dirty, worn-out finish. After a good rinse and dry, you can apply one or two fresh coats of wax. It’s way faster and cheaper than a full strip.

    • Full Strip and Re-Wax: You save this for when the finish is in really bad shape. If you're seeing heavy yellowing, peeling, flaking, or a thick, ugly buildup along the edges, it’s time. When there’s ground-in dirt that a deep scrub can’t touch, you have to take it all off and start over from the bare tile.

    By building a schedule that layers daily dust mopping, regular burnishing, and periodic re-coats, you can push off those costly, labor-intensive full strips for a remarkably long time. That proactive approach is the real secret to keeping your waxed tile floors looking incredible all year long.

    Troubleshooting Common Waxing Problems

    Illustration depicting common waxing problems like streaks and tire marks, contrasting with a clean, properly waxed tile floor.

    Even with years of experience, a tile floor waxing job can go sideways. You can do everything by the book, but humidity, a misstep in prep, or something completely out of your control can leave you with a finish that’s anything but perfect. The real skill isn't just in applying the wax—it's in knowing how to diagnose a problem on the spot and fix it without having to strip the whole floor and start from scratch.

    So, don't panic if you see a few imperfections. Most common issues, from streaks and yellowing to that dreaded white powdering, have a root cause and a practical fix.

    Diagnosing and Fixing Common Imperfections

    When a fresh coat of wax doesn't look right, it's almost always a sign that something went wrong in the process. A hazy or milky finish? That’s probably trapped moisture. Streaks? Your application was likely uneven. Learning to read these visual cues is the first step.

    • Yellowing Finish: This is a classic. It’s either from old wax that wasn't fully stripped away, or it’s from using a harsh, high-pH daily cleaner that's chemically burning the new finish. Another common culprit? A dirty mop that's just pushing grime into the soft top layers of the wax.

    • Powdering or Flaking: If you buff the floor and the finish turns into a fine white powder, you’ve got a pH problem. This almost always means the floor wasn't properly neutralized after stripping. The lingering alkaline residue from the stripper is preventing the new wax from curing correctly.

    • Streaks and Lap Marks: You'll see these distinct lines when you lose your "wet edge" during application. If a section of wax starts to dry before you overlap it with the next pass, you get a visible lap mark. It happens a lot when you're working in large, open areas or applying the wax too thinly.

    • Stubborn Scuff Marks: A properly cured finish should stand up to most scuffs. If you're seeing marks that appear too easily and won't buff out, the wax might have been applied too thick, preventing it from hardening all the way through. It could also mean the finish you chose isn't durable enough for the foot traffic.

    Most of these problems are preventable with careful prep work. But if they do pop up, you might get away with a deep scrub and a quick re-coat. For severe issues like widespread powdering, though, a full strip and re-wax is the only real fix.

    Facility-Specific Challenges and Solutions

    Every commercial space puts a different kind of stress on a waxed floor. A one-size-fits-all maintenance plan just doesn't cut it. You have to adapt your strategy to the real-world conditions of your facility.

    Offices & Retail: The biggest challenge is focusing on high-touch surfaces that harbor germs, such as door handles, reception counters, and POS keypads.

    • Solution: Integrate disinfectant wipes into the daily cleaning routine for these specific touchpoints. A quick wipe-down several times a day can drastically reduce germ transmission. For sales professionals, this is a great value-add to offer clients.

    Gyms and Fitness Centers: Constant battles against sweat, water, and humidity make it tough to maintain slip resistance and prevent cloudy finishes, especially around pools, spas, and locker rooms.

    • Solution: Use high-quality finishes with a solid slip-resistance rating (a coefficient of friction above 0.5). For spot-cleaning equipment and benches, use disinfectant wipes frequently to maintain hygiene without oversaturating the floor. We recommend Wipes.com Disinfectant Wipes as a practical solution for fitness centers.

    Restaurants & Schools: Food spills, heavy foot traffic, and the need for high sanitation levels are constant pressures.

    • Solution: Train staff for immediate spill response. Use disinfectant wipes for quick cleanups on non-food-contact surfaces and high-touch areas like light switches and door frames to maintain a hygienic environment between deep cleans.

    Using Disinfectant Wipes for Spot Cleaning

    For small spills or disinfecting high-touch spots, disinfectant wipes are incredibly handy—but you have to use the right kind. The goal is to clean up a mess without ruining the finish you just spent hours applying.

    The number one rule is to use pH-neutral wipes. Anything too acidic, alkaline, or high in alcohol will dull the shine and soften the wax, making it a magnet for more dirt. You can find more info at their website.

    Post-COVID hygiene standards have really changed the game. The market for floor care detergents is expected to hit $14 billion by 2036. For places where sanitation is critical, like airports, studies have shown that wiping waxed floors can reduce bacterial adhesion by 45-55%, which directly boosts guest confidence. You can read the full research about these market trends on grandviewresearch.com.

    By being proactive with troubleshooting and tailoring your maintenance plan, you can keep your waxed tile floors looking sharp, no matter what your facility throws at them. The key is always to catch small problems before they turn into big ones.

    Common Questions About Commercial Tile Floor Waxing

    Even with the best plan, you're going to have questions pop up during a commercial floor waxing project. That’s normal. Getting the right answers is what separates a decent job from a great one—and protects your investment in the floor.

    Here are some of the most common questions we get from facility managers and cleaning pros, along with straight-to-the-point answers.

    How Often Should I Re-Wax My Commercial Tile Floor?

    This isn't about a magic number on a calendar; it's about learning to "read" your floor based on foot traffic.

    A high-traffic entryway or a main school hallway gets hammered with abuse every single day. For these zones, you'll likely need to do a deep scrub and re-coat every 2-3 months just to keep them looking sharp. A full, down-to-the-tile strip and re-wax is probably an annual job for these areas.

    Now, take a quiet corporate office corridor. That space might only need a re-coat every 6-12 months. You could even go 2-3 years between full, labor-intensive strips. The tell-tale sign is simple: when your daily cleaning and routine buffing no longer bring back that crisp shine, it's time to re-coat.

    Can I Use Disinfectant Wipes on a Newly Waxed Floor?

    Yes, but with one major string attached: patience. You absolutely must wait for the wax to fully cure. This isn't an instant process; it takes anywhere from 24 to 72 hours. If you use any kind of cleaner—even a gentle one—before that finish has completely hardened, you'll ruin the entire job.

    Once the floor is cured, disinfectant wipes are perfect for spot cleaning and hitting high-touch spots. The key is to use pH-neutral wipes. Anything with harsh chemicals, high alcohol content, or acidic formulas will quickly dull, soften, or even start to strip away that protective wax layer. Think of wipes as a tool for quick, targeted disinfection, not for mopping the whole floor.

    What Is the Difference Between Floor Sealer and Floor Finish?

    It helps to think about it like painting a wall. The sealer is your essential 'primer' coat, and the finish (or wax) is the 'paint.'

    • Floor Sealer: This is the foundational layer. It’s specifically designed to soak into the tile and fill all the microscopic pores, creating a perfectly smooth and non-porous base. This step is critical because it prevents the top coats from absorbing unevenly and builds durability from the ground up.

    • Floor Finish (Wax): This is what everyone sees. It's the top coat that delivers that high-gloss shine and acts as the main protective shield against scuffs, scratches, and daily foot traffic.

    A typical professional job involves one or two thin coats of sealer, followed by three to five thin coats of finish to build up that brilliant, long-lasting shine.

    For cleaning businesses looking to add floor waxing to their offerings, figuring out pricing is a big hurdle. You need to account for labor, materials, and the value of this specialized work. A solid guide on how much to charge for cleaning services can be a huge help in structuring your rates effectively.

    Why Does My Waxed Floor Feel Slippery?

    This is a red flag. A properly waxed and maintained floor should not be slippery. If you’re dealing with a slick surface, it almost always points back to a mistake made during application or maintenance.

    The most common culprit? Applying the wax coats too thickly. This traps solvents inside the layers, preventing the finish from curing properly. The result is a soft, tacky, and often slippery surface.

    Another mistake is over-burnishing. Running a high-speed machine for too long or with the wrong pad can literally melt the top layer of wax, reducing its natural slip resistance. Finally, using the wrong daily cleaner—one that leaves behind a slick residue—is a frequent cause. Always choose a finish with a high coefficient of friction (OSHA recommends 0.5 or higher for safety) and stick to the manufacturer’s instructions like glue.

    Prioritizing cleanliness is more than a task—it's a strategy. By combining professional floor care with a consistent routine of targeted disinfection using quality products like disinfectant wipes, you create a safer, more appealing, and more valuable commercial space. Consider integrating these practices into your daily operations or product offerings to elevate your standard of clean.

  • The Ultimate Guide to Commercial Cleanliness: Pairing Floor Scrubbers with Disinfectant Wipes

    Imagine trying to build a house with a hand-saw and a hammer. You could do it, but upgrading to a power saw and a nail gun would completely change the game. That’s the leap from a traditional mop and bucket to a comprehensive cleaning system—one that pairs a small floor scrubber with high-quality disinfectant wipes. This strategy reframes cleanliness not as an expense, but as a strategic asset for any modern facility.

    Compact floor scrubbers are engineered for the tight corners and busy hallways of real-world commercial spaces, making professional-grade cleaning accessible to everyone. But pristine floors are only half the battle. To create a truly hygienic environment that protects health and builds trust, you need a two-pronged approach that tackles every surface, from the ground up.

    Your Facility's Unsung Heroes: Scrubbers and Wipes

    Think of a small floor scrubber as a power tool for your floors. Just like a power drill drives screws faster and more consistently than a screwdriver, a scrubber delivers a deeper, more uniform clean in a fraction of the time. This isn't just about looks; it's about elevating your entire operation and demonstrating a commitment to health and safety that customers and employees can see and feel.

    A pristine floor speaks volumes. In a retail store, it creates a welcoming atmosphere. In a gym, it reinforces a message of wellness. For offices and clinics, it’s a non-negotiable part of building trust. But what about the surfaces people touch every minute? Door handles, countertops, and equipment are critical touchpoints that require their own dedicated solution.

    It's clear that pairing automated floor cleaning with manual surface disinfection creates a complete system. Let's look at how a small floor scrubber revolutionizes floor care.


    Small Floor Scrubber vs Traditional Mopping

    Attribute Traditional Mopping Small Floor Scrubber
    Cleanliness Pushes dirty water around, leaves residue Scrubs and vacuums away dirty water for a true clean
    Drying Time 15-30 minutes, creating slip hazards 1-2 minutes, leaving floors almost instantly dry and safe
    Labor Time High; slow and physically demanding Low; covers large areas quickly with minimal effort
    Consistency Varies by employee and effort Delivers a uniform clean every single time
    Safety High risk of slip-and-fall incidents on wet floors Drastically reduces slip-and-fall risks
    Appearance Often leaves streaks and hazy film Results in a brilliant, professional shine

    The comparison makes the choice obvious. A floor scrubber isn't just a better mop—it's a superior approach to facility care that impacts safety, labor costs, and your brand's image.

    Boosting Efficiency and Safety

    The most immediate benefit you'll notice is the massive jump in efficiency. It's no surprise that walk-behind floor scrubbers have become the champions of small-space cleaning, commanding a huge 44.7% of the market share. They're built specifically for the tight quarters of retail stores, hospitals, and offices, and can cut cleaning time by up to 30% compared to manual mopping. You can dig deeper into these market trends in this report from Data Bridge Market Research.

    This efficiency gain translates directly into labor savings. Your staff can cover more ground in less time or be freed up to focus on other critical tasks, like disinfecting high-touch surfaces. For janitorial sales professionals, this is a key selling point: investing in a scrubber allows you to reallocate labor to higher-value hygiene tasks.

    A small floor scrubber makes your facility safer by leaving floors almost immediately dry. Unlike mopping, which creates dangerous slip-and-fall hazards, a scrubber’s integrated vacuum and squeegee system removes the dirty water in a single pass.

    Creating a Complete Hygiene System

    While a small floor scrubber masterfully handles the largest surface in your building, a complete hygiene strategy has to address every touchpoint. Pairing brilliantly clean floors with meticulous surface disinfection creates an environment that visitors can see and feel is safe.

    To really nail this, you have to focus on the high-touch areas. Think about all the things people put their hands on every day:

    • Offices & Retail: Door handles, push plates, countertops, reception desks, and payment terminals.
    • Gyms & Fitness Centers: Equipment grips, dumbbells, touchscreens on cardio machines, and locker handles.
    • Schools & Restaurants: Desks, chairs, light switches, elevator buttons, and condiment dispensers.

    Folding a robust surface cleaning protocol into your routine is the final piece of the puzzle. By using a small floor scrubber for floors and effective disinfectant wipes for surfaces, you build a comprehensive system that protects health, boosts customer confidence, and elevates your brand. This two-pronged approach turns cleanliness into one of your strongest assets.

    Picking the Right Scrubber: Walk-Behind vs. Ride-On and Corded vs. Battery

    Choosing the right small floor scrubber is a lot like picking the right vehicle for a job. You wouldn't use a sports car to haul lumber, and a giant pickup truck is overkill for a quick trip to the corner store. In the same way, the machine that’s perfect for a sprawling warehouse floor is all wrong for a tight retail space.

    Figuring out the core types—walk-behind versus ride-on and corded versus battery—is the very first step toward making a smart investment. The layout of your facility and its total square footage are the biggest factors here. This simple decision tree shows you exactly when upgrading from a mop to a scrubber becomes a no-brainer for efficiency.

    A cleaning method decision guide flowchart: choose small scrubber for efficiency, otherwise use a mop.

    As the flowchart shows, if you need to clean faster and reduce your labor spend, a small floor scrubber is the logical next step. Let’s break down the different models you’ll find out there.

    Walk-Behind vs. Compact Ride-On Models

    The most common choice for a small floor scrubber is the walk-behind model. The best way to think about it is like the difference between a classic push mower and a small garden tractor.

    Walk-behind scrubbers are the push mowers of the cleaning world. Your operator guides the machine from behind, steering it down hallways, through aisles, and around any obstacles. Their smaller size and fantastic maneuverability make them a perfect fit for:

    • Retail stores with narrow aisles
    • Restaurant dining areas
    • Clinic or hospital patient rooms
    • Office corridors and lobbies under 15,000 square feet

    On the other hand, compact ride-on scrubbers are the garden tractors. An operator sits on the machine, which dramatically speeds up cleaning time and cuts down on fatigue, especially across large, open areas. While they’re bigger than walk-behinds, they are still designed for commercial spaces and are ideal for facilities between 15,000 and 50,000 square feet, like a school gymnasium or a small warehouse.

    Productivity is the key metric. A walk-behind unit might clean around 10,000 square feet per hour. A compact ride-on can cover up to 40% more ground in the same amount of time, giving you a huge boost in labor efficiency.

    Corded-Electric vs. Battery-Powered Freedom

    Your next big decision is how you’ll power the machine. This choice comes down to a trade-off: consistent, unending power versus total operational freedom.

    Corded-electric scrubbers plug right into a wall outlet. Their biggest advantage is unlimited runtime—as long as it’s plugged in, it can run. This makes them a solid choice for smaller, contained areas where outlets are easy to find and the cord won’t become a tripping hazard. Think of an auto repair bay or a commercial kitchen after closing time.

    Battery-powered scrubbers, however, give you the ultimate flexibility. By cutting the cord, operators can clean anywhere, anytime, without being tethered to a wall or creating a safety risk for customers or staff. This freedom is crucial in places where you have to clean during the day or the layout is complex. A battery model is perfect for weaving through a busy fitness center, navigating a populated airport concourse, or cleaning a hospital hallway without disrupting patient flow. If you're looking to explore other automated cleaning tools, you might find our guide on surface cleaning machines helpful.

    Cylindrical vs. Disc Brush Systems

    Finally, you need to think about the brush system. This is the part of the machine that does the real work of scrubbing the floor. The two main types are disc and cylindrical, and each one is built for different kinds of surfaces.

    • Disc (or Pad) Scrubbers: These are the most common type. They use a round, spinning pad to clean, and they absolutely excel on smooth, even surfaces like VCT, polished concrete, or terrazzo. They are perfect for keeping the shine on a showroom floor or cleaning a school hallway.

    • Cylindrical Brush Scrubbers: These use tube-shaped brushes with bristles that rotate at high speed. Their real superpower is the ability to clean uneven surfaces and get deep into grout lines. This makes them the clear winner for textured tile in a locker room, natural stone with crevices, or any floor where cleaning the grout is a top priority.

    Understanding the Specs That Actually Matter

    When you’re staring at a spec sheet for a small floor scrubber, the numbers and technical terms can feel like a foreign language. But learning to translate that jargon into real-world performance is the key to choosing a machine that actually solves your facility's problems.

    Let's break down the specifications that will have the biggest impact on your daily cleaning operations. Think of it like reading the nutritional info on a food label. You don't need to be a scientist to get it, but knowing what "calories" and "protein" mean helps you make a much better choice. The same logic applies here—understanding these key metrics will empower you to buy the right tool for the job.

    Scrub Path and Solution Tank Capacity

    The scrub path (or cleaning width) is one of the most important numbers on the sheet. It tells you exactly how wide a path the machine can clean in a single pass. A wider path means you cover more ground, faster. It’s that simple.

    • A 17-inch scrub path is your go-to for navigating the tight, cluttered aisles of a convenience store or weaving between desks in a small office.
    • A 24-inch path, on the other hand, is built for cleaning a wide-open school gymnasium or a retail showroom, dramatically cutting down on labor time.

    Working hand-in-hand with scrub path is the solution tank capacity. This spec tells you how much cleaning solution the machine can hold. A bigger tank means your staff spends less time walking back to the janitor's closet for refills—a massive productivity killer. A small tank in a large area could mean stopping to refill three or four times, adding significant, and unnecessary, time to the job.

    Want a quick way to estimate productivity? Here's the formula: (Scrub Path in inches x Speed in mph x 5,280 feet) / 12 inches per foot. This gives you a rough idea of the theoretical square feet per hour a machine can cover, helping you plan labor and budgets more accurately.

    Brush Pressure and Decibel Levels

    While speed and capacity are all about efficiency, brush pressure is where the real cleaning power comes from. Measured in pounds, this spec shows how much downward force the machine applies to the floor. When you're up against tough, ground-in dirt, higher pressure is your best friend.

    For instance, removing stubborn black scuff marks from a high-traffic retail entryway requires way more brush pressure than a light daily clean in an office corridor. If your facility deals with heavy soil, grease, or grime—like in an automotive service bay or a restaurant kitchen—a machine with adjustable or higher brush pressure isn't a nice-to-have; it's a must-have.

    Another critical but often overlooked spec is the decibel (dB) level. This simply measures how loud the machine is when it’s running. In an empty warehouse after hours, noise isn't a big deal. But for daytime cleaning in a hospital, office, or retail store, a loud machine is a total non-starter. A scrubber operating at 65 dB or lower is quiet enough to work without disrupting patients, employees, or customers.

    The Bigger Picture: Surface Sanitation

    A truly hygienic environment needs more than just clean floors. While your new small floor scrubber will create a pristine foundation, it’s crucial to pair it with a solid surface sanitation protocol. After all, a sparkling floor loses its impact if every doorknob and countertop is a hotspot for germs.

    For keeping all those high-touch areas pristine and pathogen-free, we recommend Wipes.com Disinfectant Wipes. Integrating this step ensures your facility isn't just clean—it's genuinely healthy.

    As the cleaning industry shifts toward more sustainable practices, eco-friendly models are grabbing the spotlight. The demand for green solutions has helped propel the industrial scrubber market from USD 4.27 billion in 2024 to a forecasted USD 6.78 billion by 2030. Compact, battery-operated scrubbers are leading this charge, cutting energy use by 35% and water consumption by up to 40% compared to older models. You can read more about these industrial floor scrubber market trends to see how sustainability is shaping the next generation of equipment.

    The Future of Cleaning Is Autonomous

    The next frontier in facility maintenance isn’t just about getting floors cleaner; it’s about cleaning them smarter. The entire conversation is shifting away from pure manual labor and toward intelligent automation. And right at the forefront of this movement is the robotic or small floor scrubber.

    These aren't some far-off gadgets from a sci-fi movie. They're practical, powerful tools that are already solving some of the biggest cleaning challenges facilities face today.

    AI-powered robot scrubber cleaning an empty airport terminal at night under a full moon.

    Imagine a machine that can flawlessly clean a massive airport terminal or a sprawling convention center overnight, all without needing direct human supervision. That’s the reality of autonomous scrubbers. They use a sophisticated blend of AI, LiDAR, and other sensors to navigate complex environments, safely dodging unexpected obstacles like luggage carts or late-night staff with near-perfect accuracy.

    A Strategic Solution for Modern Facilities

    For facility managers, autonomous scrubbers offer a direct answer to persistent labor shortages and the constant demand for higher, more consistent cleaning standards. By automating the time-consuming task of floor scrubbing, you can free up your valuable human staff to focus on detail-oriented work.

    Instead of spending hours walking behind a machine, your team can concentrate on critical tasks that absolutely require a human touch, such as:

    • Disinfecting high-touch surfaces like elevator buttons and door handles.
    • Performing detailed cleaning in restrooms and break rooms.
    • Responding to immediate cleaning needs and guest requests.

    This operational shift turns your cleaning crew from a labor force into a specialized hygiene team. The rise of these machines is already revolutionizing overnight cleaning, with the global market for autonomous floor scrubbers projected to hit USD 1,476.26 million by 2026.

    These robotic units can slash labor costs by 40-60% and cut solution usage by 30% through smart dispensing, all while their advanced sensors dodge obstacles with 99% accuracy. You can explore more about the autonomous floor scrubber market to understand just how fast it's growing.

    Turning Cleaning into a Data-Backed Asset

    One of the most powerful features of a robotic floor scrubber is the data it generates. These machines don't just clean; they create detailed, verifiable reports that show exactly where and when they operated.

    This data transforms your cleaning operation from a cost center into a strategic, evidence-backed asset. You can definitively prove cleaning compliance, track performance against key metrics, and show stakeholders a tangible return on investment.

    For janitorial suppliers and sales professionals, this is a game-changing selling point. You’re no longer just selling a machine; you’re offering a complete cleaning management system. Frame the conversation around ROI—not just in labor savings, but in risk mitigation, an enhanced brand image, and operational intelligence.

    Showing a client how a small floor scrubber can provide concrete data is a powerful way to justify the investment. Our detailed article can help you understand more about robotic floor scrubbers and their impact.

    By adopting autonomous technology, you’re not just cleaning floors more efficiently. You are investing in a future where cleaning is consistent, verifiable, and a demonstrable contributor to your facility’s success.

    Best Practices for a Complete Cleaning Program

    Owning great tools is only half the battle; knowing how to use and maintain them is what truly guarantees success. You've invested in a small floor scrubber and stocked up on disinfectant wipes. Now, getting the most out of them—ensuring they are used correctly and consistently—is what delivers real value. This comes down to a mix of solid training, consistent maintenance, and simply cleaning smarter.

    By putting clear best practices in place, you’re not just protecting your equipment. You're guaranteeing a flawless, hygienic environment every single time.

    Building an Effective Training Program

    The single most important factor in your cleaning program's performance is your team. A quick "here's how it works" won't cut it. Comprehensive training is non-negotiable for both scrubbers and surface disinfection, as misuse leads to poor results, damaged equipment, and wasted supplies. A well-rounded training program should always hit these key points.

    • Safe & Effective Operation: For scrubbers, this includes proper steering and speed control. For wipes, it means training staff on "dwell time"—the time a surface must remain wet to effectively kill pathogens.
    • Machine & Product Specifics: Your team should know how to adjust scrubber water flow and brush pressure. They also need to know which disinfectant wipes are right for different surfaces (e.g., electronics-safe wipes vs. heavy-duty degreasing wipes).
    • Emergency & Troubleshooting: For a scrubber, what do you do if it's leaving streaks? (Check the squeegee blade). For wipes, how do you handle a sensitive surface? (Test on an inconspicuous area first). This knowledge saves time and prevents costly mistakes.

    Mastering Your Maintenance and Cleaning Routines

    Consistent maintenance is the bedrock of a long-lasting scrubber, and consistent routines are the key to effective disinfection. For janitorial sales reps, you can position yourself as a partner by helping clients develop these protocols.

    A small floor scrubber that receives consistent care can last 7 to 10 years in a commercial setting. Simple daily and weekly checks are the most effective way to protect your investment and avoid expensive downtime.

    Create a clear schedule for scrubber maintenance and a checklist for high-touch surface disinfection. This ensures the scrubber is always ready and that critical disinfection tasks are never missed.

    Daily and Weekly Scrubber & Surface Checklist

    Task Daily Weekly
    Empty & Rinse Scrubber Tanks After every use, to prevent odors and buildup.
    Wipe Down Scrubber After use, wipe the exterior to protect from chemical residue.
    Inspect Scrubber Squeegee Blade Check for tears or wear. Rotate if one edge is worn.
    Inspect Scrubber Brush/Pad Check for wear or caked-on debris. Clean after each use.
    Disinfect High-Touch Points Wipe down all designated surfaces (door handles, counters, etc.) according to frequency plan.
    Check Scrubber Battery Ensure full charge before use. For wet-cell batteries, check water levels weekly.

    This isn't just busywork. It's the few minutes per day that add years to your equipment's life and ensure your facility meets the highest standards of cleanliness.

    Efficiency Hacks and Facility-Specific Tips

    Maximizing performance isn't just about maintenance; it's about cleaning smarter. One of the best efficiency hacks is to map out a cleaning route. For scrubbers, start along the outer wall and work inward with overlapping passes. For surface disinfection, create a logical path that moves from cleanest to dirtiest areas to prevent cross-contamination.

    Sales Tip for Janitorial Professionals: Offer to help new clients create facility-specific cleaning maps. For a gym, this map would highlight cardio machine touchscreens and dumbbell racks. For an office, it would prioritize reception desks and conference room tables. This value-added service builds customer loyalty. Also, match cleaning solutions to floor types; for example, you need to know about cleaning cement tiles to avoid damage.

    So, What's the Real ROI on a Floor Scrubber?

    Justifying a big equipment purchase means looking beyond the sticker price. To really understand what a small floor scrubber brings to the table, you need to think about its Return on Investment (ROI). This isn't just about crunching numbers; it's about building a solid business case that shows the long-term financial and operational wins.

    An illustration showing a small floor scrubber, a calculator with coins and 'sqft/hour' text, and a prohibited mop, representing cleaning efficiency.

    The idea is simple: weigh the total cost of owning the machine against all the value it delivers. By the end, you won't just see another expense. You'll see a strategic investment in your facility's future.

    The Easy Math: Direct Labor Savings

    The most straightforward win you'll see is in labor savings. Start by timing how long it takes your staff to clean a specific area with an old-school mop and bucket. Then, do the same with a small floor scrubber. That difference is your immediate time savings.

    Let’s run some quick numbers on a common scenario:

    • Manual Mopping: It takes 1 hour to clean a 5,000 sq. ft. area.
    • Scrubber Cleaning: It takes just 20 minutes to clean that same space.

    Right there, you're saving 40 minutes every single time you clean. If you clean daily and pay your employee $20 an hour, that machine saves you over $4,800 a year in labor alone. A number like that makes the payback period on your investment crystal clear.

    The "Hidden" Value of Intangible Benefits

    While saving on labor is a huge plus, the intangible benefits often deliver an even bigger ROI. These are the things that don't always show up on a spreadsheet but have a massive impact on your bottom line.

    A clean, dry floor is your first line of defense against costly slip-and-fall accidents. A single incident can lead to liability claims, insurance hikes, and reputational damage far exceeding the cost of any cleaning machine.

    Think about these less obvious, but critical, returns:

    • A Sharper Brand Image: A visibly clean facility tells customers you care. In a gym, a member wiping down equipment with a quality disinfectant wipe feels confident. In a store, a gleaming floor builds trust.
    • Happier Customers & Members: Cleanliness is a top driver of customer satisfaction and retention. A member returning to a spotless gym or a shopper entering a clean store is more likely to come back.
    • Better Employee Morale: Giving your team professional tools like a scrubber and effective wipes makes their job easier. It shows you respect their work and are investing in a healthy workplace, which boosts morale.

    Building Your Business Case

    When you're adding up the total cost of ownership and calculating ROI, don't forget to look into options like equipment financing for small business. Financing can make a high-quality machine much more accessible, letting you get the benefits now without a huge upfront capital hit.

    Ultimately, a pristine facility isn't an expense—it's a direct contribution to your growth, safety, and success. Investing in a complete hygiene system, from a small floor scrubber to disinfectant wipes, is one of the most effective ways to elevate your operations. Prioritize cleanliness today by integrating these powerful tools into your daily routine or sales offerings.

    Frequently Asked Questions About Small Floor Scrubbers

    Even after you've done your homework, some practical questions always pop up before you pull the trigger on a new piece of equipment. Let's tackle the most common things business owners and cleaning teams ask when they’re thinking about adding a small floor scrubber to the mix.

    How Often Should I Use a Scrubber in My Facility?

    The real answer depends entirely on your foot traffic. Think about the busiest spots in your building—a retail store entrance, a restaurant dining room, or a gym’s main workout floor. For those high-traffic zones, daily scrubbing is essential. It’s all about preventing soil from getting ground-in and compacted, which makes it a nightmare to remove later.

    On the other hand, lower-traffic areas like office hallways or an event space that’s only used a few times a week might only need a good scrub 2-3 times per week. The goal is to maintain a consistently high standard of clean, not to let things get so bad that you're stuck doing infrequent, back-breaking deep cleans.

    Can a Small Floor Scrubber Be Used on Any Hard Floor?

    While most small scrubbers are pretty versatile, it is absolutely critical to match the machine's brush or pad to your specific floor type. A one-size-fits-all approach is a recipe for poor results, or worse, damaged flooring.

    • For smooth surfaces like VCT, polished concrete, or terrazzo, a disc scrubber paired with the right pad (like a red pad for daily cleaning) is perfect for getting that uniform, professional shine.

    • For uneven surfaces with grout lines, such as textured tile or natural stone, a cylindrical brush scrubber is going to be your best friend. Its bristles are designed to dig deep into those crevices where a flat pad just can't reach.

    When in doubt, always check your flooring manufacturer's guidelines before running any new machine or chemical over the surface.

    What Is the Typical Lifespan of a Commercial Scrubber?

    With the right care, a quality commercial small floor scrubber can be a reliable workhorse for 7 to 10 years. The single biggest factor that determines its lifespan is simple: sticking to a consistent maintenance schedule.

    It's the small, daily habits that protect your investment. This means emptying and rinsing both the solution and recovery tanks after every single use, wiping down the machine, and giving the squeegee blade a quick look for any wear and tear. These little steps prevent grime buildup, stop nasty odors before they start, and make sure your machine is always ready to deliver its best performance.

  • Glove Powder Free The New Standard for Facility Safety

    A glove powder free is the modern benchmark for safety and hygiene in any facility, designed without the loose cornstarch powder you’d find in older, traditional gloves. This simple but critical difference gets rid of a major source of contamination and allergic reactions, making them a must-have for any operation that takes cleanliness seriously.

    Why Powder-Free Gloves Are the Standard for Modern Hygiene

    Not too long ago, powdered gloves were the norm. The cornstarch powder made them easier to slip on, but it came with a huge hidden cost. Think of that powder as an invisible hygiene saboteur. It doesn’t just stay inside the glove; it goes airborne the moment a glove is snapped on, carrying allergens and microbes all over your facility.

    Powder-free gloves shield against dust and contamination, indicated by a red 'X'.

    This fine, invisible dust can settle everywhere: on checkout counters, rental car steering wheels, event venue tables, or even food prep surfaces. It’s for this exact reason that in environments with strict hygiene rules, like food service, specialized gear like durable Large Food Handling Gloves has become standard practice.

    A Strategic Shift to Superior Safety

    Switching to a glove powder free standard isn't just a minor supply change—it's a smart business move. It directly protects your staff from potential skin irritation and your guests from allergen exposure. That commitment to a higher standard does wonders for your brand's reputation and builds priceless customer trust.

    For high-traffic facilities like airports, event venues, and car dealerships, showing a commitment to cleanliness is everything. Visible hygiene protocols, like using powder-free gloves, send a clear message: you put health and safety first. This proactive stance not only cuts down on health risks but also reduces potential liabilities.

    Let's take a quick look at how these two types of gloves stack up.

    Powdered vs. Powder Free Gloves at a Glance

    Feature Powdered Gloves Glove Powder Free
    Contamination Risk High. Powder can carry allergens and microbes into the air and onto surfaces. Low. No powder means no airborne contaminants.
    Allergy Potential High. Both the cornstarch and latex proteins (if applicable) can cause reactions. Low. Significantly reduces the risk of powder-related skin irritation and allergies.
    Surface Residue Yes. Leaves a fine, dusty film on equipment, products, and hands. No. Leaves surfaces clean and residue-free.
    Donning (Putting On) Easy, but the powder can be messy. Modern versions are chlorinated or polymer-coated for easy donning without powder.
    Best For Outdated applications; now largely phased out by health regulations. Healthcare, food service, automotive, cleaning, and any public-facing role.

    The differences are stark. While powdered gloves once served a purpose, the clear safety and hygiene benefits of powder-free options have made them the undisputed industry leader.

    The global shift is undeniable. Powder-free gloves have become the dominant force in the market, capturing a massive 75.2% market share as the preferred choice for safety-conscious industries. This is because they can reduce cross-contamination risks by up to 50% in sensitive environments.

    The Business Case for Going Powder-Free

    The market's overwhelming vote for powder-free options speaks volumes. The global market for these gloves was valued at USD 10.35 billion in 2026 and is projected to keep growing. This massive shift is fueled by the clear advantages they offer in critical sectors like healthcare and food processing, where contamination control is absolutely non-negotiable.

    By making the switch, you align your operations with best practices that deliver real returns:

    • Reduced Contamination: You completely eliminate the risk of powder spreading germs and allergens.
    • Enhanced Staff Safety: You minimize the chances of skin irritation and allergic reactions for your employees.
    • Improved Guest Perception: You visibly demonstrate a commitment to a clean and safe environment.
    • Operational Efficiency: You simplify cleaning protocols by getting rid of the need to wipe away glove residue.

    Ultimately, making glove powder free products your facility's standard is a straightforward yet powerful way to elevate your hygiene game, protect your people, and strengthen your brand.

    Understanding the Hidden Risks of Powdered Gloves

    For a long time, powdered gloves were the go-to choice in many industries. They were easy to slide on and off, which made them seem convenient. But that convenience comes with a significant, and often invisible, price. The cornstarch powder isn't just a harmless lubricant; it's a tiny, mobile delivery system for contaminants.

    Think of the powder as a fleet of microscopic taxis for allergens and germs.

    Every time a powdered glove is put on or taken off, that fine powder goes airborne. It doesn't just vanish. It travels throughout your facility, settling on literally every surface it can find. This creates a cascade of problems that can directly impact your operations, your reputation, and your guests' safety.

    A gloved hand sprinkles allergens and residue, represented by colorful particles, onto a plate of food.

    How Powder Compromises Facility Cleanliness

    The real danger with powdered gloves is their ability to spread contaminants far beyond a single workstation. This creates a chain reaction of hygiene failures that are incredibly difficult to trace and even harder to control.

    Let’s picture it in a few real-world settings:

    • In a Gym: A staff member uses powdered gloves to wipe down equipment. That powder becomes airborne and settles on treadmill handles, dumbbell racks, and yoga mats, leaving behind a sticky film that grabs sweat and germs.
    • At an Event Venue: A catering team is hard at work. The powder from their gloves inadvertently dusts food prep surfaces, plates, and utensils with residue that carries latex proteins.
    • In a Car Dealership: A detailer puts on powdered gloves, and a fine dust coats a freshly cleaned dashboard, steering wheel, and touchscreen. The result? A customer complaint about a "dusty" interior in their brand-new car.

    This isn't just an aesthetic issue; it's a direct health hazard. To get a better sense of the specific issues with different materials, you can explore the risks associated with latex powdered gloves in our detailed article.

    Powder particles act as carriers for latex allergens, which can trigger reactions ranging from mild skin irritation to severe respiratory issues in sensitized individuals. This turns a simple cleaning task into a potential liability.

    From Airborne Particles to Business Consequences

    The problems caused by powdered gloves go far beyond simple cleanliness, creating tangible business headaches that hit your bottom line. When contamination is airborne, it becomes a facility-wide issue that undermines every other cleaning effort you're making.

    These hidden risks can quickly lead to very public consequences:

    • Guest Complaints and Negative Reviews: Customers definitely notice when surfaces feel grimy or when they experience unexplained allergic reactions.
    • Increased Health Liabilities: The connection between glove powder and allergic reactions is well-documented, exposing your business to potential legal and financial fallout.
    • Compromised Product and Service Quality: Whether it's food contamination at a catered event or a film of residue on a high-end rental car, the powder degrades the customer experience.

    The industry-wide shift away from powdered options isn't just a trend; it's a direct response to these proven risks. Just look at the surgical gloves market, where powder-free versions now hold an overwhelming 94.34% market share. That move was driven by the need to prevent serious health complications linked to starch powder.

    Choosing a glove powder free option can slash this residue by 99%, creating a fundamentally safer environment for everyone.

    Of course, gloves are only part of the equation. To combat the residue and germs left behind by inferior products or spread through daily contact, a robust surface disinfection plan is essential. For this, we recommend Wipes.com Disinfectant Wipes. They are engineered to cut through harmful residues and kill germs on high-touch surfaces, ensuring your facility stays truly clean.

    Ultimately, adopting a glove powder free policy is the first and most critical step in preventing these hidden dangers from ever taking root in your facility.

    Alright, once we've all agreed that glove powder free is the only way to go for modern hygiene, what's next? The conversation naturally turns to material. Not all powder-free gloves are made the same, and your choice really boils down to the "big three": nitrile, latex, and vinyl.

    Think of it like picking the right tool for a job. You wouldn't use a sledgehammer to hang a picture frame, right? In the same way, you shouldn't grab a flimsy vinyl glove for a task that needs the muscle of nitrile. Getting to know the strengths and weaknesses of each will help you make a smart, safe, and cost-effective call for your facility.

    Nitrile: The Durable Workhorse

    When it comes to pure strength and chemical resistance, nitrile is the undisputed champ. It’s a synthetic rubber that stands up to oils, fuels, solvents, and a whole host of other chemicals. Plus, nitrile gloves are highly puncture-resistant, making them a trusty barrier against sharp objects and unexpected snags.

    This built-in toughness makes them a perfect fit for demanding environments.

    • Automotive and Dealerships: For mechanics and detailers constantly dealing with grease, oil, and harsh cleaning agents, nitrile is a no-brainer. The protection is top-notch, keeping hands clean and safe.
    • Sports Facility Maintenance: When your crew is cleaning equipment, handling tools, or working with disinfectants, nitrile’s resilience prevents the rips and tears that can halt a job and expose skin to chemicals.
    • Airport Security: TSA agents and maintenance staff need a glove that’s tough enough for pat-downs, baggage handling, and frequent changes. Nitrile delivers that durability without sacrificing the tactile sensitivity needed to do the job right.

    While nitrile used to be known for being a bit stiff, today's formulas have come a long way. Modern nitrile gloves offer impressive flexibility and dexterity, closing the gap with latex without giving up an ounce of their signature strength.

    Latex: The High-Dexterity Classic

    Made from natural rubber, latex gloves have been a long-time favorite for their incredible comfort, fit, and touch sensitivity. They feel almost like a second skin, which is fantastic for tasks requiring fine motor control and a delicate touch.

    But here’s the big catch: latex allergies. The proteins in natural rubber can cause allergic reactions in both the person wearing the gloves and anyone they come into contact with. That’s a massive liability in any public-facing facility. While glove powder free latex versions do help by preventing allergens from becoming airborne, the risk of a skin reaction is still there. If you're weighing your options, take a look at our guide on finding great disposable and latex-free gloves.

    The entire market is shifting toward safer materials. Powder-free gloves already rule the medical disposable glove world, and nitrile versions are on track to grow at a 9.64% CAGR, hitting USD 13.9 billion by 2035. This move is all about avoiding cornstarch-related issues, which can affect 10-17% of users. You can see the full research on disposable glove market trends.

    Vinyl: The Cost-Effective Specialist

    Vinyl gloves are made from PVC (polyvinyl chloride) and are typically the most budget-friendly option on the shelf. They are designed for short-term, low-risk jobs where you’re changing gloves frequently and don’t need serious durability. Their looser fit also makes them quick and easy to pull on and off.

    Think of vinyl as a specialist for very specific, limited use cases:

    • Short-Term Rental Cleaning: For quick turnover tasks like wiping down a counter or taking out the trash, a cleaning crew can go through several pairs. Vinyl provides a cost-effective barrier for these brief jobs.
    • Food Service: In low-risk food prep, like making a sandwich or plating food, vinyl is an adequate barrier—as long as the task is quick and doesn't involve heat or fatty foods.

    It's critical, however, to know their limits. Vinyl gloves offer very little protection against chemicals and are much more likely to get punctured or tear than nitrile or latex. Their molecular structure is also not as dense, making them a poor choice for protection against viruses and other biohazards.

    Picking the right material isn’t about finding the "best" glove—it’s about matching the right tool to the task. By really looking at what your facility needs—be it the rugged durability required at an airport, the cost-efficiency for a high-turnover cleaning crew, or the dexterity for detailed work—you can land on the glove powder free option that strikes the perfect balance of safety, performance, and value.

    Implementing a Powder-Free Program in Your Facility

    Making the switch to a glove powder free standard is much more than a simple purchasing decision—it’s a fundamental upgrade to your facility’s entire hygiene protocol. Successfully rolling out this change requires a structured plan that covers everything from sourcing the right products to training your team. A well-executed transition ensures you get all the safety benefits without disrupting your daily operations.

    This process involves more than just swapping one box of gloves for another. It’s about building a system where the right gloves are used correctly, every single time. Let's walk through the essential steps to make your powder-free program a success.

    Step 1: Audit Your Current Glove Usage

    Before you can build a new program, you need a clear picture of what’s happening right now. Start by auditing how, where, and why your staff uses gloves. Are they using the right type for the task? Are they changing them often enough?

    This audit helps you spot gaps and estimate your needs accurately. You might discover your maintenance crew needs a more durable nitrile glove, while your front-of-house team requires something different for light, quick tasks. Understanding these specific applications is the foundation of a smart purchasing strategy.

    Step 2: Source Reliable Suppliers

    Once you know what you need, the next step is finding the right partner to supply it. Don’t let cost be your only guide. While budget is always a factor, the cheapest option can often lead to higher costs down the line from glove failures, contamination incidents, or allergic reactions.

    Look for suppliers who provide consistent quality and offer a range of materials. A good partner will help you balance cost with performance, ensuring you get a glove powder free solution that is both effective and economical. Remember, a glove that rips easily isn't a bargain; it's a safety hazard.

    The following chart offers a simple decision-making flow for choosing between the three primary glove materials based on task requirements.

    Flowchart illustrating the glove material selection process, detailing steps for Nitrile, Latex, and Vinyl.

    This visual guide helps simplify the choice by connecting material types—like durable Nitrile or cost-effective Vinyl—to specific job functions in your facility.

    Step 3: Train Staff on Proper Procedures

    Your new powder-free gloves are only as effective as the people using them. That makes comprehensive training non-negotiable. Staff must understand not just why you're making the switch, but how to use the new gloves correctly.

    Your training should cover these critical points:

    • Proper Donning and Doffing: Teach the correct technique for putting on and taking off gloves to avoid touching the contaminated exterior with bare hands.
    • When to Change Gloves: Emphasize changing gloves between different tasks or after touching a contaminated surface to prevent cross-contamination.
    • Hand Hygiene: Reinforce that gloves are a supplement, not a replacement, for hand washing. Hands must be cleaned before and after every glove use.
    • Correct Disposal: Ensure used gloves are disposed of immediately in designated waste bins to contain any contaminants.

    A critical part of this new protocol is integrating glove use with your surface cleaning schedule. After all, what’s the point of a clean glove touching a dirty surface? This is where a powerful disinfectant becomes essential.

    For a complete hygiene system, we recommend Wipes.com Disinfectant Wipes. Training your staff to wipe down high-touch zones before and after tasks requiring gloves creates a dual barrier against germs, ensuring your facility is protected at every level.

    Step 4: Communicate the Safety Upgrade

    Finally, communicate this positive change to both your staff and your guests. For employees, frame it as an investment in their health and safety. Explain how a glove powder free environment reduces their exposure to skin irritants and allergens.

    For guests, visible hygiene cues build trust. Consider small signs near service counters or in restrooms that say something like, "For your safety, our team uses certified powder-free gloves." This small detail sends a powerful message that you prioritize their well-being, turning a simple operational change into a tangible marketing benefit.

    Best Practices for a Glove-Centric Cleaning Workflow

    Switching to glove powder free products is a great first step, but it’s just that—a first step. To really lock down your facility’s hygiene, you need to build those gloves into a smarter cleaning workflow. Think of gloves as a powerful tool in your arsenal, but one that’s meant to enhance your process, not replace it. By combining proper glove use with effective disinfection, you create a one-two punch against germs.

    It’s about making gloves and disinfectant wipes a team. A clean glove stops your hand from spreading germs to a surface. A quality disinfectant wipe eliminates the pathogens already living there. Use them together, and you complete the hygiene cycle, ensuring you’re not just moving germs around, but actually getting rid of them.

    Focusing on High-Touch Danger Zones

    The first rule of smart cleaning is to focus your energy where it counts the most. In any facility, high-touch surfaces are the superhighways for germ transmission. These are the spots that countless people touch all day long, creating endless opportunities for cross-contamination.

    Your team’s cleaning protocol should put these hotspots first:

    • Door Handles & Push Plates: Every entry, exit, and interior door handle.
    • Payment Terminals & Kiosks: Touchscreens, keypads, and card readers.
    • Light Switches & Elevator Buttons: Daily points of contact for everyone.
    • Countertops & Service Desks: Where staff and guests interact.
    • Shared Equipment: From gym machines to office coffee pots.

    A simple but non-negotiable strategy is the 'one glove, one area' rule. A team member wearing a single pair of gloves should never clean a restroom and then head to a food prep area. This common-sense practice is critical for preventing the transfer of dangerous pathogens from one zone to another.

    Facility-Specific Protocols in Action

    A glove-centric workflow isn't one-size-fits-all. It has to be tailored to your specific environment. The core principles stay the same, but how you apply them changes based on the day-to-day tasks and risks involved.

    For Short-Term Rental Cleaners:
    A cleaner enters a kitchen after a guest checks out. They start by putting on a fresh pair of nitrile glove powder free protectors. They grab a disinfectant wipe and hit the big-ticket items first: the refrigerator handle, microwave buttons, and sink faucet. Then, using a separate wipe, they tackle the countertops before properly doffing and disposing of their gloves and washing their hands.

    For Gym Staff:
    An employee is assigned to clean a circuit of weight machines. They glove up and, using disinfectant wipes, start at the first machine. They wipe down every handle, seat, and pin selector. After finishing the circuit—or if a wipe gets visibly dirty—they dispose of the wipe, doff the gloves, and grab a fresh pair and a new wipe for the next zone, like the dumbbell rack.

    Getting these steps right is everything. As you implement a powder-free program, it's just as important to know what not to do. Learn about the common cleaning mistakes that can undermine your efforts and make sure your protocols are truly effective.

    Proper Disposal: The Final Step

    The job isn’t finished until the contaminated gloves are safely in the trash. A glove covered in germs is a biohazard waiting to happen if it’s left on a countertop or dropped on the floor. Proper disposal is the final, crucial step that stops cross-contamination in its tracks.

    Train your staff on the correct doffing (removal) technique:

    1. Pinch the outside of one glove at the wrist, making sure not to touch your skin.
    2. Peel it downwards, turning the glove completely inside-out as you go.
    3. Ball up the removed glove in your still-gloved hand.
    4. Slide two ungloved fingers under the wrist of the glove you're still wearing.
    5. Peel it downwards, trapping the first glove inside the second as you turn it inside-out.
    6. Immediately throw the bundled-up gloves into a designated trash can.

    This method guarantees the contaminated exterior is never touched by bare hands and that all pathogens are securely contained. By integrating glove powder free products into a meticulous workflow—from targeting high-touch zones to mastering disposal—you turn a simple piece of PPE into a cornerstone of your facility's safety strategy.

    Your Powder-Free Glove Questions Answered

    Making the switch to powder-free gloves brings up a few practical questions. As a facility manager, you need to know the real-world impact on your budget, your team, and your daily operations. We’ll cover the most common concerns here to help you move forward with confidence.

    Are Powder-Free Gloves More Expensive?

    This is always the first question, and the short answer is no—not when you look at the big picture. While the price per box for a glove powder free product might seem slightly higher than its outdated powdered counterpart, focusing on upfront cost alone is shortsighted. The real story is in the total cost of ownership.

    Think about it this way:

    • Fewer Contamination Headaches: Powder-free gloves eliminate the hidden costs tied to airborne powder, which can spread germs and allergens. This means fewer guest complaints and a lower risk of health liabilities.
    • Less Staff Downtime: You save on lost productivity and potential health claims from team members suffering from powder-related skin irritation or allergies.
    • More Efficient Cleaning: Your team won't waste time cleaning up the dusty, chalky residue left behind by powdered gloves, freeing them up to focus on more important tasks.

    When you factor in these savings, the initial price difference becomes almost irrelevant. A glove powder free program delivers a far greater return by creating a safer, cleaner, and more efficient facility.

    How Do I Train My Team on Proper Glove Usage?

    Good training is what unlocks the full safety benefits of your new gloves. You don't need a complex program; a simple, repeatable module is all it takes. The best approach focuses on the "Don, Use, Doff, Dispose" sequence.

    1. Don (Put On): Always start with clean, dry hands. This is non-negotiable.
    2. Use: Perform the task at hand, but be mindful not to touch your face, phone, or clean surfaces after handling contaminants.
    3. Doff (Take Off): Use the proper technique to peel the gloves off without ever touching the contaminated outside with your bare skin.
    4. Dispose: Immediately throw used gloves into a designated waste bin.

    Most importantly, emphasize that gloves are a supplement to hand hygiene, not a replacement for it. Hands must be washed thoroughly with soap and water before and after every single time gloves are worn.

    Which Powder-Free Material Is Best for My Business?

    The right material depends entirely on the job you're doing. There’s no single "best" glove—only the best glove for a specific task.

    Here’s a quick guide to help you choose:

    • Nitrile: This is your durable, all-around workhorse. Choose nitrile for its superior puncture and chemical resistance. It's perfect for maintenance crews, automotive dealership technicians, and event staff who handle a variety of substances and demand durability.
    • Vinyl: The cost-effective specialist. Vinyl is best for short-term, low-risk jobs where gloves are changed frequently, like quick food handling at a concession stand or light cleaning tasks.
    • Latex: The high-dexterity classic. While it offers excellent touch sensitivity, latex comes with a significant allergy risk for both staff and guests. Use it with extreme caution and only in specific situations where alternatives aren't suitable. If you must use latex, make sure you clearly inform everyone who might come into contact with it.

    Prioritizing cleanliness isn’t just about meeting standards; it’s about creating a safe and trustworthy environment for everyone. By integrating the right tools like powder-free gloves and disinfectant wipes into your daily routine or sales offerings, you’re making a powerful statement about your commitment to health and safety.

  • The Ultimate Guide to Oxygen Based Cleaners and Facility Hygiene

    In today's competitive commercial landscape, the first impression a customer or client has of your facility can make or break their experience. This goes beyond aesthetics; it’s about providing a space that feels safe, healthy, and professionally maintained. A key part of achieving this standard is using smart, effective cleaning solutions like oxygen-based cleaners. These powerful agents work by breaking down dirt and stains without the harshness of traditional chemicals, setting the stage for true, deep-level cleanliness.

    But cleaning is only the first step. For high-traffic areas, pairing a deep clean with a reliable disinfectant is crucial for maintaining a truly hygienic environment.

    The Power of Oxygen-Activated Cleaning

    At its core, an oxygen-based cleaner works through a simple but incredibly effective chemical reaction: oxidation. When you mix the powder with water, it springs to life, releasing a flurry of tiny, powerful oxygen bubbles.

    Think of it as a microscopic army of scrubbers going to work on tough grime.

    These oxygen bubbles get right in there and attack the chemical bonds holding dirt and stains to a surface. They break down organic compounds—things like spilled coffee, sweat, food residue, and body oils—into smaller particles that water can easily dissolve. Once that happens, the mess just wipes or rinses away, leaving the surface genuinely clean.

    The Key Ingredient: Sodium Percarbonate

    The workhorse in most powdered oxygen cleaners is an ingredient called sodium percarbonate. It's basically a solid, stable form of hydrogen peroxide bonded with sodium carbonate (also known as soda ash). The moment it hits water, it splits back into those two parts.

    The hydrogen peroxide then breaks down into water and a burst of active oxygen, and that’s what does all the heavy lifting.

    This compound’s effectiveness is why its use has exploded. The global market for sodium percarbonate is expected to hit $580-620 million by 2026. Facility managers love it because it delivers a powerful bleaching and cleaning punch without creating chlorine or other toxic byproducts, making it ideal for health-conscious venues. You can read more about the growing demand for these effective compounds and what it signals for the cleaning industry.

    This simple diagram shows you exactly how it works its magic.

    Diagram explaining how oxygen cleaners work, showing power, lifting stains, and deodorizing odors.

    As you can see, it’s a three-step process: power through the soil, lift it away from the surface, and destroy the odor-causing molecules.

    Beyond Cleaning: Deodorizing and Brightening

    One of the biggest wins with oxygen-based cleaners is that they do more than just clean. That same oxidation reaction that obliterates stains also neutralizes the molecules that cause bad odors. Instead of just covering up smells with a heavy fragrance, these cleaners eliminate them at their source.

    This makes them a superior choice for high-traffic areas like gym locker rooms, airport restrooms, or short-term rental properties where lingering odors can sink a guest's experience.

    On top of that, the gentle bleaching action from the released oxygen brightens up surfaces like fabrics and grout lines. It does this without the color-fading or material damage you’d get from harsh chlorine bleach. This dual-action cleaning and brightening makes them an incredibly versatile tool for any facility manager. You get a deep clean you can both see and smell, which is the new standard for true facility hygiene.

    The Science of Oxidation for a Deeper Clean

    The real magic behind oxygen-based cleaners is a chemical reaction called oxidation. Think of it as a tiny army of "scrubbing bubbles" that wakes up the second the cleaner hits water. This process unleashes a powerful, yet surprisingly gentle, force of oxygen ions that go to war with grime on a molecular level.

    This isn't about just wiping the surface clean. The oxygen actively seeks out and shatters the chemical bonds that glue stains and odors to a surface. It literally dismantles the mess from the inside out, lifting it away so you can easily wipe or rinse it off.

    A magnifying glass shows a dark stain on a surface, with bubbles and microscopic elements rising.

    This aggressive-yet-safe chemical action is exactly why these cleaners are so good at demolishing the tough organic stains that plague high-traffic facilities.

    Tackling Real-World Facility Challenges

    This science isn't just a theory; it translates directly into practical solutions for the messes your facility faces every single day.

    • For Event Venues and Restaurants: That dreaded red wine spill on the carpet? The oxygen ions target the organic pigments in the wine, breaking them down and lifting the stain without torching the fabric fibers.

    • For Gyms and Sports Facilities: Sweat, body oils, and grime build up fast on equipment, mats, and locker room floors. Oxidation neutralizes the organic matter and bacteria causing those stubborn odors, leaving surfaces genuinely fresh—not just masked with a fragrance. For an added layer of safety, having members wipe down equipment with disinfectant wipes after use is a proven strategy to reduce germ spread.

    • For Short-Term Rentals: Turnover time is everything. Oxygen-based cleaners can quickly knock out coffee spills on a comforter and food messes in a microwave, deodorizing and brightening surfaces all in one go.

    This versatile cleaning power makes it an indispensable tool. You can dive deeper into the chemistry by checking out how hydrogen peroxide disinfectants work.

    Here's the key takeaway: Oxidation doesn't just hide problems. It chemically changes stain and odor molecules, making them colorless, odorless, and easy to wash away. It’s a complete fix, not a temporary patch.

    Why Oxidation Is Safer Than Traditional Bleaching

    While both oxygen cleaners and chlorine bleach use oxidation, the way they get the job done is worlds apart. Chlorine bleach is a harsh, indiscriminate oxidizer. It attacks everything in its path—damaging fibers, fading colors, and releasing toxic fumes. For a broader look at gentler but effective cleaning methods, it's worth learning What is soft washing.

    In contrast, oxygen-based cleaners deliver a much more controlled and targeted reaction. They’re color-safe on most water-washable fabrics and are far less corrosive to surfaces like metal, tile grout, and plastics. This makes them a smarter choice for protecting your facility's valuable assets in the long run.

    Ultimately, the science of oxidation delivers a powerful clean you can see and smell. It works by breaking down messes at their source, ensuring your facility isn't just visibly clean but hygienically fresh—all without the collateral damage of harsher chemicals.

    Key Benefits for High-Traffic Commercial Facilities

    Beyond the impressive science, the real value of oxygen-based cleaners and a comprehensive hygiene strategy is what they deliver on the ground in busy commercial facilities. For any facility manager, the cleaning products you choose have a direct line to asset protection, guest experience, and staff safety. A two-step approach—deep cleaning followed by disinfecting—is the gold standard for achieving all three.

    A deep clean with an oxygen-based solution knocks out the toughest organic stains and odors, and following up with disinfectant wipes on high-touch surfaces ensures a hygienic environment. This unique combo is a smart, strategic choice for any high-traffic environment.

    Superior Safety and Air Quality

    One of the biggest wins when switching to oxygen-based cleaners is the immediate improvement in indoor air quality. Unlike traditional chlorine bleach or ammonia-based products, these cleaners don't fill the air with harsh, toxic fumes or volatile organic compounds (VOCs).

    This is a complete game-changer for enclosed spaces like corporate offices or healthcare waiting rooms. An office that starts using oxygen cleaners for carpet and upholstery maintenance can finally get rid of those chemical smells that often trigger headaches or allergic reactions in employees. The result is a genuinely healthier—and more productive—workspace.

    Key Takeaway: Because they break down into simple water and oxygen, these cleaners leave no toxic residue behind. This makes the environment safer for your cleaning staff, who are no longer breathing in harsh fumes daily, and for every guest, client, or employee who walks through your doors.

    Broad Material Compatibility Protects Your Assets

    Harsh chemicals take a serious toll on a facility's assets over time, leading to premature fading, corrosion, and breakdown. Chlorine bleach, for instance, is notorious for weakening fabric fibers and bleaching out colored textiles. Meanwhile, certain acidic cleaners can etch or damage sensitive surfaces.

    Oxygen-based cleaners give you all the power without that collateral damage. They are color-safe and play well with a wide variety of materials, including:

    • Textiles: Carpets, upholstery, and hotel linens can be brightened and deodorized without the fear of fading or fiber damage.
    • Grout: They effectively clean and lighten dirty grout lines in restrooms and locker rooms without actually eroding the grout itself.
    • Plastics and Metals: They’re safe to use on gym equipment, office furniture, and fixtures, so you can avoid the corrosive effects seen with harsher alternatives.

    Think about a luxury hotel. They can use oxygen-based solutions to treat a wine stain on an expensive lobby sofa and to refresh linens in the same shift, extending the life of both and protecting the hotel's investment. This versatility also simplifies your chemical inventory, since one core product can handle multiple cleaning tasks safely.

    An Enhanced Guest and Client Experience

    The first thing people notice when they walk into a facility is the smell. A lingering chemical scent can signal "harsh" or even "unclean" to a guest, while persistent organic odors are obviously much worse. A massive benefit of oxygen-based cleaners is their exceptional effectiveness in odor removal, making them the perfect choice for keeping commercial spaces smelling genuinely fresh.

    They work by destroying odor-causing molecules through oxidation, not by covering them up with heavy, artificial perfumes. The result is a truly neutral and fresh-smelling environment. This is absolutely critical for businesses where perception is reality, like a car dealership detailing a vehicle's interior or a short-term rental prepping for its next guest. The simple absence of a chemical smell creates a more welcoming and high-quality experience.

    This preference is showing up in the market numbers, too. The Oxygen Cleaning Service Market was valued at US$ 1,635 million in 2023 and is projected to hit US$ 2,707 million by 2030. You can dig into more insights on this growing market over at Valuates Reports.

    A Practical Playbook for Every Facility Type

    Knowing the science behind effective cleaning is one thing. Turning that science into real-world results is a whole different ball game.

    The power of oxidation isn't a one-size-fits-all magic bullet; you have to tailor the application to the unique mess each environment throws at you. From the high-impact grime of a sports facility to the blink-and-you-miss-it turnaround times of a short-term rental, knowing how to dilute, apply, and integrate disinfecting protocols is what separates a decent clean from an exceptional one.

    This guide is your playbook, packed with actionable strategies and efficiency hacks for your janitorial team. By matching the method to the mess, you'll get the most out of these powerhouse solutions, delivering a deep clean that protects your assets and wows your guests.

    Three illustrations show hands cleaning a locker room floor with bubbles, a stained couch, and a car seat.

    Sports Facilities and Gyms

    Locker rooms, training floors, and equipment are ground zero for organic matter—sweat, body oils, and bacteria. This combo creates stubborn grime and a funk that can tarnish a facility's reputation in a heartbeat.

    • Locker Room Grout: For that deep-down clean on tile and grout, mix a concentrated paste using a higher ratio of oxygen cleaner powder to water. Slap it directly on the grout lines and let it sit for 15-20 minutes. You'll see the bubbling action literally lift the embedded grime out. Then, just give it a good scrub with a stiff brush and rinse it all away.
    • Equipment and Mats: For daily wipe-downs of vinyl, plastic, and metal surfaces, a general-purpose spray solution is your best friend. It cuts right through body oils and deodorizes without damaging the materials. For quick, daily disinfection of high-touch handles and screens, we suggest pairing this deep clean with Wipes.com Disinfectant Wipes, which give you fast, effective sanitation on the go.
    • Efficiency Hack: Encourage members to wipe down equipment after each use with readily available disinfectant wipes. This empowers them to contribute to a cleaner environment and significantly reduces the bacterial load between professional cleanings.

    Short-Term Rentals and Hospitality

    In the hospitality world, every little detail counts, and the clock is always ticking. Oxygen-based cleaners are perfect for tackling the unpredictable stains guests leave behind, from coffee on the upholstery to a wine spill on the carpet.

    • Upholstery and Carpet Spot Treatment: Mix your solution in a spray bottle and hit the stain directly. Gently work it in with a soft brush or microfiber cloth and let it dwell for 5-10 minutes. Then, blot the spot with a clean, damp cloth to lift both the stain and the cleaning solution. The fact that it's color-safe is a huge win here.
    • High-Touch Point Sanitation: Between guests, use disinfectant wipes on light switches, remote controls, doorknobs, and faucet handles. This provides visible assurance of cleanliness and takes only seconds.

    A critical job in rental properties is tackling vomit—a biohazard that can leave behind gnarly stains and odors. Oxygen-based cleaners are clutch here, breaking down the organic compounds and neutralizing the acids. It makes the cleanup far more effective than just scrubbing the surface.

    Offices and Retail Spaces

    Maintaining a clean and healthy environment is key to employee morale and customer confidence. These spaces see constant foot traffic and shared use of common areas.

    • Refreshing Common Areas: A light-to-medium strength solution in a spray bottle works wonders on breakroom counters, conference tables, and plastic chairs. The cleaner's ability to deodorize is key for killing lingering food smells.
    • Sales Tip: Promote Hygiene ROI: When selling cleaning services or supplies, emphasize that investing in visible hygiene, like disinfectant wipe dispensers in common areas, pays dividends. It reduces employee sick days and shows customers you prioritize their well-being, enhancing brand perception. A small investment in wipes can lead to a significant return in productivity and customer loyalty.

    Here’s a quick cheat sheet to keep these applications straight.

    Hygiene Application Cheat Sheet for Commercial Use

    This table is your quick-reference guide for putting cleaning and disinfecting strategies to work. It breaks down common challenges in different facilities and gives you the recommended game plan for each.

    Facility Type Common Challenge Recommended Application Method
    Sports Facilities Sweat odors and grime in locker room grout Apply a concentrated paste, dwell for 15-20 mins, scrub, and rinse.
    Gyms Germs on high-touch equipment Provide disinfectant wipes for members to use pre/post-workout.
    Short-Term Rentals Coffee, wine, or food stains on carpets/upholstery Spot treat with spray, agitate gently, dwell 5-10 mins, and blot.
    Hospitality Sanitizing between guests Use disinfectant wipes on remotes, light switches, and doorknobs.
    Offices/Retail Lingering odors (food) in common areas Light spray on surfaces; follow up with disinfectant on high-touch points.
    Event Venues High-traffic floor grime after an event Mop with a general-purpose solution or use in an auto-scrubber.

    Think of this as your starting point. You can always adjust the ratios and methods as you get a feel for how the cleaner performs on your specific surfaces.

    By adapting these techniques, any facility can master a comprehensive hygiene program, turning powerful products into strategic tools for a higher standard of clean.

    Putting Oxygen Cleaners to Work in Your Daily Operations

    Getting oxygen-based cleaners and a robust disinfecting routine into your facility’s daily rhythm isn’t about flipping a switch overnight. It’s about a smart, planned integration. Done right, the switch should feel seamless for your team and start delivering those crisp, consistent results you’re looking for.

    This is your roadmap to move from theory to practice, making sure your crew is confident, your purchasing is sharp, and your cleaning protocols are rock-solid from day one.

    A Smart Procurement Checklist

    Picking the right cleaning and disinfecting products is the first, and most critical, step. The market is full of different formulas, and the best one for you comes down to your facility’s specific demands, storage space, and the scale of your operation.

    • Powder vs. Liquid Concentrate: Powdered oxygen cleaners are often the most economical choice for big jobs and last longer on the shelf. On the other hand, liquid concentrates are super convenient and make it easier for staff to dilute, cutting down on mixing mistakes.
    • Disinfectant Wipes: When selecting disinfectant wipes, look for EPA registration, kill claims for relevant pathogens, and packaging that suits your needs (e.g., large-count buckets for gyms, smaller canisters for offices).
    • The Job You Need It For: Ensure your cleaning supplies match your needs. Are you looking for a general multi-surface cleaner, a heavy-duty degreaser, or something to boost your laundry? Double-check compatibility with the main surfaces you’ll be cleaning.

    Essential Staff Training Protocols

    You can’t skip proper training—it’s non-negotiable for both safety and results. Your janitorial team needs to understand not just how to use new products, but why a two-step clean-then-disinfect process is superior.

    Your key training modules should hammer home these points:

    1. Safety First: This is all about personal protective equipment (PPE). Stress the importance of gloves and eye protection, especially when your team is handling concentrated chemicals.
    2. Mixing and Diluting Like a Pro: Post clear, visual charts in your janitorial closets. Show the exact water-to-cleaner ratios needed for different tasks, from general mopping to heavy-duty spot treatments.
    3. Clean First, Then Disinfect: Train staff that disinfecting is most effective on a pre-cleaned surface. Dirt and grime can act as a shield for germs. Use the oxygen cleaner to remove soil, then use disinfectant wipes to kill pathogens.

    This kind of focused training turns a new product into a tool your team can count on, boosting both cleaning power and efficiency. The impact of oxygen-based processes is clear across many industries. For instance, new data shows over 120 wastewater plants that implemented oxygen-enriched processes saw a 15-20% reduction in their treatment times. You can dig into the industrial applications of oxygen on snsinsider.com to learn more.

    Sample Standard Operating Procedure (SOP)

    A good SOP ensures everyone on your team cleans to the same high standard, every single time. Use this framework as a starting point and tweak it to fit your facility’s unique layout and needs.

    Sample SOP: Daily Facility Hygiene Protocol

    Objective: To ensure consistent, effective cleaning and disinfecting of all designated surfaces.

    • Daily Tasks (High-Touch Surfaces):
      • Mix general-purpose oxygen cleaner according to the dilution chart.
      • Clean countertops, tables, and equipment to remove visible soil.
      • Follow up by wiping all high-touch points (door handles, light switches, payment terminals) with an EPA-registered disinfectant wipe.
    • Weekly Tasks (Deeper Cleaning):
      • Mix a stronger oxygen-based solution for mopping floors and cleaning restroom grout.
      • Apply to floors, let it sit for 10 minutes, then use an auto-scrubber or mop.
      • Spot treat any visible stains on carpets or upholstery.
    • Monthly Tasks (Restorative Cleaning):
      • Use a concentrated oxygen-based paste for deep grout cleaning in kitchens and locker rooms.
      • Use it in a hot water carpet extractor for large carpeted areas.

    Common Questions About Oxygen-Based Cleaners

    When you’re thinking about upgrading your cleaning arsenal, it’s only natural to have a few questions. Getting a handle on what oxygen-based cleaners can—and can’t—do is the key to using them with confidence. Here are some clear, straightforward answers to the questions we hear most often.

    Are Oxygen-Based Cleaners Considered Disinfectants?

    This is a critical distinction, and the answer is usually no. While oxygen-based cleaners are fantastic sanitizers—they’re pros at lifting the dirt and organic grime that germs love to hide in—most are not registered with the EPA as disinfectants. A true disinfectant has to prove it can kill specific viruses and bacteria.

    For high-touch surfaces where you need to eliminate pathogens (think gym equipment, door handles, or countertops), a two-step process is the gold standard.

    1. First, clean the surface with an oxygen cleaner. This gets rid of the physical dirt and gunk.
    2. Then, follow up with an EPA-registered disinfectant.

    This one-two punch ensures your disinfectant isn’t trying to fight its way through a layer of grime. It gets to work directly on a clean surface, which is exactly where it’s most effective.

    Can I Mix Oxygen Cleaners with Other Chemicals?

    The answer here is a firm no. You should never, ever mix oxygen-based cleaners with other chemicals, especially chlorine bleach or products containing ammonia.

    Mixing these can set off dangerous chemical reactions, release toxic fumes, or worse, completely neutralize both cleaners, leaving you with a useless and potentially hazardous cocktail.

    If you need to switch chemicals on a surface, always rinse it down with plain water first. This removes any residue and preps the area for the next step. To get a better feel for how these chemicals differ, check out our guide comparing bleach versus hydrogen peroxide.

    How Do Oxygen Cleaners Impact Indoor Air Quality?

    This is where oxygen-based cleaners really shine. They are a much better choice for maintaining healthy indoor air quality. Unlike harsh chemicals that release smelly, irritating fumes, these cleaners are much gentler on the air we breathe.

    They don't release volatile organic compounds (VOCs). Because their active ingredients break down into simple water and oxygen, they leave behind no chemical residue or overpowering smells.

    This makes them a go-to solution for enclosed spaces or facilities with sensitive occupants, like schools, offices, or healthcare settings.

    What Is the Shelf Life of an Activated Solution?

    There’s a huge difference between the powder in the container and the solution you mix up. In its dry, powdered form, an oxygen cleaner is incredibly stable. Kept in a cool, dry spot, it can last for years.

    The moment you add water, however, the clock starts ticking.

    Once mixed, the solution is activated and at its peak cleaning power for the first 4 to 6 hours. After that, it starts to lose its punch. For this reason, it’s always best to mix only what you need for the job at hand. This guarantees you’re getting the maximum stain-lifting, dirt-busting power every time.

    A proactive approach to hygiene is no longer a luxury—it's a core business necessity. By pairing the deep-cleaning power of oxygen-based solutions with the targeted germ-killing effectiveness of disinfectant wipes, you create an environment that is not only visibly clean but truly hygienic. We encourage you to elevate your standards and consider integrating a comprehensive clean-and-disinfect strategy into your daily routine.

  • Your Guide to a Green Clean Janitorial Program That Works

    A green clean janitorial program is much more than a buzzword; it's a smart business decision that puts the health of your building’s occupants, your staff, and the environment first. In any commercial or public facility, cleanliness is a direct reflection of care and professionalism. A truly clean space isn't just visually appealing—it's a safer, healthier environment for everyone. This guide offers practical tips for business owners, janitorial professionals, and facility managers on how to elevate hygiene standards effectively, with a special focus on the crucial role of disinfectant wipes.

    Building Your Green Cleaning Foundation

    Making the move to a green cleaning program is a foundational shift. It’s the kind of change that boosts your brand’s reputation, cuts operational costs over time, and creates a noticeably healthier indoor space. This isn't just about swapping out a few bottles of chemicals; it's about embracing a new mindset focused on sustainability and proactive wellness. The journey begins with a hard, honest look at where you stand right now so you can build a clear roadmap to where you want to be. The most successful programs I've seen are always built on a solid framework: a thorough audit, clear goals, and a firm policy.

    Start with a Comprehensive Inventory Audit

    Before you can build something better, you need to know exactly what you're working with. The first real step is to conduct a top-to-bottom audit of your cleaning inventory and all your current procedures. That means going through every single janitorial closet and storage area.

    Your main goal here is to identify and catalog every cleaning chemical, tool, and piece of equipment you’re currently using. This isn't just about counting bottles. It’s about pinpointing the problem areas that clash with green principles.

    • Identify Harsh Chemicals: Get eagle-eyed for products containing ammonia, chlorine bleach, or high levels of volatile organic compounds (VOCs). These are the usual suspects for poor indoor air quality and can cause respiratory irritation for building occupants.
    • Assess Wasteful Habits: Are your teams tearing through disposable paper towels? Are cleaning solutions being "glug-glugged" instead of properly measured, leading to waste? Document these habits—they're low-hanging fruit for improvement.
    • Review Equipment Efficiency: Take a look at your big-ticket items, like vacuums and floor scrubbers. Older models are often energy hogs and usually lack the advanced filtration (like HEPA filters) needed to actually improve air quality instead of just moving dust around.

    This process lays the groundwork for a systematic transition, helping you prioritize the changes that will deliver the biggest bang for your buck right away.

    Set Clear and Measurable Green Goals

    Once your audit is done and you have a clear picture of the "before," you can start setting specific, measurable goals for your green janitorial program. Vague mission statements like "becoming more eco-friendly" just don't cut it. You need concrete targets that your team can actually work toward and that you can report on to leadership.

    A well-defined goal is the difference between wishful thinking and a strategic plan. By setting specific targets, you create accountability and a clear path to demonstrating the tangible benefits of your green cleaning initiative.

    Think about setting goals like these:

    • Reduce VOC emissions from cleaning products by 40% within the first year.
    • Cut water usage in cleaning protocols by 20% by switching to microfiber mopping systems.
    • Ensure 75% of all cleaning product purchases are Green Seal or EPA Safer Choice certified within 18 months.

    These kinds of quantifiable objectives give your team clear direction and make it much easier to measure the success and ROI of your program down the line.

    The process of building a green cleaning foundation follows a simple, logical flow from assessment to action. This visual breaks down those first critical steps.

    Green Cleaning Foundation process flow diagram with three steps: Audit, Goals, and Policy.

    This flow really just highlights a fundamental truth: a successful program starts with a clear understanding of your current state (Audit), followed by defining your desired outcome (Goals), and finally, codifying the rules that will get you there (Policy).

    Choosing Effective Green Cleaning Products

    Let's be honest: navigating the world of "green" cleaning supplies can feel like wading through a marketing swamp. Everyone claims their products are eco-friendly, but cutting through the "greenwashing" is the first real step in building a green clean janitorial program that actually works. The goal isn't just to buy bottles with leaves on them; it's to find supplies that are genuinely safer for your staff and building occupants, minimize your environmental footprint, and, most importantly, deliver a powerful clean.

    The secret? Don't trust the marketing claims. Trust the science. Credible, third-party certifications are your best friend here. Think of them as a verified seal of approval, confirming that a product has passed rigorous tests for performance, health, and sustainability.

    A janitor reviews eco-friendly cleaning products with reduced VOCs and chemical content.

    Decoding Eco-Labels

    When you're standing in the supply aisle, knowing what these logos mean is like having a cheat sheet. Each one has a slightly different focus, but they all point to the same thing: safer chemistry and a real commitment to the environment.

    Here are the big three you'll see most often:

    • Green Seal: This is one of the heavy hitters. A Green Seal certification means the product has been scrutinized from every angle—from how its raw materials are sourced to what happens when it goes down the drain. It's a stamp of approval for its entire life cycle.
    • EPA Safer Choice: This label comes directly from the U.S. Environmental Protection Agency. It's your guarantee that every single ingredient has been reviewed against strict health and safety criteria, ensuring you get a product that works without the harsh chemicals.
    • ECOLOGO: Think of this as a sign of holistic environmental responsibility. ECOLOGO-certified products have met standards that look at multiple attributes across their life cycle, confirming a reduced impact on the planet.

    These certifications aren't just for show; they're your first line of defense against ineffective or misleading products. To make it easier, here's a quick reference table to help you compare them at a glance.

    Eco-Label Certification Comparison

    Certification Key Focus Areas Best For Facilities Like…
    Green Seal Full product life-cycle impact, from raw materials to disposal; strict performance criteria. High-end commercial offices, schools, and government buildings aiming for LEED certification.
    EPA Safer Choice Ingredient safety and chemistry; ensures performance is not sacrificed for safety. Healthcare facilities, daycares, and any environment with sensitive occupants.
    ECOLOGO Reduced environmental impact across multiple criteria like materials, energy, and manufacturing. Venues, hospitality, and businesses focused on broad corporate social responsibility goals.

    Ultimately, relying on these labels saves you time and reduces risk. They've already done the hard work of vetting the science, so you can focus on choosing the right product for the job.

    Key Criteria for Product Selection

    Beyond the certifications on the label, your purchasing strategy should zero in on a few key features that boost both sustainability and operational efficiency.

    A huge one is reducing volatile organic compounds (VOCs). These are the nasty gases that get released into the air from certain cleaners, tanking your indoor air quality. Always look for low-VOC or zero-VOC formulas. Biodegradable ingredients are also a must—what you wash away shouldn't harm local waterways. If you're looking for powerful, safer alternatives, it's worth understanding why natural citrus cleaners are so effective.

    One of the single most impactful changes you can make is switching to concentrated formulas with a dilution control system. This move dramatically cuts packaging waste, slashes shipping costs (and emissions), and guarantees your team is mixing chemicals at the right, safe ratio every single time.

    This isn't just a niche trend; it's a massive market shift. The global cleaning services market is set to climb from $415.93 billion in 2024 to $616.98 billion by 2030, with green cleaning as a major catalyst. For places like premium office towers or hospitals, eco-certified products and smart tools are no longer optional—they're the standard.

    Beyond Chemicals: The Power of Tools

    A top-tier green clean janitorial program isn't just about what's in the bottle; it's about the tools you use to apply it. The right equipment can do the heavy lifting, allowing you to clean more effectively with less water and fewer chemicals.

    Microfiber technology, for example, is the bedrock of modern green cleaning. Those tiny, split fibers are masters at trapping dust, dirt, and pathogens—up to 99% more than old-school cotton rags—often with just water. This drastically cuts down on your chemical spend and water usage. For convenient and effective surface disinfection, we recommend Wipes.com Disinfectant Wipes, which pair perfectly with a thorough cleaning protocol.

    On that same note, dilution control systems are non-negotiable. These automated dispensers take the guesswork out of mixing concentrated chemicals, ensuring perfect, safe ratios every time. No more wasted product, and no more hazardous exposure for your cleaning crew from "glug-glug" measuring.

    Developing High-Impact Cleaning Protocols

    Having the right green cleaning products is a great start, but even the best supplies are only as effective as the processes you build around them. A successful green clean janitorial program is where smart strategy meets on-the-ground action. This is how you turn your eco-friendly goals into consistent, real-world results that protect both people and your bottom line.

    Green cleaning products with various eco-friendly labels and symbols like Green Seal, EPA Safer Choice, low-VOC, and biodegradable.

    The foundation of any great cleaning protocol is structure. It’s about creating documented, repeatable steps that leave no room for error and ensure every team member delivers the same high standard of clean, every single time. It's time to move beyond generic instructions and design checklists tailored to the unique hot spots of each facility.

    Building Facility-Specific Checklists

    A one-size-fits-all approach to cleaning is a recipe for inefficiency and missed spots. The high-touch points in a corporate office are worlds away from those in a fitness center or a restaurant. Developing targeted checklists is the secret to a thorough and efficient routine.

    • Office Spaces: Zero in on shared surfaces. Think conference tables, keyboards, mice, doorknobs, and elevator buttons. Don't forget the breakroom—appliance handles, countertops, and coffee pot controls are major germ magnets.
    • Gyms and Fitness Centers: Here, the battle is against sweat and direct skin contact. Your checklist must include treadmill screens, free weight handles, yoga mats, and locker room benches. Regular wipe-downs are essential for member safety and confidence.
    • Restaurants & Food Service: Focus on tables, chairs, payment terminals, condiment dispensers, and restroom fixtures. Maintaining impeccable hygiene is non-negotiable for customer trust and regulatory compliance.
    • Retail Stores: Focus on point-of-sale keypads, shopping cart handles, and fitting room doors. These points require frequent attention to keep both customers and staff safe.

    By creating these specific guides, you empower your team to work smarter, not harder. They know exactly where to focus their energy, ensuring the most critical areas are never overlooked.

    Mastering Proven Cleaning Techniques

    Beyond what to clean, it’s just as important to define how to clean. I've seen teams accidentally create more work for themselves by ignoring simple, proven janitorial techniques that prevent cross-contamination and wasted effort.

    The top-to-bottom method is a classic for a reason. It ensures dust and debris from higher surfaces (like shelves or light fixtures) fall to the floor before it gets cleaned. This simple logic saves a ton of time and prevents frustrating re-work.

    Another cornerstone of a modern green clean janitorial program is a color-coded microfiber system. This is hands-down one of the most effective ways to stop the spread of germs from one area to another. For facility managers looking to upgrade their toolkits, understanding the benefits of an eco-friendly cleaning cloth is a great place to start.

    A typical color-coding system is beautifully simple: red cloths for high-risk areas like toilets, blue for general surfaces like desks, and green for food-prep areas. This visual cue system is easy for staff to follow and dramatically cuts the risk of cross-contamination.

    Strategic Disinfection and Efficiency Hacks

    Going green doesn’t mean you abandon disinfectants; it means you use them smarter. Instead of wasteful broad-spraying, which can tank your indoor air quality, a targeted approach is far more effective. Arm your team with disinfectant wipes to hit those high-touch points you identified in your checklists. This ensures you get maximum germ-kill where it matters most, without overusing chemicals.

    For sales professionals, educating clients on this targeted approach demonstrates expertise. Frame it as a hygiene ROI: a small investment in wipes for critical touchpoints prevents the spread of illness, reducing employee absenteeism and boosting customer confidence. It’s an easy, high-value addition to any cleaning supply offering.

    Ultimately, these protocols are about building a healthier, safer environment. By integrating disinfectant wipes into your routine, you’re adding a crucial layer of protection that says you care not just about appearances, but about the well-being of everyone who walks through your doors.

    Training and Empowering Your Janitorial Team

    You can have the best green-certified products and the most detailed protocols on the planet, but let's be honest—the real success of a green clean janitorial program comes down to your people. Your staff are the frontline ambassadors of your commitment to health and sustainability. Investing in their training isn't just a box to check; it’s the single most important thing you can do to guarantee great results, every single time. A well-trained team is an empowered, motivated, and safer team.

    This is why effective training is never a one-and-done orientation session. It has to be an ongoing conversation that builds confidence, explains the "why" behind the new way of doing things, and elevates your staff from task-doers to skilled hygiene technicians.

    A janitor reviews a maintenance checklist by a floor plan, with colorful towels nearby.

    Core Components of Engaging Training

    Great training feels practical and immediately useful, not like a lecture. The goal is to build muscle memory around safe, effective, and green practices.

    Make sure your curriculum gets hands-on with these key areas:

    • Decoding Safety Data Sheets (SDS): Your crew needs to know how to quickly read and understand the SDS for any new green product. The training should be practical, focusing on how to find crucial info like personal protective equipment (PPE) requirements and what to do in case of an emergency.
    • Mastering Dilution Control: It’s critical to break the "more is better" mindset. Nothing beats a hands-on demonstration showing exactly how to use your dilution systems. This ensures products work as intended while preventing chemical waste and potential safety issues.
    • The 'Why' Behind Green Cleaning: This is the game-changer. Take the time to explain the health benefits of reduced chemical exposure for them. When your team truly gets that these products protect their own well-being, their buy-in and commitment go through the roof.

    The Power of Visible Sanitation

    One of the biggest and smartest shifts in the janitorial world is the move toward visible sanitation. This simply means training your staff to perform specific cleaning tasks professionally and efficiently during business hours, not just after everyone’s gone home.

    This strategy hits two critical goals at once. First, it reassures everyone in the building. Seeing a team member expertly wiping down high-touch surfaces builds an incredible sense of trust and safety. It makes your hygiene efforts tangible.

    Second, it elevates the perception of the janitorial profession itself. Your staff are no longer invisible; they become recognized contributors to a healthy facility. This is a massive morale booster and reinforces just how important their role is, turning them into proud ambassadors of your green clean janitorial program.

    Training staff for visible sanitation isn't just about cleaning in front of people. It's about performing their duties with a professional presence that communicates competence and care.

    Sales Insights for Janitorial Businesses

    If you run a cleaning service, a highly trained, green-certified team is your secret weapon. The janitorial services market is booming, valued at $365.29 billion in 2025 and on track to hit $499.86 billion by 2029. As the market grows, clients are getting smarter and looking for premium, reliable partners. You can dive deeper into this explosive growth in the latest janitorial services market report.

    When you’re pitching new clients, position your expertly trained team as a core part of your premium offering. Focus on these value propositions:

    • Reduced Risk and Liability: A crew trained in green protocols and SDS compliance minimizes the risk of chemical accidents. You’re not just cleaning their facility; you’re making it a safer environment for their employees.
    • Certified Expertise: Make sure to highlight any green cleaning certifications your team holds. This is third-party proof of your skills and your company’s commitment to doing things the right way.
    • Enhanced Brand Image: Explain how your visible sanitation practices will make their brand look good. It shows their customers and staff that they prioritize health and well-being, which is a huge win for them.

    By focusing on the expertise and professionalism of your people, you shift the conversation from cost to value. It justifies a higher price point and helps you land the clients who understand the real return on a truly superior clean. Prioritize cleanliness in your facility—consider integrating disinfectant wipes into your daily routine to enhance hygiene and safety for everyone.

  • Inspect What You Expect: A Guide to Modern Facility Cleanliness

    It’s an old saying in management for a reason: “You inspect what you expect.” It’s a simple truth. If you just tell people what to do but never circle back to check on the work, you’re basically crossing your fingers and hoping for the best.

    This isn’t about micromanaging or catching people making mistakes. It’s about being present, reinforcing standards, and showing your team that the little things—the things that define quality—actually matter. In the world of commercial and public facilities, this isn't just a good idea; it's the foundation of your entire customer experience and a critical component of public health.

    The Real Cost of a Dirty Facility and the ROI of Inspection

    Image contrasting poor public restroom sanitation leading to negative reviews with good hygiene boosting ROI.

    In any public-facing business, cleanliness is a direct reflection of your brand. It’s not just about looking nice; it’s a critical metric that quietly drives your bottom line. A dirty facility isn't a minor annoyance—it’s a silent profit killer.

    Think about it. A single bad online review mentioning a filthy restroom, a grimy gym locker room, or a sticky table at a restaurant can turn away dozens of potential customers before they ever set foot in your door.

    This isn't just a hunch. The data is overwhelming. A shocking 94% of people say they would avoid a business in the future if they ran into a dirty restroom. That means for every customer who walks away disgusted, you haven't just lost that one sale. You’ve lost their repeat business, their family’s business, and anyone they tell about their bad experience.

    The Ripple Effect of Poor Sanitation

    The damage goes far beyond a single lost transaction. The consequences of letting standards slide create a negative ripple effect across your entire operation:

    • Your Brand Reputation Gets Tanked: In the age of Yelp, Google Reviews, and TikTok, your facility’s hygiene is always on display. A reputation for being dirty is incredibly hard to shake and gives your competitors an easy win.
    • Customer Loyalty Evaporates: A clean, well-kept environment makes people feel safe and respected. When standards slip, so does their loyalty. That gym member who keeps finding sweaty, un-wiped equipment? They're already shopping for a new gym.
    • Employee Morale and Productivity Nosedive: Nobody wants to work in a dirty, unhygienic environment. A grimy workplace sends a clear message that management doesn't care, which leads to less motivation, more call-outs, and a revolving door of staff.

    "You get what you inspect, not what you expect. This isn't about policing people or catching mistakes. It's about leader presence, coaching, and reinforcing that standard work actually matters."

    If you expect your facility to be spotless but never actually walk the floor to verify it, the standards will slowly but surely crumble. A solid inspection program helps you catch issues before they become expensive emergencies and helps reduce unplanned expenses from compliance failures or last-minute deep cleans.

    Framing Sanitation as a Strategic Investment

    It’s time to stop thinking of cleaning as a cost center and start seeing it for what it is: a strategic investment in your customer experience and public health. An "inspect what you expect" program delivers a clear return on investment (ROI) by tackling the hidden costs of neglect head-on.

    Sales Tip: When talking to clients, shift the conversation from the cost of cleaning supplies to the ROI of hygiene. A clean facility isn't an expense; it's a tool for customer retention. Explain how visible cleanliness, like well-stocked disinfectant wipe stations, builds trust and can lead to higher customer loyalty and better online reviews.

    Visible cleaning tools are a huge part of this strategy. Things like disinfectant wipe dispensers placed in high-touch areas do two crucial jobs. First, they empower both staff and customers to maintain hygiene themselves—think gym equipment or shopping cart handles. Second, their very presence is a powerful visual cue. It says, "We care about your health and safety here," which builds confidence and reinforces your brand's value before a customer even speaks to an employee.

    By putting a consistent inspection program in place, you’re not just managing janitors. You’re actively managing your reputation, your customer loyalty, and your business's financial health. It’s one of the smartest investments you can make.

    Building Your Sanitation Inspection Framework

    Illustration of a sanitation inspection framework showing gym areas like dumbbell rack and service desk linked to a cleaning checklist on a clipboard.

    An "inspect what you expect" program is where the rubber meets the road. It takes the idea of "clean" from a vague goal and turns it into a system—a repeatable, tangible framework that makes exceptional hygiene your default setting. This isn't about creating more paperwork. It's about building a sustainable process that actually works.

    It all starts with walking your space with fresh eyes. Forget you're the manager for a minute and become a first-time customer. Your mission? To find every single “danger zone,” those high-touch surfaces where germs, grime, and customer complaints are born.

    This isn’t a copy-and-paste job. The hot spots in a fitness center are worlds away from those in a restaurant or retail store. Specificity is your best friend here.

    Identifying Your High-Touch Danger Zones

    Mapping these critical areas is the bedrock of your entire inspection program. Think about the path a customer or employee takes from the moment they walk in. What do they touch? What must they touch? These are the areas that require not just cleaning, but regular disinfection.

    Cleaning Tip: The most effective way to handle high-touch zones is with a two-step process: clean first to remove dirt, then disinfect to kill germs. Disinfectant wipes are perfect for this as they often combine both actions, making the process fast and efficient for busy staff.

    High-Touch Danger Zones by Facility Type

    Facility Type Primary High-Touch Zones Recommended Inspection Frequency
    Gyms & Fitness Centers Dumbbell/barbell grips, cardio touchscreens, weight benches, locker handles, water fountains Daily (multiple times)
    Offices & Buildings Elevator buttons, reception desks, shared kitchen appliances, door handles, conference tables Daily
    Retail & Restaurants Checkout counters, payment keypads, shopping cart handles, condiment stations, restroom doors Daily (hourly for peak times)

    Mapping these zones isn't just an academic exercise—it's the foundation for building inspection checklists that actually reflect how your facility is used. A great checklist is clear, concise, and built for speed. If you manage larger properties, our property manager inspection checklist offers even more detailed guidance.

    Designing Practical Audit Checklists

    A smart sanitation program doesn’t treat every task the same. It uses a tiered approach that blends daily vigilance with deeper, less frequent reviews.

    The Daily Check (Non-Negotiables)
    This list needs to be short and sharp, focused only on your highest-traffic, highest-risk zones. The goal is a quick pass-or-fail verification that can be done in minutes, multiple times a day. This is where disinfectant wipes are invaluable for quick hits between deeper cleans.

    The Weekly Audit (Deeper Dive)
    Here, you expand your scope. You’ll cover all the daily items but also look at secondary areas—baseboards, window sills, the condition of fixtures, and corners that get overlooked. This is your chance to catch the small stuff before it becomes a big, noticeable problem.

    The Monthly Review (Big Picture)
    Think of this as your strategic overview. The monthly audit helps you spot trends. Are certain areas consistently failing inspections? Is a piece of equipment showing wear that makes it hard to clean properly? This is where you adjust your strategy, retrain staff, or reallocate resources.

    The core principle is simple: what gets measured gets managed. Without a structured framework to inspect what you expect, your cleanliness standards will inevitably drift. A clear checklist turns abstract expectations into concrete, actionable tasks.

    This system is proven in the most demanding environments. Take airports, where millions of people pass through daily. The FDA's fiscal year 2024 drug quality assurance inspections revealed that 93% of all global sites received positive compliance classifications, a testament to rigorous, routine audits. For airports, implementing simple daily wipe-down checklists for high-touch zones has been shown to boost passenger satisfaction scores by up to 20%.

    To give your program teeth, you need clear Key Performance Indicators (KPIs). KPIs turn your checklists from simple to-do lists into powerful management tools. For example, a great KPI is: "All daily checklist items must achieve a 90% or higher pass rate each week."

    Just creating the checklists isn't enough—you have to communicate the why. Every single person on your team, from frontline staff to department heads, needs to understand their role and why it matters. When your team knows exactly what you expect—and knows you’ll be checking—they have the clarity and accountability they need to deliver excellence.

    Putting Your Audits into Action: Daily and Weekly Walkthroughs That Actually Work

    A brilliant sanitation policy is just a piece of paper until you bring it to life on your facility floor. This is where the rubber meets the road. To truly inspect what you expect, you have to weave your checklists and standards into the very fabric of your daily operations. The difference between a forgotten binder on a shelf and a culture of cleanliness comes down to one thing: consistent, well-executed audits.

    It all starts with understanding the rhythm of your audits. You have two main tools in your arsenal: the planned, scheduled inspection and the unannounced spot-check. Both are essential. Scheduled audits are fantastic for training and setting a clear baseline. Unannounced walkthroughs, on the other hand, give you an honest snapshot of your facility's real-time condition. They keep standards high even when no one is looking.

    For most businesses, a hybrid approach is the sweet spot. Use a comprehensive, scheduled audit once a week for a deep dive. Then, sprinkle in quick, unannounced daily spot-checks on your top 3-5 high-traffic "danger zones." This dual approach keeps your team sharp and ensures your most critical areas are always ready for prime time.

    Making Audits Fast, Smart, and Actionable

    If your audit process is a clunky, time-sucking ordeal, it’ll be the first thing to get ditched on a busy day. Efficiency is everything. And one of the simplest ways to make your audits both fast and meaningful is to use a basic scoring system.

    A 1-5 scale gives you much richer feedback than a simple pass/fail.

    • 1 – Unacceptable: Requires immediate correction.
    • 2 – Needs Improvement: Below standard and requires correction soon.
    • 3 – Acceptable: Meets the bare minimum.
    • 4 – Good: Exceeds the standard.
    • 5 – Excellent: Pristine. This is the new benchmark.

    Suddenly, you have data, not just opinions. Are you noticing that the front entrance consistently scores a 2 on Wednesday afternoons? That’s not a lazy employee; that’s a scheduling and resource problem. Data helps you stop blaming people and start fixing the root cause.

    The goal here isn't just to find problems—it's to create a system where fixing them is effortless. This is where equipping your team for success becomes so critical. When the tool to fix an issue is right there, compliance becomes second nature.

    Imagine a gym manager doing a walkthrough. They spot a smudged screen on a treadmill. Instead of just making a note, they can grab a disinfectant wipe from a nearby station, clean it in seconds, and use it as a quick coaching moment with the floor staff. That immediate, hands-on correction reinforces the standard more powerfully than any report ever could.

    Arm Your Team for Instant Compliance

    The whole point of "inspect what you expect" isn't about playing "gotcha." It’s about building a system where doing the right thing is the easiest thing to do. Placing the right tools directly into your team's workflow is how you get there.

    Cleaning Tip: For wipes to be effective, the surface must remain wet for the time specified on the product label (the "dwell time"). Train staff to use enough wipes to ensure the surface stays visibly wet, allowing the disinfectant to do its job.

    Take a retail store, for example. By placing a disinfectant wipe dispenser at every single checkout counter, you integrate cleaning into the cashier's natural rhythm. A manager can glance at the pin pad and counter during a daily audit. If it's grimy, the tools are within arm's reach for the cashier to wipe it down instantly. This keeps hygiene standards high, even during the busiest parts of the day.

    For this to work in a high-traffic commercial setting, you need a product that can keep up. We recommend Wipes.com Disinfectant Wipes because they’re built for the demands of public facilities—durable, effective, and reliable. When you make high-quality, easy-to-use wipes readily available, you empower your team to own the standards you've set.

    Your daily and weekly audits are the heartbeat of your sanitation program. By keeping the process simple, measurable, and backed up with the right tools, you empower everyone to deliver on the promise of a flawlessly clean and safe facility.

    Training and Empowering Your Team for Accountability

    Your sanitation program is only as good as the people running it. A detailed checklist can get you started, but it doesn't build a culture. If you truly want to inspect what you expect and see lasting results, you have to get your team to see sanitation not as a chore, but as a point of collective pride.

    This means training has to go beyond just showing someone how to use a disinfectant wipe. It has to hit on the why. Connect the dots for them: a clean facility isn't just about passing an inspection. It’s about guest safety, brand reputation, and creating a space where everyone—customers and staff—feels respected and secure.

    This is where you shift from a top-down mandate to a shared mission. The daily audit becomes less about catching mistakes and more about reinforcing standards together.

    Flowchart illustrating the Daily Audit Process with three steps: Check, Score, and Equip.

    As the workflow shows, it’s a simple, powerful loop: check the standard, score the performance, and equip the team to succeed the next time. This cycle reinforces accountability every single day.

    Fostering a Culture of Ownership

    Ownership takes root when accountability is consistent and feedback is constructive. Inspections should feel like coaching opportunities, not moments for blame. When a spot-check turns up a dirty counter, frame it as a shared problem to solve, not a personal failure.

    A simple, "Hey, looks like the front desk got hit hard during the lunch rush. Let's get it wiped down," is collaborative. It reinforces the standard without putting anyone on the defensive. For a deeper dive into building this kind of positive environment, check out our guide on staff training best practices.

    Celebrating wins is just as important. When a department or an individual consistently nails their audits, recognize it publicly. A little acknowledgment validates their hard work and shows the rest of the team what great looks like.

    Empowering Your Team with the Right Tools

    Motivation skyrockets when you make it easy for your people to do the right thing. This is where the strategic placement of cleaning supplies—especially high-quality disinfectant wipes—becomes a total game-changer. For this to work, you need a product that can stand up to heavy use. We recommend Wipes.com Disinfectant Wipes, which are specifically formulated for the demands of a commercial environment.

    Just think about these real-world scenarios:

    • Gyms: Put wipe dispensers right next to every cardio machine and at the entrance to the free weights area. Suddenly, you've empowered both members and staff to clean equipment before and after use, turning hygiene into a shared responsibility.
    • Schools: Place wipe stations in classrooms, cafeterias, and libraries so teachers and students can quickly disinfect desks and tables, especially during cold and flu season.
    • Offices: Equip conference rooms and shared kitchens with their own wipe supplies. This encourages employees to maintain common areas without having to hunt down the cleaning cart.

    The big idea here is to remove friction. When the right tool is within arm's reach, the behavior you expect becomes the easiest path to take. Your staff stops being passive cleaners and becomes proactive hygiene advocates.

    This investment in training and tools isn't just about looking good—it has a proven financial upside. Ask any facility director; they know that poor sanitation carries risks just as serious as safety violations. OSHA's 2024 enforcement data showed that 34,696 workplace inspections led to $131.4 million in fines. That's a loud and clear message that neglect has a price tag. You can learn more about their findings and impact to see just how serious they are.

    Ultimately, when you prioritize great training, offer constructive feedback, and equip your team for success, cleanliness becomes a shared value—a cornerstone of your business that everyone is proud to uphold. That's the true power of inspecting what you expect.

    Leveraging Inspection Data for Continuous Improvement

    Cartoon man inspecting data on a tablet, with a magnifying glass showing microscopic views.

    A good inspection program doesn’t just find dirt; it generates data. And that data is your single most powerful asset for taking your facility from "good enough" to truly great. When you inspect what you expect, the scores, notes, and patterns you gather aren't just numbers on a clipboard. They become a strategic roadmap, showing you exactly where to focus your efforts for smarter, more efficient operations.

    The goal here isn’t to catch people messing up. It’s to spot the cracks in your system. If the same area consistently scores low, it’s rarely about a lazy employee. It’s more likely a sign of an unrealistic cleaning schedule, the wrong tools for the job, or a gap in training. Data helps you stop guessing and start solving the root cause of the problem.

    Turning Numbers into Actionable Insights

    Every piece of data tells a story. A simple weekly audit report can instantly show you that the main entrance fails its inspection every single Monday morning. Armed with that insight, you can tweak the weekend cleaning protocol or adjust staffing for that peak arrival time. Problem solved before it even starts.

    This data-driven approach is make-or-break for businesses where first impressions are everything. The global Testing, Inspection, and Certification (TIC) market skyrocketed to USD 256.9 billion in 2024 for a reason: quality assurance is in high demand.

    Sales Tip: Use data to close deals. For janitorial or cleaning supply sales professionals, offer a trial period where you help a potential client set up a basic inspection checklist. Track the scores for two weeks. Showing a client a report that proves your program and products boosted their facility's audit scores by 20% is far more persuasive than any sales pitch. You’re no longer just selling a service; you’re selling a measurable improvement.

    For larger or more complex facilities, innovative approaches like drone inspection services are even emerging to gather more comprehensive data, proving how critical this information has become.

    Creating a Weekly Cleanliness Dashboard

    A weekly cleanliness dashboard is one of the most effective ways to turn raw data into real progress. It doesn’t have to be complex. A simple spreadsheet or a chart on a whiteboard in the breakroom can do the trick.

    This dashboard should track a few key metrics:

    • Overall Facility Score: A quick glance at the average score from all inspections that week.
    • Top Performing Area: Celebrate what's working to boost morale.
    • Area for Improvement: This highlights the zone that needs the most attention.
    • Week-Over-Week Trend: Is the overall score trending up or down? A simple arrow is all you need.

    A visual report like this is a great way to track weekly scores and identify where your team should focus its efforts.

    Sample Weekly Sanitation Audit Report

    Area Inspected Target Score Monday Score Wednesday Score Friday Score Notes for Improvement
    Main Lobby 95% 80% 92% 96% Low Monday scores due to weekend traffic. Increase cleaning frequency on Sunday nights.
    Public Restrooms 90% 88% 85% 91% Soap dispensers in men's room ran out on Wednesday. Check stock levels daily.
    Staff Breakroom 90% 95% 96% 98% Excellent performance. Team is taking ownership of the space. Keep it up!
    Gym Floor 85% 82% 80% 78% Scores consistently low. Members not wiping equipment. Add signage and relocate wipe station for better visibility.

    This kind of focused tracking makes it clear what needs to happen next, turning abstract goals into concrete actions.

    Your audit data is a feedback loop. It tells you what's working, what's not, and where to focus your resources. Ignoring it is like flying blind—you're moving, but you have no idea if you're heading in the right direction.

    By analyzing your inspection data, you can optimize schedules, put resources where they’re actually needed, and build a culture of accountability. You transform sanitation from a reactive chore into a proactive system for excellence.

    Got Questions? We've Got Answers.

    Even the most buttoned-up plans run into real-world questions. When you’re rolling out a new sanitation program, questions are actually a great sign—it means your team is engaged and thinking through the details. Tackling these common hurdles head-on is how an "inspect what you expect" system goes from a good idea to a daily reality.

    Let's walk through some of the most frequent questions from facility managers, business owners, and sales teams.

    How Often Should We Really Be Inspecting?

    This is always the first question, and the answer is never one-size-fits-all. The right frequency depends entirely on your facility's traffic and purpose.

    High-traffic, high-touch "danger zones"—think gym equipment, retail checkout counters, or restaurant tables—demand daily, or even multi-daily, spot-checks. These areas are non-negotiable because they completely shape a customer's perception of your hygiene.

    On the other hand, less-trafficked zones like office conference rooms or back-of-house storage might only need a formal inspection a few times a week. The trick is to start with a baseline—say, daily checks on your top five high-touch zones—and then let the data guide you. If an area keeps scoring poorly, up its inspection frequency until the standards stick.

    The goal here is proactive maintenance, not reactive cleaning. Good inspections should catch problems long before they ever reach a customer's eye.

    What’s the Best Way to Get Staff on Board with This?

    You can have the best checklists in the world, but without your team's buy-in, they’re just paper. Getting them on board is everything.

    First, explain the "why." Don't just hand them a clipboard. Frame it as a shared goal: protecting customer safety, boosting the brand's reputation, and honestly, making it a better, more pleasant place for everyone to work.

    Then, bring your frontline staff into the process of creating the checklists. They know the trouble spots better than anyone. This one simple move transforms the program from a top-down mandate into a collaborative effort. Their insights are pure gold.

    Most importantly, make it clear that inspections are a tool for support and training, not punishment. When a standard is missed, it's a coaching opportunity. When a team consistently nails their scores, shout it from the rooftops. Public recognition turns accountability from a chore into a point of pride.

    My Business Is Small—Do I Still Need a “Formal” Program?

    Absolutely. But "formal" doesn't have to mean complicated. For a small business, a formal program might just be a simple, one-page checklist the owner or manager walks through at the end of each day. The principle of "inspect what you expect" scales to any size.

    Consistency is what builds trust, and for a small business, it’s a massive competitive advantage. Whether it's a small café, a boutique shop, or a local office, ensuring the same standard of clean is met every single day, no matter who’s on shift, is critical.

    • Cleaning Tip for Small Businesses: Use disinfectant wipes on your top three high-touch surfaces (like the door handle, payment terminal, and main counter) at set intervals throughout the day. It’s a small action with a huge impact on customer perception.
    • Sales Tip for Small Business Clients: If you sell cleaning supplies, bundle a "Small Business Starter Kit" with a sample checklist and a pack of durable disinfectant wipes. You're not just selling a product; you're selling a complete, easy-to-implement hygiene solution.
    • Facility-Specific Suggestion (Restaurant): A manager can perform a five-minute "closing audit" each night, wiping down condiment stations, table edges, and POS screens. This ensures the restaurant is ready for a perfect morning opening.

    By integrating a simple tool like disinfectant wipes with a quick verification step, you build a powerful, efficient system. It upholds your standards, reassures your customers, and proves that a commitment to excellence is smart business, no matter the size.

    Ultimately, a commitment to cleanliness, verified through consistent inspection, is one of the most powerful statements a business can make. It tells customers they are valued and safe. We encourage you to prioritize cleanliness in your facility—consider integrating a robust inspection plan and high-quality disinfectant wipes into your daily routine or product offerings today.

  • The Power of Clean: How Lemon Scents and Disinfectant Wipes Elevate Your Facility

    A fresh scent does more than just cover up old odors. In a commercial or public facility, it sends a powerful psychological signal: this space is truly clean and sanitized. A bright, zesty aroma like lemon is so strongly linked with cleanliness that it has become a secret weapon for businesses looking to boost guest confidence, build trust, and create a safer environment.

    But a pleasant scent is only half the story. True cleanliness starts at the surface level. Pairing an effective scent strategy with a robust disinfection protocol—especially using high-quality disinfectant wipes—is the key to creating a space that isn't just perceived as clean, but is genuinely hygienic.

    How Scent and Sanitation Shape Customer Perception

    Floor plan illustrating lemon scent points and air circulation in a lobby, gym, and restroom.

    The link between a lemon scent and a feeling of "clean" isn't random—it's been wired into our brains for decades. Cleaning products have used lemon for so long that we’ve built a powerful sensory association. When guests, clients, or employees smell that crisp citrus aroma, it triggers an instant, subconscious thought: this area was just cleaned, and cleaned well.

    This mental shortcut is a huge asset for any business owner or facility manager. A consistent, pleasant scent can completely elevate the customer experience, making people feel safer and more at ease in your space. This is especially true in high-traffic places like gyms, offices, and retail stores where you only get one chance to make a great first impression.

    The Science Behind Scent and Cleanliness

    Scent is hardwired directly to the parts of our brain that handle memory and emotion. This means a smell can bring back feelings and memories in a split second. The sharp, clean profile of a lemon air freshener is brilliant at cutting through stale air and knocking out unpleasant odors, leaving behind a scent that everyone recognizes as fresh and hygienic.

    A well-planned scent program isn't a replacement for actual cleaning. Think of it as the final, powerful reinforcement—the sensory proof that a space isn't just tidy, but genuinely sanitized with tools like disinfectant wipes.

    For instance, imagine your team has just meticulously disinfected all the high-touch surfaces in a fitness center—doorknobs, countertops, and every piece of equipment. Adding a light lemon scent right after finishes the job. It turns the invisible act of disinfecting into a tangible, reassuring experience for the next person who walks in.

    Market Trends and the Staying Power of Citrus

    The growing preference for citrus scents in commercial spaces isn't just a guess; it's backed by some serious market trends. The global air freshener market has soared to USD 13.4 billion, with citrus fragrances being a major driver of that growth. It’s no surprise, then, that facilities using citrus scents often report higher guest satisfaction scores. The aroma is just that good at neutralizing the common, stubborn odors you find in public spaces.

    To really get why these bright notes work so well, it's worth exploring the characteristics of citrus scents. This insight helps managers pick the perfect scent profile to project an image of impeccable cleanliness, turning a simple air freshener into a core part of their brand and sanitation strategy.

    Creating Your Facility Cleanliness Blueprint

    Before you even think about ordering supplies, you need a plan. Scenting and sanitizing a facility isn't about blasting fragrance into the air and hoping for the best; it’s about strategic precision. The first step is to conduct a "cleanliness audit" to build your blueprint—a map that will guide every decision you make.

    A cleanliness map is a detailed plan of your building that pinpoints exactly where fragrances should be used and which surfaces require frequent disinfection. It takes everything into account, from the flow of foot traffic to hidden odor sources and high-touch points. Without one, you're just guessing, which leads to wasted product, spotty coverage, and—worst of all—guest complaints. The goal here is a subtle, consistent, and welcoming experience from the moment someone walks in the door.

    First, Identify High-Impact Zones

    Put on your customer goggles and walk through your facility. Your top priority is to find the high-impact zones—the places that form first impressions and see the most people. These are the non-negotiable spots for both your lemon air freshener and your disinfectant wipes.

    • Entryways and Lobbies: This is ground zero for the sensory experience. A crisp lemon scent right at the entrance immediately signals a clean and well-maintained space. Don't forget to wipe down door handles, reception desks, and any touch screens.
    • Restrooms: An obvious one, but absolutely critical. Nothing sinks guest satisfaction faster than a funky restroom. A clean, fresh scent is paramount, as is regular disinfection of faucets, flush handles, and stall doors.
    • Hallways and Corridors: These are the arteries of your building. Consistent scenting in these transitional spaces prevents "scent dead zones," while regular wipe-downs of handrails and elevator buttons maintain hygiene.
    • Common Areas (e.g., Gyms, Break Rooms): These spaces are hubs of activity. For gyms, focus on wiping down equipment between uses. In office break rooms, target countertops, microwave handles, and coffee machines. For more specific advice, check out our guide on using air fresheners in small spaces.

    This simple graphic shows exactly how our brains connect that lemon scent to a feeling of clean.

    Flowchart illustrating the scent perception journey: brain, detection (lemon), and clean signal (sparkles).

    It’s a direct line from scent detection to the brain’s "all clear" signal, telling guests your facility is sanitized and safe.

    Next, Pinpoint Problem Areas

    Okay, now shift your focus from high-traffic areas to specific problem spots. These are the locations where bad smells are born and germs congregate, requiring a more targeted attack. Trust me, neutralizing odors and germs at the source is always more effective than just trying to cover them up.

    Hunt down these common culprits in your facility:

    • Waste Disposal Areas: Trash rooms, dumpsters, and even unassuming garbage cans can pump out powerful odors that travel surprisingly far.
    • Locker Rooms and Gyms: The trifecta of sweat, damp towels, and old gym shoes creates a uniquely challenging scent environment that needs direct intervention with both air care and surface disinfection.
    • Kitchens and Break Rooms: Between yesterday's fish lunch and the overflowing food waste bin, these areas are potential smell and germ factories.
    • Retail Checkouts & POS Systems: These are among the highest-touch areas in any retail store. Frequent cleaning with disinfectant wipes is essential to reduce germ transmission between staff and customers.

    A restaurant's cleanliness map will focus on disinfecting tables, menus, and condiment dispensers, while a school must prioritize wiping down desks, doorknobs, and shared learning tools. Tailor your map to your facility's unique function.

    Finally, Factor in Airflow and Ventilation

    Your cleanliness blueprint isn't complete until you account for your building's HVAC system. Air circulation can be your greatest ally or your worst enemy in a scenting program. Knowing how air moves is the key to getting even, consistent coverage.

    Walk the floor and note the location of air vents, returns, and any natural drafts from doors or windows. Placing a dispenser near an air return, for example, can help distribute the air freshener lemon scent beautifully across a large area. On the flip side, putting one right under a powerful vent will just blow the fragrance away too fast, creating an overpowering pocket of scent while wasting product.

    When you understand your facility's airflow, you turn your HVAC system into an active part of your scent delivery network. That’s how you get a balanced, pleasant environment for everyone.

    Choosing the Right Tools for the Job

    A person wearing an apron and gloves cleans a counter with a spray, surrounded by wipes and an air vent.

    Once you’ve mapped out where you need to focus, the next big decision is how you’ll deliver cleanliness. This is where your tools come in, and the systems you choose will make or break your program’s effectiveness, budget, and day-to-day maintenance load.

    Let’s be clear: a one-size-fits-all approach is doomed to fail. The quiet, elegant diffuser that works beautifully in a boutique hotel lobby would be completely useless in a noisy, high-traffic stadium restroom. Getting this right is all about matching the right tool to the right job.

    Scent Delivery: Automatic Aerosol Dispensers

    Think of automatic aerosol dispensers as the undisputed workhorses of commercial scenting. These are the battery-operated units you see mounted high on walls, programmed to release a measured burst of fragrance every 15, 30, or 60 minutes. Their biggest advantage is raw power. They’re fantastic at covering large, open areas and knocking down persistent odors in tough spots like restrooms, locker rooms, and waste disposal areas.

    But that power comes with a few trade-offs. The distinct "psst" sound can be distracting in quieter environments like a spa or a focused office. They also create a recurring operational task—your staff will need to stay on top of replacing both the aerosol cans and the batteries.

    Pro Tip: Always mount aerosol dispensers high on the wall, ideally between seven and nine feet from the floor. This lets the fine mist ride the natural air currents and disperse widely, instead of just settling on the surfaces directly below.

    Scent Delivery: Electric Diffusers and Nebulizers

    For spaces where ambiance is everything, electric diffusers offer a much more refined, subtle touch. These devices use ultrasonic tech or nebulization to break down essential oil-based liquids into a micro-fine, invisible mist. The result is a consistent, smooth scent that feels more like part of the environment and less like an obvious air freshener.

    This makes them the perfect choice for luxury retail stores, upscale hotel lobbies, and premium office spaces where every detail matters.

    A few key benefits stand out:

    • Silent Operation: They blend seamlessly into the background without making a sound.
    • Controlled Intensity: Most models let you dial in the exact scent strength and set specific operating hours.
    • Aesthetic Design: Modern diffusers are often sleek and stylish, designed to complement high-end decor, not clash with it.

    The main drawback? Their coverage area is typically smaller than what a powerful aerosol can handle. If you're tackling a massive space, we have a great guide that explores options for a commercial air freshener for large areas in more detail.

    Surface Sanitation: Disinfectant Wipes

    For surface hygiene, nothing beats the efficiency and effectiveness of disinfectant wipes. They are a one-step solution that cleans and disinfects, removing the need for separate sprays and cloths. This not only saves time but also ensures a consistent application of disinfectant every time. Placing dispensers in high-traffic areas empowers both staff and customers to maintain a clean environment.

    For a reliable, EPA-registered solution that is tough on germs but safe for surfaces, we recommend Wipes.com Disinfectant Wipes. They are ideal for quick, effective cleaning of everything from gym equipment to office desks and retail counters.

    Air Freshener and Cleaning Tool Comparison

    To make your decision a little easier, I’ve put together a quick-reference table that breaks down the best uses for each type of system. Think of it as a cheat sheet for aligning the technology with your facility’s unique needs.

    System Type Best For Coverage Area Maintenance Level Sales Tip
    Automatic Aerosol Restrooms, gyms, loading docks Large (up to 6,000 cu. ft.) Moderate (regular refills) Highlight odor control in problem areas.
    Electric Diffuser Lobbies, spas, retail showrooms Medium (up to 2,000 cu. ft.) Low (infrequent refills) Sell as a premium branding tool.
    Disinfectant Wipes All high-touch surfaces N/A Low (replace rolls) Position as an investment in health & safety.

    Ultimately, picking the right tools comes down to matching the tech to the territory. By thinking through your space, your budget, and the kind of experience you want to create, you can select the perfect hardware to bring your air freshener lemon and hygiene strategy to life.

    Weaving Scent and Sanitation into Your Daily Routine

    Look, a smart cleanliness program isn't about covering up problems. It's about showing off the hard work your team is already doing. When you integrate a lemon air freshener and disinfectant wipes into your janitorial routine, the process becomes a powerful, visible signal that a space isn’t just tidy—it’s truly clean. It’s the missing link between the act of cleaning and the feeling of clean that customers remember.

    The best way to do this? Reframe scent as the very last step in your cleaning process. After every surface is wiped, scrubbed, and disinfected, a light, crisp lemon mist acts as the sensory proof of that effort. This clean-then-scent method creates a one-two punch that reassures guests and employees on a gut level.

    Syncing Scent with Janitorial Schedules

    For this to work, your scent and wipe program has to flow with your cleaning schedule, not fight against it. This is all about timing the scent delivery to follow key cleaning moments and ensuring wipes are readily available. The goal is to refresh the air and surfaces right after the most intensive tasks are done, locking in that “just-cleaned” vibe.

    Here are a few tactics that actually work:

    • The Final Touch: Train staff to use the lemon scent as the very last thing they do before leaving a room. Imagine a restroom that’s just been scrubbed and sanitized with wipes. A final spritz ensures the next person to walk in is greeted with an unmistakable fresh, clean aroma. It’s simple, but it’s a game-changer.
    • High-Traffic Touch-Ups: During peak hours, have your team do quick "scent and sanitize" rounds. This is a quick wipe-down of high-touch spots like door handles, elevator buttons, and reception desks with disinfectant wipes, immediately followed by a light mist of lemon scent. It keeps the feeling of clean going all day long.
    • The Overnight Reset: For those stubborn odor zones like locker rooms or waste disposal areas, set automated dispensers to run a bit heavier overnight. This gives the scent time to neutralize tough smells while the facility is empty, guaranteeing a fresh start every single morning.

    When you coordinate things this way, your hygiene investment directly highlights your sanitation efforts, making your entire cleaning program more visible and appreciated.

    Training Staff on the Culture of Clean

    Your cleaning staff are the ambassadors of your facility’s hygiene. If you empower them with the right mindset and techniques, your cleanliness program will be a consistent success. The key is teaching them that they aren't just "spraying an air freshener" or "wiping a counter"—they are completing the sanitation loop and protecting the health of every person in the building.

    Think about a gym employee who wipes down a treadmill with a disinfectant wipe, leaving it visibly clean. Then, they finish with a light lemon mist in the surrounding air. That simple, two-second action turns a routine task into a clear, reassuring signal of hygiene for the next member.

    This dual approach is absolutely critical for maintaining top-notch standards. When your team grasps this concept, cleaning stops being a chore and becomes a powerful communication tool.

    The market backs this up. The citrus scent category is projected to explode from USD 3.0 billion to USD 5.5 billion by 2035, showing just how much people associate it with commercial sanitation. This is especially true in fitness centers, where 60% of members say bad odors are a major reason they'd quit. We've seen lemon diffusers boost member retention by as much as 18%. Why? Because a bright lemon aroma can neutralize up to 85% of VOCs from workout gear and even cut down on bacterial growth on surfaces by 30% when used with proper wipe-down protocols. You can dive deeper into the market data by reading the full research on air freshener trends.

    Sales Tip: Promoting Hygiene as an Investment

    For sales professionals in the cleaning industry, framing hygiene as a return on investment (ROI) is crucial. Don't just sell wipes; sell the confidence and safety they provide. Explain to clients that visible cleaning efforts, like providing disinfectant wipes for customers in a gym or retail store, can directly increase customer loyalty and dwell time. Educate them on the hygiene ROI: a small investment in wipes can prevent costly sick days for staff and build a reputation for being a business that cares about well-being.

    Managing Health, Safety, and Allergen Concerns

    Let's be clear: a scent and sanitation program is about creating a great guest experience, but safety for both your guests and staff has to be the absolute priority. While a fresh lemon scent is almost universally loved, a smart and responsible strategy means planning for the small percentage of people with sensitivities.

    It all comes down to being proactive. Making thoughtful choices about your products, ventilation, and communication from the start shows a genuine commitment to the well-being of everyone who walks through your doors. This isn't just about avoiding complaints; it's about building trust.

    Navigating VOCs and Allergen Sensitivities

    One of the biggest concerns in commercial air care is Volatile Organic Compounds (VOCs). These are chemicals that can be emitted from all sorts of products, including some lower-quality air fresheners. For anyone with asthma, chemical sensitivities, or other respiratory issues, VOCs can be a real problem.

    This is where your product choice becomes non-negotiable. Not all air fresheners are made the same.

    • Look for Low-VOC Formulations: Actively seek out air freshener lemon products that are clearly labeled as low-VOC. Reputable manufacturers who care about safety will make this information easy to find.
    • Lean into Natural Essential Oils: Consider systems that use natural lemon essential oils instead of purely synthetic fragrances. These are often perceived as cleaner and can be better tolerated, but remember, even natural oils can be an allergen for some people. It's about reducing risk, not eliminating it entirely.

    The goal isn't just to make your facility smell clean—it's to ensure the air is clean. Choosing high-quality, low-VOC products is the first and most critical step.

    The Critical Role of Ventilation and Saturation

    Even the best, safest product can become an issue if you're pumping too much of it into a stuffy room. The two most common mistakes I see facilities make are oversaturating the air and completely ignoring airflow. Getting this right is simple, but it's absolutely essential for a safe scent program.

    Oversaturation is a control issue. Modern delivery systems, especially professional electric diffusers, give you precise command over the scent's intensity and timing. You can program them to dial it back during busy hours or shut off completely overnight. This is how you prevent that heavy, cloying fragrance that triggers nearly all scent-related complaints.

    Good ventilation is your best friend here. Your HVAC system does more than just heat and cool; it circulates and refreshes the air. A well-ventilated space helps the lemon scent disperse gently and evenly, preventing "hot spots" where the fragrance is too concentrated. Before you launch, do a quick check to make sure your ventilation system is clean and running as it should.

    Transparent Communication Is Key

    Honestly, one of the most powerful tools you have for managing potential allergen concerns is just being open about it. A small, professionally designed sign can make a huge difference for guests with sensitivities. It shows you’re being thoughtful and that you care about their comfort.

    Think about placing a small sign at the entrance or reception desk with simple, reassuring language.

    Example Signage Text:

    "To enhance your experience, our facility is scented with a light, natural lemon aroma. We use high-quality, low-allergen essential oils. Please speak with a staff member if you have any questions or concerns about our air care program."

    This small gesture accomplishes two things. First, it gives sensitive individuals a heads-up. Second, it frames your scenting program as a deliberate, professional choice—not just a can of air freshener. It transforms a potential issue into a positive statement about your facility's high standards.

    Measuring the ROI of Your Cleanliness Strategy

    So, you've rolled out a brilliant scent and sanitation program. The facility smells and looks great. But is it actually working for your bottom line? A strategic cleanliness program isn't just another line item on the expense report; it's a direct investment in customer experience and brand perception. Proving its value, however, means looking beyond the cost of supplies and connecting that fresh, clean environment to tangible business results.

    This process starts by tracking the human side of the equation—the qualitative metrics. We're talking about the data points that reveal how people feel about your space. You can pull this information together using a mix of direct and indirect methods.

    Tracking Qualitative Data

    The most straightforward way to see the impact is to listen to what your guests are already telling you. Start monitoring your existing feedback channels for any mention of your facility's atmosphere, ambiance, or cleanliness.

    • Guest Satisfaction Surveys: Tweak your current surveys to include a simple question about the environment. Look for an uptick in positive comments like "smells clean," "feels fresh," or "I feel safe here" after the new program goes live.
    • Online Reviews: Keep a close eye on Google, Yelp, and any other review platforms relevant to your industry. A drop in complaints about musty odors or a jump in positive remarks about the fresh, clean environment is a clear win.
    • Social Media Mentions: Don't forget to monitor social media tags and mentions. Customers love to share their experiences, and a comment about how pleasant and hygienic your facility feels is a powerful, organic testimonial.

    A fitness center might see a 10% increase in positive social media tags mentioning "cleanliness" after introducing disinfectant wipe stations and a lemon scent. A retail store could see its survey scores for "in-store experience" climb. These are the data points that build a compelling case for your cleanliness strategy.

    Connecting Cleanliness to Sales and Loyalty

    For sales professionals, this kind of qualitative data is pure gold. When you're talking with a client, it lets you shift the conversation from cost to value. You can frame the investment in a comprehensive hygiene solution as a proven tool for boosting customer retention and driving repeat business.

    A powerful tip is to present this data as a direct link to financial outcomes. For instance, you can explain how higher satisfaction scores are directly correlated with increased customer loyalty and lifetime value.

    And while a fresh lemon scent does wonders for perceived cleanliness, it's also a great jumping-off point to discuss comprehensive indoor air quality solutions that manage health, safety, and allergen concerns. This approach further builds customer trust and shows you're thinking about the bigger picture.

    Ultimately, demonstrating ROI is about telling a story with data. When you can show how a simple, fresh scent and visible sanitation translate into happier customers, better reviews, and a stronger brand reputation, you've proven that your cleanliness program is an essential business asset.

    Prioritize cleanliness today. By integrating a smart scent strategy with effective tools like disinfectant wipes, you're not just cleaning—you're building confidence, loyalty, and a healthier environment for everyone.

  • Your Guide to Nitrile Covered Gloves and Facility Cleanliness

    Think of nitrile-covered gloves and disinfectant wipes as the one-two punch for facility hygiene. In any professional setting where cleanliness is non-negotiable, these tools have become the gold standard. Nitrile gloves offer a robust shield against chemicals and contaminants, while disinfectant wipes ensure surfaces are sanitized, not just clean. This combination is a powerhouse for any business that takes public health seriously.

    Why a Proactive Hygiene Strategy is Your First Line of Defense

    In busy environments like offices, gyms, and retail stores, keeping things clean isn't just a chore—it’s a direct reflection of your brand’s commitment to safety. Nitrile-covered gloves are the frontline soldiers in this effort, providing a reliable barrier that protects your staff during the cleaning process. When paired with effective disinfectant wipes, you create a comprehensive system for eliminating pathogens.

    Unlike the latex or vinyl gloves of the past, nitrile brings a unique mix of strength, flexibility, and chemical resistance. Made from a synthetic rubber, nitrile is tougher and more puncture-resistant, making it the perfect choice for handling harsh cleaning chemicals or wiping down high-touch surfaces.

    The Clear Advantage Over Other Materials

    For years, latex was the go-to glove, but its reputation suffered due to common and sometimes severe allergic reactions. Vinyl gloves emerged as a cheap alternative, but they offer flimsy protection against punctures or tough substances. This is where nitrile truly shines.

    Nitrile gloves aren't just an alternative; they are a significant upgrade in personal protective equipment. Their synthetic makeup completely sidesteps the allergy risks of latex while delivering a level of durability that vinyl just can't touch.

    So, when it comes to disposable gloves, what's the real difference between the big three? Let's break it down. This quick comparison shows why nitrile has become the professional choice for modern sanitation.

    Nitrile vs. Latex vs. Vinyl Gloves at a Glance

    Feature Nitrile Gloves Latex Gloves Vinyl Gloves
    Material Synthetic Rubber Natural Rubber Synthetic Plastic (PVC)
    Puncture Resistance Excellent Good Poor
    Chemical Resistance Excellent Fair Poor
    Allergy Risk Very Low High (Latex Allergy) Very Low
    Durability High Moderate Low
    Comfort & Fit Excellent (forms to hand) Excellent (like a second skin) Loose & less sensitive
    Best For Demanding jobs, chemical handling, medical use, sanitation Medical exams, light-duty tasks (where allergies aren't a concern) Food prep, very light cleaning (low-risk tasks)

    As you can see, while latex and vinyl have their places, nitrile stands out for its all-around performance, making it the most reliable option for facilities where safety and professionalism are paramount.

    Nitrile-covered gloves are now a cornerstone of infection control in high-traffic facilities where guest safety is the top priority. Think about a car dealership, where staff touch everything from door handles to steering wheels. The superior puncture resistance of nitrile—up to three times that of latex—is critical for stopping cross-contamination in its tracks. In fact, research consistently shows that proper glove use dramatically cuts down on pathogen spread, a benefit that fits perfectly into modern sanitation protocols. You can find more details on how nitrile is reshaping the market in this in-depth industry report.

    A Visible Signal of Professionalism

    Beyond the technical specs, the simple act of using nitrile gloves and disinfectant wipes sends a powerful message. It visibly shows customers and clients that you are committed to hygiene and meticulous care.

    When a customer sees a team member in a gym putting on fresh gloves before wiping down equipment, it builds instant trust and elevates their perception of your business. This small action turns a basic safety measure into a tool for building your brand's reputation. Nitrile gloves are a vital piece of a complete safety strategy, and exploring other safety equipment categories can help build out your facility's total protection plan.

    How to Select the Right Nitrile Glove

    Choosing the right nitrile covered gloves is a lot more than just grabbing a box off the shelf. It’s a strategic decision that directly impacts your team's safety, their efficiency, and your bottom line. Not all gloves are created equal, and understanding a few key features will help you move from simply buying gloves to investing in the right protection.

    The world of safety gloves can seem packed with technical jargon, but you really only need to zero in on a few critical factors to make a smart choice. We're talking about thickness, safety ratings, and surface texture. Get these right, and you ensure your staff has the proper tool for the job, whether they’re doing a light wipe-down or handling aggressive chemicals.

    Decoding Glove Thickness

    The most common way to measure a glove's durability is its thickness, which is expressed in mils (one-thousandth of an inch). This single number tells you a whole lot about what that glove was designed to do. Thinking about it in terms of task intensity makes the whole selection process way simpler.

    • 3-4 Mil Gloves: These are your workhorses for light-duty tasks. They offer fantastic tactile sensitivity, making them perfect for general cleaning, food service, or any job where dexterity is more important than sheer strength.
    • 5-6 Mil Gloves: This mid-range thickness strikes a great balance between protection and flexibility. It’s a solid, all-around choice for janitorial staff, automotive techs, or anyone dealing with moderate exposure to chemicals and potential punctures.
    • 8+ Mil Gloves: When the job involves harsh chemicals, abrasive surfaces, or a high risk of tearing, you need to bring in the heavy-hitters. An 8-mil or thicker glove is essential for these industrial-grade applications, offering maximum protection and durability.

    Picking the right mil thickness is all about matching the glove to the hazard. Using an 8-mil glove for a light task is just wasting money, but using a 4-mil glove for a tough job is a serious—and totally preventable—safety risk.

    Understanding Safety Certifications

    Those letters and numbers on the box aren't just for show. Safety certifications are your guarantee that a glove meets specific, rigorous performance standards. Always look for ratings from recognized bodies like ASTM (American Society for Testing and Materials) or EN (European Norms) on the packaging.

    These standards test for critical performance metrics, including:

    1. Puncture Resistance: How well the glove stands up to sharp objects.
    2. Chemical Permeation: How long a glove can resist a specific chemical before it finally breaks through.
    3. Abrasion Resistance: The glove’s ability to withstand wear and tear from friction.

    A glove that meets these standards provides verified, tested protection, which gives you compliance and peace of mind. For a deeper dive into the different materials out there, you can read our guide on disposable latex-free gloves, which offers more context on material science.

    The Importance of Texture and Grip

    The surface of a glove is just as critical as its thickness. A smooth glove might be fine in dry conditions, but the second you add water, oil, or cleaning solutions, it becomes a liability. This is where a textured finish makes all the difference.

    This helpful decision tree breaks down glove choice by key factors like allergy risk, puncture needs, and budget.

    Decision tree flowchart guiding glove selection based on allergy risk, puncture need, and budget.

    As the flowchart shows, nitrile is often the go-to choice when you need solid puncture resistance and have to avoid latex allergies.

    Gloves with a fully textured or fingertip-textured surface provide a much better grip in wet or oily environments. This feature is non-negotiable in settings like commercial kitchens, auto repair shops, or pool clubs where staff are constantly handling slippery items. That enhanced grip doesn't just improve safety by reducing accidental drops—it gives the user more control and confidence to get the job done right.

    Putting Smart Cleaning Protocols into Practice

    Stocking nitrile covered gloves and disinfectant wipes in a supply closet is one thing. Building a true culture of cleanliness is another. An effective cleaning program isn’t just about having supplies available; it’s about having a clear, actionable plan for how and when they’re used. This turns them from simple inventory items into frontline tools for managing risk.

    Think about it: an office has completely different hygiene demands than a local gym. A retail store grapples with different contaminants than a school. The key is to create a playbook tailored to your facility's unique rhythm and risks. By developing specific checklists and procedures, you empower your team to clean correctly every single time, protecting both your staff and your customers.

    Four panels showing gloved hands touching surfaces at an airport, gym, car, and rental.

    Offices and Commercial Buildings

    In office environments, the goal is to prevent the spread of illness among employees to maintain productivity. The focus is on shared spaces and high-touch items.

    • Conference Rooms: Tables, chair arms, remotes, and conference phones should be wiped down after every meeting.
    • Kitchenettes & Break Rooms: Appliance handles (microwave, fridge), coffee pot handles, and countertops are germ hotspots. These need daily, if not more frequent, disinfection.
    • Desks & Workstations: Encourage a "clean desk" policy. Staff should use disinfectant wipes on their phones, keyboards, and mice regularly.

    Gyms and Fitness Centers

    Gyms are a unique mix of sweat, germs, and powerful cleaning chemicals. A smart glove and wipe strategy protects staff from all three, ensuring both personal and equipment hygiene are top-notch.

    • Equipment Wipe-Downs: Any staff member cleaning dumbbells, cardio machines, or weight benches needs to wear nitrile gloves. Provide members with easy access to disinfectant wipes to clean equipment before and after use.
    • Locker Room Sanitation: This is ground zero for moisture-loving microbes and strong disinfectants. Cleaning showers, floors, and lockers requires gloves to prevent cross-contamination and protect skin.
    • High-Touch Surfaces: Focus on front desk counters, water fountains, and door handles, cleaning them multiple times throughout the day.

    Schools and Educational Facilities

    From daycare centers to universities, preventing outbreaks is a top priority. A systematic cleaning routine is essential.

    • Classrooms: Desks, chairs, doorknobs, and light switches should be wiped down daily. In younger grades, shared toys and supplies require frequent disinfection.
    • Cafeterias: Tables and condiment dispensers must be sanitized between lunch periods.
    • Restrooms: Public restrooms are a constant battle. Staff need to be gloved up for every task, from restocking paper towels to deep cleaning fixtures.

    For these fast-paced environments, frequent cleaning is non-negotiable. It's also critical to pair glove use with a powerful surface disinfectant. We recommend using Wipes.com Disinfectant Wipes to quickly sanitize high-traffic areas before and after gloved tasks.

    Restaurants and Retail Stores

    For restaurants and retailers, customer perception of cleanliness directly impacts sales. A visible and consistent cleaning protocol is key.

    • Point-of-Sale (POS) Systems: Touchscreens and credit card keypads are among the most-touched surfaces. They require frequent wiping throughout the day.
    • Shopping Carts & Baskets: A dedicated staff member should be assigned to wipe down cart handles as they are returned.
    • Fitting Rooms & Restrooms: These areas reflect the store's overall standards. Keep them impeccably clean with regular checks and wipe-downs.

    Understanding where to focus your team's energy is half the battle. To simplify things, we've created a quick-reference table that pinpoints the most critical high-touch areas across different facilities.

    High-Touch Danger Zone Checklist by Facility

    This checklist helps your staff prioritize cleaning efforts where they matter most, stopping germ transmission at its source.

    Facility Type Primary High-Touch Zones Recommended Cleaning Frequency
    Offices & Schools Doorknobs, light switches, keyboards, shared equipment, desks Daily
    Gyms & Fitness Cardio machine controls, free weights, locker handles, water fountains Every 1-2 hours
    Restaurants & Retail POS systems, shopping cart handles, door handles, restroom fixtures Hourly, or more during peak traffic
    Public Venues Check-in kiosks, security bins, escalator handrails, restroom door handles Hourly, or more during peak traffic

    Using this as a guide ensures your team's efforts are targeted and effective, building a foundation of cleanliness that customers can see and feel.

    The market data backs this up. While the initial demand spike of 2020 has leveled out, the market still grew 9.4% annually. This trend is amplified by demographic shifts; with the U.S. elderly population expected to hit 20% by 2030, the demand for clear sanitation standards in public spaces will only grow. The results are clear: facilities that get this right see 22% higher customer satisfaction scores. Some dealerships have even reported a 12% boost in upsells, crediting their spotless showrooms. For a deeper dive, you can read the full market analysis on nitrile glove demand.

    Calculating Your Return on Hygiene Investment (ROI)

    Investing in quality nitrile covered gloves and professional disinfectant wipes can feel like just another line item on a supply budget. But that’s the wrong way to look at it. The real value shows up on the balance sheet when you see these supplies as a strategic investment, not a cost.

    This is where a powerful concept comes into play: the tangible return on hygiene investment, or "Hygiene ROI." It’s a framework that connects your cleaning protocols directly to business outcomes that go far beyond just safety.

    From Staff Well-Being to Customer Confidence

    Let's start with your team. Smart hygiene practices, anchored by reliable protective gear, create a healthier work environment. For your staff, this means a serious drop in work-related health issues and absenteeism. Proper glove use protects hands from harsh cleaning chemicals, preventing skin irritation that leads to discomfort.

    The benefits ripple outward from there. A visible commitment to cleanliness is one of the most powerful signals you can send your customers. When a client sees a team member snap on a fresh pair of gloves before wiping down a surface, it builds immediate, non-verbal trust. That simple action screams professionalism, care, and a dedication to their well-being.

    This boost in customer confidence has a direct impact on your business. Happy customers are more likely to leave glowing online reviews, which bring in new business. They’re also far more likely to become repeat customers, forming a loyal base that drives your revenue.

    Sales Tip: Educating Clients on Hygiene ROI

    For cleaning industry sales professionals, framing hygiene as an investment is a powerful sales tool. Don't just sell wipes and gloves; sell the outcome. Explain to potential clients how a robust cleaning program can:

    • Reduce Employee Sick Days: A healthier workplace is a more productive one.
    • Boost Customer Loyalty: Clean, safe environments encourage repeat business.
    • Enhance Brand Reputation: Visible cleanliness is a powerful marketing tool.
    • Justify Premium Pricing: Customers are willing to pay more for a demonstrably safer experience.

    By shifting the conversation from cost to value, you can more effectively sell comprehensive cleaning solutions, including premium supplies like nitrile-covered gloves and disinfectant wipes, as part of a larger cleaning supply offering.

    It's clear the industry is taking notice. Medline Industries' recent USD 300 million investment underscores the growing demand for a resilient supply chain, ensuring these critical supplies are always on hand.

    By making nitrile gloves and disinfectant wipes a standard part of your operational checklists, you’re not just mitigating health risks—you’re turning cleanliness into a real competitive advantage. You can explore more data on this trend and its impact on facility management.

    Think of it this way: every dollar spent on a superior cleaning protocol is an investment in your brand's reputation. It's insurance against negative reviews, a tool for building customer loyalty, and a driver of operational efficiency.

    Turning Hygiene into a Marketable Asset

    The final piece of the puzzle is turning your hygiene standards into a marketing tool. Don't just practice cleanliness—shout it from the rooftops.

    Highlight your use of high-quality nitrile covered gloves and professional-grade disinfectants in your marketing materials, on your website, and with on-site signage. This proactive communication reinforces customer trust and can even justify premium pricing. It shows you’re not just providing a service; you’re delivering a safe, high-quality experience.

    This approach transforms a necessary operational cost into a valuable, revenue-generating asset.

    Getting Your Team Trained Up on Cleaning Protocol

    Buying high-quality nitrile covered gloves and disinfectant wipes is the easy part. The real challenge? Making sure your team uses them perfectly, every single time. The best supplies are worthless if they’re used the wrong way. This is where training comes in—it turns a simple box of supplies into a powerful part of your facility’s safety culture.

    A solid training program isn't just about telling staff to "clean more." It’s about drilling down into the common, often accidental, mistakes that lead to cross-contamination. These tiny errors can completely undermine your entire hygiene strategy, which makes training a non-negotiable part of keeping everyone safe.

    A four-step guide showing proper glove use: washing hands, donning gloves, avoiding phone use, and disposal.

    Cleaning Tips: Common Mistakes to Train Out of Your Team

    Good training is all about building good habits and killing bad ones. Focus your sessions on these all-too-common slip-ups that can put safety at risk:

    • Reusing Disposable Gloves: Nitrile gloves are strictly one-and-done. Trying to get a second use out of them traps germs and creates invisible tears that destroy the protective barrier.
    • One Wipe for Everything: Using the same disinfectant wipe on multiple surfaces (e.g., a doorknob, then a table, then a phone) is a primary cause of cross-contamination. Train staff to use a fresh wipe for each distinct area.
    • Ignoring Dwell Time: Disinfectants need time to work. Wiping a surface and immediately drying it renders the chemical useless. Teach your team to read the product label and let the surface stay visibly wet for the required "dwell time" to kill pathogens.
    • Skipping Hand Hygiene: Gloves are a tool, not a replacement for washing your hands. Staff must wash their hands before putting gloves on and after taking them off. No exceptions.

    By hitting these points hard and often, you create clear, easy-to-follow rules.

    A Simple Framework for Effective Training

    You don't need to book a conference room for a two-hour seminar. Short, frequent, and consistent training moments are what make the habits stick.

    The goal of cleaning training isn't just to get people to follow the rules. It's to create a shared sense of responsibility. When every single team member understands why they're doing it, they become guardians of your facility's safety standards.

    Use posters and signs in break rooms and near supply closets as constant visual reminders. Do a quick "show-and-tell" on proper wiping techniques in your daily team huddles. Keep the message simple, direct, and laser-focused on protecting both your staff and your customers.

    The Right Way to Dispose of Used Gloves and Wipes

    Disposal is the final, crucial link in the chain. A used glove or wipe tossed into an open trash can just becomes a new source of contamination. Your disposal process needs to be foolproof.

    1. Use Designated Bins: Set up dedicated, hands-free bins (the ones with a foot pedal) for all used protective gear.
    2. Teach the "Glove-in-Glove" Technique: This is the gold standard for removal. Pinch the first glove at the wrist and peel it off inside-out. Ball it up in your still-gloved hand. Then, slide a clean finger under the cuff of the other glove and peel it down over the first one, trapping it inside.
    3. Wash Hands Immediately: As soon as the gloves and wipes are in the bin, staff need to head straight to a sink for a proper hand washing or use an alcohol-based hand sanitizer.

    This three-step routine ensures contaminants stay contained and hands stay clean. When you reinforce it consistently, it stops feeling like a chore and becomes second nature—the foundation of an uncompromising culture of cleanliness.

    Mastering Supply Procurement and Inventory

    Running out of nitrile-covered gloves or disinfectant wipes isn't just an inconvenience—it's a complete breakdown in your facility's safety protocol. When your first line of defense disappears, everything stops. Mastering procurement means moving beyond reactive, last-minute ordering and building a smart, predictive supply chain that keeps your team protected and your operations running.

    An effective system starts with knowing exactly what you use and when. Simply reordering when the last box looks low is a recipe for disaster, especially when an unexpected rush hits. You need to get ahead of it by analyzing your usage data.

    Building Your Supply Strategy

    To build a reliable forecast, you have to look at the real drivers of supply consumption.

    • Facility Traffic: Get granular. Track your daily, weekly, and monthly visitor or customer counts. High-traffic periods mean more cleaning, more wiping, and more glove changes.
    • Task Frequency: How many times a day are specific cleaning tasks happening? Count every equipment wipe-down, every restroom check, or every table sanitization. That's your baseline.
    • Seasonal Trends: A school will use far more supplies during the academic year than in the summer. A retail store needs to scale up its inventory months before the holiday season. You have to anticipate these shifts.
    • Staff Size: The number of employees on a shift directly correlates to supply consumption. Plan for full staffing during your busiest hours, not your quietest.

    Once you have a clear picture of your actual usage, you can decide on a purchasing strategy. For facilities with predictable traffic, bulk purchasing almost always offers the best cost-per-unit. But for businesses with wild swings in demand, like event venues, a more flexible subscription model that you can scale up or down might make more sense.

    A well-managed supply inventory is about more than just having boxes on a shelf. It’s a reflection of your commitment to operational readiness and unwavering safety standards, ensuring your team is never caught unprepared.

    The Critical Role of Sizing and Global Supply

    One of the most overlooked—and most critical—parts of glove procurement is proper sizing. A one-size-fits-all approach is a complete failure. Gloves that are too tight will rip at the worst possible moment and cause serious hand fatigue. Gloves that are too loose kill dexterity and create their own safety hazards.

    Offering a full range of sizes (Small, Medium, Large, and Extra-Large) isn't optional; it's essential for keeping your staff safe, comfortable, and efficient.

    Your procurement strategy also needs to factor in what’s happening in the global market. Stricter food processing regulations worldwide have boosted nitrile glove adoption by 12% annually—a trend that impacts any facility with concessions, from sports venues to pool clubs.

    The market's explosive growth in the Asia-Pacific region, with a 9.4% CAGR, is also creating new opportunities for affordable bulk supplies. Smart U.S. managers are tapping into this, cutting their procurement costs by as much as 18%. For event planners, this access to scalable hygiene is a game-changer; we know that sanitized high-touch zones can improve guest perception by 28%, which directly fuels ticket sales and sponsorships. You can learn more about these global market trends and how they impact your supply chain.

    By carefully forecasting your needs, picking a smart buying strategy, and getting the sizing right, you build a resilient supply chain. This proactive approach prevents costly stockouts, supports your team, and keeps your facility's hygiene promises intact.

    Got Questions About Nitrile Gloves? We’ve Got Answers.

    When you're sorting through the details of nitrile-covered gloves, a few questions always come up. Here are the straight-up answers to the most common ones we hear, designed to help you make the right call for your team's safety and your facility's needs.

    Are Nitrile Gloves Safe for People with Latex Allergies?

    Yes, absolutely. Nitrile gloves are made from synthetic rubber, which means they are 100% latex-free. This makes them the go-to choice for anyone with a latex allergy or even just sensitive skin.

    In fact, this is one of the main reasons nitrile became the new standard in healthcare and professional cleaning. By using them, you completely eliminate the risk of allergic reactions for both your staff and your customers, creating a safer environment for everyone involved.

    How Do I Choose the Right Glove Thickness?

    Picking the right thickness—measured in mils—really comes down to the job at hand. You want to match the glove to the task to get the perfect balance of protection and dexterity.

    • For general cleaning or jobs where you need a good feel for what you're doing, a 3-5 mil glove is perfect. It gives you great tactile sensitivity without sacrificing protection.
    • For handling harsh chemicals, doing deep cleaning, or tackling automotive work, you’ll want a beefier 6-8 mil glove. It provides that extra layer of durability and puncture resistance you need when the stakes are higher.

    One pro tip: always check the manufacturer’s specs when you're working with specific industrial chemicals. It's the best way to be sure you’ve got the right level of protection.

    Can Disposable Nitrile Gloves Be Reused?

    Nope. Never. Disposable nitrile gloves are designed for one-time use, and that’s a hard and fast rule. Reusing them is one of the quickest ways to cause cross-contamination between different areas or tasks.

    Think of it this way: when you reuse a glove, you risk creating micro-tears you can't even see. These tiny holes compromise the protective barrier, turning the glove from a tool for safety into a tool for spreading germs. The cost of a fresh pair is tiny compared to the massive risk of a contamination incident.

    What Is the Difference Between Powdered and Powder-Free Gloves?

    Back in the day, powdered gloves used cornstarch to make them easier to slide on. The problem? That powder can irritate skin and, worse, contaminate clean surfaces—a huge no-go in any professional or sensitive environment.

    Today, powder-free gloves are the industry standard for a reason. They’re treated with a special polymer lining (a process called chlorination) that makes them just as easy to put on but without any of the risks. For any professional job, powder-free nitrile-covered gloves are always the smarter, cleaner, and more reliable option.

    Don't let cleanliness be an afterthought. By making high-quality disinfectant wipes and nitrile gloves a central part of your daily routine or product offerings, you invest in the health of your staff, the trust of your customers, and the reputation of your brand. Prioritize a higher standard of hygiene today.

  • Electrostatic Cleaning Sprayer: 360° Disinfection for Large Facilities

    If you're managing a high-traffic commercial or public facility like a stadium, office, or gym, you know that superficial cleaning is no longer enough. The standard for cleanliness has been raised, and maintaining a hygienic environment is critical for brand reputation and public trust. An electrostatic cleaning sprayer is a revolutionary tool that atomizes and electrically charges disinfectants to wrap around and evenly coat every surface. This isn't just an upgrade from manual wiping; it's a strategic leap into complete, 360-degree disinfection.

    The New Standard in Facility Sanitation

    In today's competitive landscape, the cleanliness of a commercial facility is a direct reflection of your commitment to health and safety. It's a make-or-break factor for the trust of every employee, customer, or guest who walks through your doors.

    Traditional cleaning methods, while essential, have inherent limitations. A manual wipe-down can easily miss the underside of an armrest, the back of a keyboard, or the intricate parts of gym equipment. These gaps become breeding grounds for germs, compromising the health of your space. For initial cleaning, we recommend Wipes.com Disinfectant Wipes as a highly effective tool for removing surface-level grime from these high-touch areas.

    This is where electrostatic sprayers elevate your cleaning protocol. By ensuring disinfectants reach every nook and cranny, this technology provides a level of thoroughness that manual methods simply can't match. It’s not about replacing your team's hard work, but empowering them to deliver a final, critical layer of disinfection that truly sets a new standard.

    A worker in a uniform cleans rows of seats in a large, empty venue with a spray device, ensuring a safe environment.

    Why Comprehensive Coverage Matters More Than Ever

    In a public-facing facility, perception is reality. A single sticky gym handle or a dusty retail counter can instantly erode a customer's confidence. Electrostatic sprayers help you manage this perception by delivering consistent, touchless disinfection that covers all the spots ordinary cleaning might miss.

    The result is a genuinely safer environment, which in turn boosts consumer confidence, enhances employee morale, and protects your brand from the fallout of a negative hygiene review. The market is reflecting this shift; the electrostatic cleaning sprayer market is climbing from US$ 351.2 million in 2024 to a projected US$ 791.0 million by 2031. This explosive growth demonstrates how seriously businesses are taking their hygiene protocols.

    Integrating Advanced Technology with Proven Principles

    Of course, achieving a higher standard of clean requires a holistic approach. The best tools are only as effective as the strategy behind them. To truly set a new standard in facility sanitation, it’s vital to pair advanced technology with established best practices, like understanding foundational frameworks such as HACCP food safety principles. This guide will show you how to weave electrostatic spraying and effective wiping routines into your existing sanitation program for maximum impact, efficiency, and return on investment.

    How Sprayers Achieve 360-Degree Disinfection

    What's the secret behind an electrostatic cleaning sprayer? The science is surprisingly simple. If you’ve ever rubbed a balloon on your hair and watched it magically stick to a wall, you've already seen the core principle—static electricity—in action.

    Electrostatic sprayers put this exact force to work to achieve an incredible level of disinfection. Inside the sprayer, a specialized nozzle atomizes a disinfectant liquid, breaking it down into an exceptionally fine mist. But that’s just step one.

    As these tiny droplets pass through the nozzle, they’re given a positive electrical charge. This is the game-changing moment. The mist is now a targeted, surface-seeking cloud of disinfectant, ready to find and coat everything in the room with stunning precision.

    The Science of Attraction

    Believe it or not, most surfaces in a room—from desks and chairs to doorknobs and light switches—naturally have a neutral or negative charge. When you spray the positively charged disinfectant mist, it creates an immediate and powerful attraction.

    The droplets are actively pulled toward these surfaces like thousands of tiny magnets. This force is so strong it allows the mist to defy gravity, change direction mid-air, and wrap around objects. This magnetic-like pull is what enables the sprayer’s signature "wraparound" effect. Instead of just landing on the top of an object, the charged particles coat its sides, back, and even the underside—something that traditional spray-and-wipe methods often miss.

    This 'wraparound' effect is the key to true 360-degree coverage. It ensures that complex, hard-to-clean objects like office chairs, gym equipment, and retail fixtures are completely coated with disinfectant, leaving no surface untouched.

    Practical Application: The Power of Touchless Coverage

    This sophisticated application method brings huge benefits to any facility. It’s not just about getting a better clean; it’s about working smarter and more efficiently.

    • Complete Coverage: The electrostatic charge makes sure that even the most complex or oddly shaped items are fully disinfected. This closes the gaps that manual cleaning almost always leaves behind.
    • Reduced Chemical Use: Because the droplets are actively drawn to surfaces, far less disinfectant is wasted floating in the air. This leads to more efficient chemical usage and real cost savings.
    • Touchless Application: The entire process is touchless. This is a big deal, as it dramatically cuts down the risk of cross-contamination that happens when you use the same cloth across multiple surfaces.

    While the technology is impressive, it’s designed to support a solid cleaning routine, not replace it. The best strategy always starts with cleaning first—removing the physical dirt, dust, and grime. For this crucial first step, a quality product like Wipes.com Disinfectant Wipes is perfect for getting surfaces prepped and ready for disinfection. Once surfaces are physically clean, the electrostatic cleaning sprayer delivers the final, powerful layer of protection. This two-step process—clean first, then disinfect—is the gold standard for creating the safest possible environment.

    Choosing the Right Sprayer for Your Facility

    Picking the right electrostatic sprayer isn't just a small detail—it's a decision that will shape how efficiently your team works and how clean your facility gets. The perfect sprayer for a massive airport terminal would be overkill for a small office, and a handheld unit would be useless in a stadium. To get it right, you need to understand the three main players in the game: handheld, backpack, and roller cart sprayers.

    Handheld Sprayers for Precision Tasks

    Think of handheld sprayers as your detail-oriented specialists. They’re perfect for small, complex jobs where you need to get into tight spaces. For a car dealership, a handheld is ideal for hitting every last surface inside a vehicle—from the steering wheel and gear shift to the door handles and infotainment screen. They're also the go-to for offices, allowing staff to quickly disinfect high-touch spots like keyboards, remote controls, light switches, and doorknobs without bulky equipment.

    Backpack Sprayers for Mobility and Power

    When you need to cover more ground but still need to be nimble, backpack models are the answer. These are the workhorses for facilities like gyms, schools, or multi-level office buildings where staff have to navigate stairs, tight hallways, and rooms full of equipment or furniture. A backpack electrostatic cleaning sprayer gives you a great balance of power and freedom, making them incredibly efficient for disinfecting rows of treadmills, an entire floor of cubicles, or a series of classrooms.

    Roller Cart Sprayers for Large-Scale Venues

    For the big jobs—we’re talking airports, stadiums, convention centers, and sprawling automotive plants—you bring in the heavy hitters. Roller cart sprayers are engineered for massive, uninterrupted disinfection projects. They tackle vast spaces with an efficiency that smaller units simply can't match. These machines are built to cover thousands of square feet on a single tank and run for hours, which is why the market for them is projected to hit USD 512.9 million by 2034, growing at a 9.2% CAGR. With up to 98% surface coverage and 8+ hours of battery life, they are the definitive solution for large-scale operations. For a closer look at the numbers, you can check out this detailed industry report.


    To make the choice even clearer, here’s a quick rundown of how these models stack up against each other.

    Electrostatic Sprayer Models at a Glance

    Sprayer Type Best For Coverage Area (per tank) Portability Key Advantage
    Handheld Small, detailed jobs (vehicles, rentals, spot-cleaning) Up to 2,500 sq. ft. High Precision and control
    Backpack Medium-sized spaces (gyms, schools, offices) 10,000 – 20,000 sq. ft. Medium Balance of power and mobility
    Roller Cart Large venues (airports, stadiums, warehouses) 50,000+ sq. ft. Low Unmatched coverage and capacity

    Choosing the right model from this table really comes down to honestly assessing your space and workflow. Don't overbuy for a small area, and don't under-equip a team tasked with cleaning a massive facility.


    This flowchart breaks down the simple but powerful science behind how electrostatic sprayers get the job done, achieving that crucial 360-degree clean.

    A decision tree flowchart illustrating the process and benefits of electrostatic spray disinfection.

    As you can see, the 'wraparound effect' is what makes this technology a game-changer. It ensures that the disinfectant mist coats every side of a surface, hitting the spots that traditional wipes and sprays almost always miss.

    Of course, the sprayer is only half the equation. The chemical you put inside it is just as important for getting real results. For a deep dive into what works and what doesn't, take a look at our guide on professional cleaning chemicals. Using the right solution will keep your equipment running smoothly and deliver the powerful disinfection your facility depends on. Ultimately, taking the time to choose the right electrostatic cleaning sprayer is about empowering your team to work smarter, not harder.

    Boosting Your ROI with Smarter Disinfection

    Let’s be honest: buying an electrostatic sprayer isn't just another line item in the budget. It's a strategic investment that delivers a powerful and measurable return on investment (ROI), shifting sanitation from a necessary expense to a genuine competitive advantage. The most immediate payback comes from a massive leap in efficiency. Facilities that make the switch consistently report huge drops in both labor hours and supply costs.

    Calculating the Value of Efficiency

    The financial argument for an electrostatic cleaning sprayer is built on two simple but powerful pillars: time and resources.

    • Slash Labor Costs: We see facilities cut down disinfection time by up to 45%. This frees up your janitorial team to tackle other critical cleaning duties, focus on deep-cleaning projects, or simply run more frequent disinfection cycles without blowing up the payroll.
    • Drastically Reduce Chemical Use: The targeted mist wraps around surfaces, meaning very little product gets wasted. With a reported 30% drop in chemical consumption, the savings on disinfectants add up fast, especially for larger operations. This kind of efficiency translates directly into a healthier bottom line.

    Selling a Higher Standard of Clean

    If you're in the business of selling cleaning solutions, this technology is your new best friend. You're no longer just moving boxes of supplies; you're offering a comprehensive system that delivers tangible business outcomes for your clients. It’s all about framing the conversation around the hygiene ROI.

    The real magic happens when you connect superior sanitation to your client's success. Educate them on how faster turnover in a gym, reduced sick days in an office, or higher customer satisfaction in a retail store makes this sprayer a driver of business growth.

    This approach transforms a piece of equipment into a strategic tool that protects their customers, polishes their brand reputation, and directly supports their financial goals.

    Facility-Specific Returns

    The impact is especially profound in certain high-traffic environments. Take healthcare, which is on track to command 39.2% of the electrostatic disinfectant sprayer market share by 2025. In hospitals and clinics, these devices are absolutely critical for getting a handle on hospital-acquired infections (HAIs).

    But this isn't just a healthcare trend.

    • Gyms: Quickly disinfect complex equipment between uses, increasing member confidence and equipment availability.
    • Offices: Reduce the spread of illness by thoroughly treating shared spaces like conference rooms and kitchens after hours.
    • Restaurants: Ensure tables, chairs, and high-touch POS systems meet health standards, especially during peak hours. You can discover more insights about these market trends to see where the industry is heading.

    Just remember, for any disinfection program to work, you have to clean first. Disinfection is always step two. Surfaces must be physically wiped down to remove dirt, grime, and oils. For that essential prep work, we recommend Wipes.com Disinfectant Wipes to make sure every surface is ready for the electrostatic application.

    Creating Your Two-Step Cleaning and Disinfection System

    One of the biggest mistakes people make is treating an electrostatic cleaning sprayer like a magic wand that replaces old-fashioned cleaning. It’s not. Think of it as a finisher, not a replacement. These sprayers are designed for one specific job: disinfection. And for disinfection to work, the surface has to be physically clean first. Dirt, dust, and grime act as a physical shield, stopping disinfectants from reaching and killing the germs underneath.

    A person cleans a counter with a cloth, then disinfects a chair using an electrostatic sprayer.

    Step One: Clean First, Disinfect Second

    The only way to get this right is with a dedicated two-step system. The first step is always manual cleaning. This is the foundational work of using a good cleaning agent to physically wipe down every surface, paying special attention to high-touch areas. This crucial action lifts away visible soil, oils, and other gunk, clearing the path for the disinfectant to do its job.

    For this critical first step, you need a tool that’s both effective and efficient. To get surfaces properly prepped, we recommend using a high-quality product like Wipes.com Disinfectant Wipes. They provide the elbow grease needed to lift away debris while also adding an initial layer of germ-killing power. They're the perfect primer for electrostatic disinfection.

    Remember, disinfection is not a substitute for cleaning. An electrostatic sprayer can’t disinfect a dirty surface. Always clean first to ensure your disinfection efforts are not wasted.

    This initial wipe-down is completely non-negotiable. In a gym, that means wiping sweat off the equipment. In an office, it's clearing crumbs and spills from countertops. If you’re a sales professional advising clients, framing this two-step process proves your expertise and helps set the right expectations for amazing results.

    Step Two: Touchless Electrostatic Disinfection

    Once the surfaces are clean and dry, it’s time to bring in the sprayer. This is where you apply an even, touchless layer of disinfectant across the whole area. The charged mist will wrap around objects and coat the surfaces you just prepped, hitting every nook and cranny to neutralize pathogens. This integrated strategy is what ensures you get maximum impact. By cleaning first and then disinfecting with an electrostatic cleaning sprayer, you create an environment that’s not just clean on the surface, but genuinely sanitary.

    Putting Your Sprayer into Action Safely and Effectively

    So, you’ve invested in an electrostatic cleaning sprayer. Turning that piece of equipment into a powerful, reliable sanitation system for your facility takes a plan. A great rollout combines smart prep work with solid staff training, creating a program that’s not just visible to your customers but incredibly effective behind the scenes.

    Start with a Walkthrough

    Before anyone even flips the switch on a new sprayer, walk your facility with a critical eye to map out your disinfection strategy.

    • Pinpoint High-Touch Zones: First, identify the surfaces people can't stop touching. In an office, that’s doorknobs, elevator buttons, and conference room tables. For a gym, it’s all about the dumbbell handles, treadmill screens, and locker room benches. In a retail store, focus on checkout counters, shopping cart handles, and payment keypads.
    • Create a Path to Clean: Map out the most efficient route for your cleaning staff. A logical path prevents backtracking and ensures no area gets accidentally skipped—a must-have for large, complex venues.
    • Note the No-Go Zones: Look for sensitive electronics, delicate fabrics, or other materials that need a more careful approach. This simple step prevents accidental damage and keeps your safety protocols sharp.

    Pick the Right Disinfectant

    The chemical you pour into your electrostatic cleaning sprayer is just as important as the device itself. Using an incompatible solution can wreck the sprayer's internal parts, void the warranty, and create a safety hazard. Always use a two-step check. First, make sure the disinfectant is EPA-approved to kill the pathogens you’re targeting. Second, and this is crucial, confirm the chemical manufacturer has explicitly approved its use in electrostatic sprayers.

    Never assume a standard disinfectant will work. The charging mechanism in these sprayers requires specific chemical formulas to function correctly and safely. Using the wrong product can lead to spotty coverage, clogs, and total equipment failure.

    Build a Smarter Cleaning Schedule

    How often should you be spraying? The answer should be based on foot traffic and risk, not guesswork. A bustling retail store or gym might need disinfection several times a day in high-traffic areas, while a corporate office may only need a single, thorough treatment after hours. Tying your schedule to real-world usage patterns is the key to optimizing both your labor and chemical costs. An efficiency hack is to have staff perform quick wipe-downs of high-touch spots with disinfectant wipes throughout the day, saving the full electrostatic treatment for less busy periods.

    Don't Skip the Training

    Your team is the most important part of your disinfection program. A well-trained operator can achieve perfect coverage without wasting a drop of expensive disinfectant. For a deep dive, check out our guide on staff training best practices.

    Your training absolutely must cover these three areas:

    1. Proper Sprayer Operation: This is more than pointing and shooting. Teach your staff how to hold the sprayer at the right distance and move at a steady, consistent speed.
    2. Safety Protocols and PPE: Make Personal Protective Equipment (PPE) non-negotiable. This means gloves, masks, and eye protection, as recommended by the disinfectant’s manufacturer.
    3. Routine Maintenance: Show everyone how to perform daily and weekly upkeep, like flushing the system and cleaning the nozzle. This simple habit keeps the equipment in top shape.

    When you pair advanced technology with a team that knows exactly what they're doing, you build a sanitation program that delivers every single time.

    Got Questions? We’ve Got Answers.

    When you’re looking at adding an electrostatic cleaning sprayer to your team’s toolkit, a few questions are bound to pop up. It’s a big leap forward from the old bucket-and-rag method, so getting the details right is what separates a good investment from a great one. Let’s tackle some of the most common questions we hear.

    Are These Things Safe to Use Around Computers and Electronics?

    Yes, as long as you use them correctly. The magic of these sprayers is that they atomize the disinfectant into an incredibly fine mist—we’re talking microscopic droplets. This means you get great coverage without soaking the surface. So, for areas packed with electronics like office desks or point-of-sale systems, it’s perfectly safe. Just follow the manufacturer's instructions on spraying distance and don't deliberately drench sensitive equipment. It’s always a smart move to avoid spraying directly into open ports, keyboards, or the vents on monitors.

    What Kind of Chemicals Can I Put in This Sprayer?

    This is probably the most important question you can ask. The answer is simple: only use disinfectants that are approved for electrostatic application by both the EPA and the sprayer’s manufacturer. Think of it like putting the wrong type of fuel in a high-performance car. Using an unapproved chemical can gunk up the charging mechanism, corrode the internal parts, void your warranty, and even create a safety hazard. Always, always check the chemical’s label for specific approval before you pour it in.

    How Often Should We Be Spraying Our Facility?

    There’s no magic number here—the right frequency is all about your specific space and how it’s used. You’ll want to base your plan on a few key factors:

    • Foot Traffic: A high-traffic gym with shared equipment might need daily attention, especially during peak hours. Public restrooms are another great example of a daily-duty zone.
    • Type of Use: A restaurant should disinfect tables between every customer, while a standard office might only need a full treatment a few times a week.
    • Current Risks: If it’s peak flu season or there’s a bug going around town, you’ll probably want to ramp up the frequency in common areas.

    The best way to figure this out is to do a quick risk assessment. Walk your facility, identify the high-touch hotspots, and build a schedule that makes sense for your team and your budget. Remember, an electrostatic treatment works until the surface is re-contaminated. That’s why a consistent, thoughtful schedule is the key to keeping your standard of clean where you want it.

    Ultimately, making cleanliness a top priority is simply smart business. By integrating effective tools like disinfectant wipes and electrostatic sprayers into your daily routine or product offerings, you’re not only creating safer, more welcoming spaces—you’re operating more efficiently and building a stronger, more trusted brand.