When you hear "ADA compliant hand dryer," what's the first thing that comes to mind? For most facility managers, it’s the 4-inch protrusion rule. And for good reason. A compliant dryer is specifically designed so it doesn't stick out more than 4 inches from the wall once installed.
This isn't an arbitrary number. It’s a critical design feature that prevents the unit from becoming a hazard for visually impaired individuals navigating a restroom or hallway. Beyond that, these dryers have to be easy to use, with touch-free activation and low operational force. In any commercial or public facility, from offices and gyms to schools and retail stores, maintaining a high standard of cleanliness isn't just about appearances—it's about public health and customer confidence.
Decoding ADA Compliance for Restroom Hand Dryers
Let's be honest, diving into the Americans with Disabilities Act (ADA) regulations can feel like prepping for a legal exam. But when you boil it down for restroom fixtures like hand dryers, the goal is straightforward: create a space that’s safe, inclusive, and works for everyone, no matter their physical abilities.
Getting this right isn't just about ticking a box to avoid fines. It’s about showing you’re committed to accessibility and the well-being of every person who walks through your doors. The first step is to stop thinking in technical jargon and start seeing your restroom through the eyes of someone with a disability. For business owners and janitorial professionals, this commitment to a safe environment extends to hygiene, where tools like disinfectant wipes play a crucial role in maintaining cleanliness on high-touch surfaces.

The Critical 4-Inch Protrusion Rule
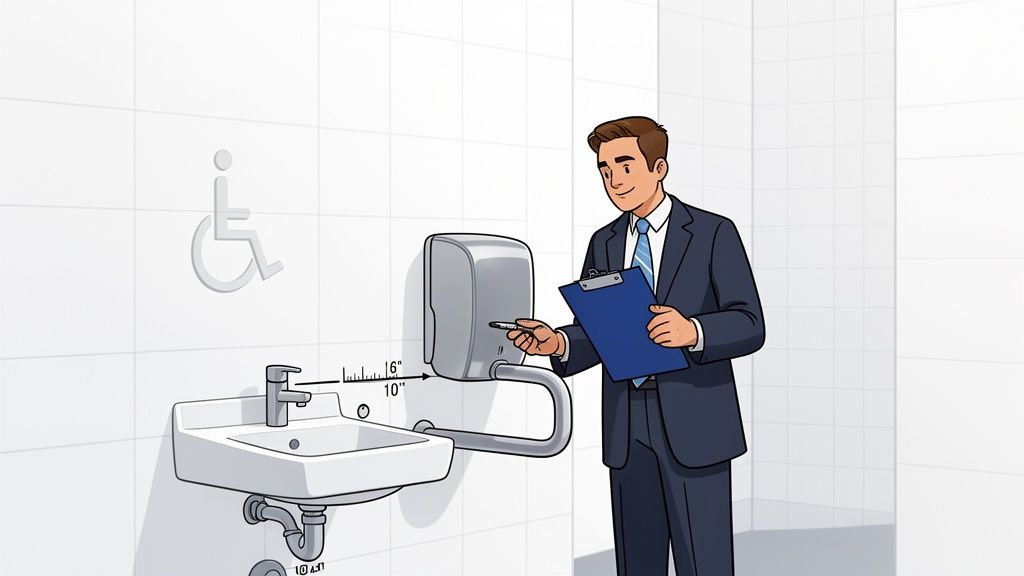
The absolute, can't-mess-this-up rule for ADA compliant hand dryers is the 4-inch protrusion limit. ADA Standard 307.2 is crystal clear: any object mounted between 27 and 80 inches off the floor can't stick out more than four inches into a walkway or circulation path.
Why is this so non-negotiable? Picture someone with a visual impairment using a cane. That cane sweeps the floor, detecting obstacles low to the ground. It offers no warning about a bulky object jutting out from the wall at torso or head height. A non-compliant hand dryer isn't an inconvenience; it's a serious, unseen hazard.
Reach Ranges and Clear Floor Space
Compliance goes deeper than just protrusion. The dryer has to be positioned so people can actually use it. For someone in a wheelchair, this comes down to two key factors:
- Forward and Side Reach: The sensor and airflow have to be within accessible reach. For a forward approach, the sweet spot is a maximum height of 48 inches from the floor. A side approach gives you a little more leeway.
- Clear Floor Space: You must provide an unobstructed rectangle of floor space measuring at least 30 by 48 inches in front of or parallel to the hand dryer. This gives a wheelchair user the room they need to approach and position themselves without being boxed in.
I’ve seen this mistake made more times than I can count: a facility installs a perfectly compliant dryer but places it in a corner where a trash can or a swinging door blocks the required clear floor space. The dryer itself is fine, but the installation makes it completely inaccessible.
Low-Force, Touch-Free Operation
The final piece of the puzzle is simple usability. An ADA compliant hand dryer has to be operable with one hand, and it can't require more than 5 pounds of force to activate.
This is exactly why nearly all modern ADA compliant hand dryers are touch-free. Sensor activation completely eliminates the need for physical force, making the units accessible to people with limited strength or dexterity. As a bonus, this touchless design is a huge win for hygiene, removing a major touchpoint and cutting down on germ transmission in your restroom. Getting these fundamentals right is the foundation for selecting and installing dryers that meet legal standards and guest expectations.
Picking the Right ADA-Compliant Dryer Model
Choosing a hand dryer for your facility is about way more than just looks or drying speed. It’s a decision that sits at the foundation of accessibility and overall facility hygiene. Get it right, and the unit blends seamlessly into your restroom, ensuring everyone has a safe and clean experience. Get it wrong, and you’ve created an immediate hazard and a potential liability.
The key is understanding that there are a few different ways to solve the ADA compliance puzzle. Your choice really boils down to three design approaches, each tackling that critical 4-inch protrusion rule from a different angle. The best fit depends entirely on your specific project, whether you're breaking ground on a new building or just retrofitting a few existing restrooms in a gym or office.
Recessed Dryers for a Clean, Flush Finish
If you’re working on a new build or a major renovation where the walls are already open, recessed hand dryers are the gold standard. These units are designed to be installed inside a recessed wall box, which means the bulk of the dryer sits inside the wall, not on its surface.
The final look is incredibly clean and streamlined, with the dryer protruding far less than the 4-inch legal limit—often less than an inch. This design completely eliminates the risk of creating a hazard for people with vision impairments, making it one of the most foolproof ways to guarantee compliance from day one. Yes, the installation is more involved than a simple surface mount, but for modern, high-traffic restrooms, that seamless look and guaranteed compliance are well worth it.
Slim-Profile Surface-Mounted Dryers
But what if you’re upgrading an existing restroom and cutting a giant hole in the wall just isn't in the cards? This is where modern hand dryer engineering really shines. Manufacturers have poured a ton of innovation into creating slim, low-profile dryers designed specifically for this exact situation.
These models are engineered from the ground up to have a total depth of less than 4 inches. This allows them to be mounted directly onto the wall surface while still staying within ADA protrusion guidelines, no extra construction needed.
A perfect example of this is the ThinAir® Hand Dryer. It delivers a powerful, fast dry but in a super-compact, surface-mounted package that’s fully ADA compliant right out of the box. It’s become a go-to solution for retrofits where you need to improve accessibility without a major construction project.
A word of caution here: always check the product’s official spec sheet. Don't just go by marketing terms like "thin" or "compact." You need to see that official depth measurement in black and white and confirm it's under that 4-inch magic number.
Using an Alcove for Standard Models
There's a third, less common strategy: installing a standard-sized dryer (one that’s deeper than four inches) inside a purpose-built alcove. Think of it as creating an intentional nook in the wall that shields the protruding dryer from the main path of travel.
While this works, it’s almost exclusively an option for new construction where architectural features like this can be planned from the start. It gives you more flexibility in choosing a dryer model, but it requires careful design to make sure the alcove itself doesn't create a new set of accessibility problems.
To help you keep these critical details straight, here’s a quick-glance checklist. It’s a simple tool I use to run through the essentials before making any final purchasing decisions.
At-a-Glance ADA Hand Dryer Compliance Checklist
| Compliance Factor | ADA Guideline | What This Means in Practice |
|---|---|---|
| Protrusion Limit | Must not protrude more than 4 inches into circulation paths. | For surface-mounted units, the dryer's total depth must be less than 4 inches. Recessed units easily meet this. |
| Activation | Must be operable with one hand and without tight grasping, pinching, or twisting of the wrist. | Look for automatic, touch-free sensor activation. This is the industry standard for compliance. |
| Operating Force | Must require less than 5 lbs of force to activate. | Sensor-activated dryers inherently meet this, as no physical force is needed. Just confirm it on the spec sheet. |
| Mounting Height | Reach ranges must be accessible from a forward or side approach. | For adults, the activation sensor should be no higher than 48 inches above the finished floor. |
| Clear Floor Space | Requires a 30" x 48" clear space for wheelchair access. | The area in front of the dryer must be completely unobstructed to allow a forward or parallel approach. |
This table isn't exhaustive, but it covers the non-negotiables that will keep you on the right side of compliance. Use it as your first line of defense when evaluating different models.
Reading the Spec Sheet Like a Pro
No matter which type of dryer you're leaning toward, the manufacturer's specification sheet is your ultimate source of truth. It's the document that cuts through the marketing fluff and gives you the hard data you need to verify compliance.
Here’s what you should zero in on:
- Protrusion Depth: Find the exact measurement for how far the unit extends from the wall. For any surface-mounted model, this number absolutely must be under 4 inches.
- Activation: The sheet should clearly state it has touch-free, sensor-based activation. This is a given for almost any modern dryer, but you still need to see it in writing.
- Operational Force: It should also confirm that the unit requires less than 5 lbs of force to use. Again, with a sensor, this is automatic, but it’s a key compliance point that needs to be officially documented.
When you can confidently navigate these options and dissect a spec sheet, you’re in a great position. You'll be able to choose an ADA-compliant hand dryer that not only meets the legal requirements but also genuinely improves the safety, function, and experience of your restroom for every single person who uses it.
Mastering Installation for Full Accessibility
You can pick the perfect ADA-compliant hand dryer, but the job is only half done. I've seen it a hundred times: a great, slim-profile unit becomes an accessibility nightmare because it was installed incorrectly. This is where your knowledge of the rules meets the reality of the restroom wall.
Proper installation is what makes a piece of hardware a truly functional and accessible part of your facility. It’s more than just bolting a dryer to the wall; it’s about thinking through the entire user journey and ensuring a clean, safe environment.
Nailing the Correct Mounting Heights
The single most common mistake? Getting the mounting height wrong. An ADA compliant hand dryer has to be positioned so its sensor and airflow are within the official reach ranges. Get this wrong, and you’ve created a barrier.
Here are the numbers you absolutely have to get right:
- For Adults and General Use: The activation sensor can’t be mounted any higher than 48 inches from the finished floor. This is the magic number that ensures someone using a wheelchair can comfortably reach it.
- For Children's Height: If you’re outfitting a school, museum, or family restaurant, it’s smart to install at least one dryer lower. Aim for the sensor to be between 38 and 40 inches from the floor.
- Obstruction Adjustments: This one trips people up. If there’s a counter or vanity below the dryer that’s more than 20 inches deep, the maximum height drops to 44 inches. That small change accounts for the reduced forward reach a person in a wheelchair has when navigating around something.
For a deeper dive into all the specifics, check out our detailed guide on ADA hand dryer height requirements.
Strategic Placement in Tight Spaces
Let’s be real, not every restroom is a wide-open space. Older buildings, in particular, often have narrow corridors and tight corners where every inch counts. This is where smart placement is crucial for ADA compliant hand dryers.
Your goal is to preserve the required 30-by-48-inch clear floor space in front of the unit without creating a new traffic jam. A classic mistake in a narrow restroom is putting the dryer directly opposite a stall door—a swinging door can easily block access. A much better spot is an adjacent wall, close enough to the sinks for convenience but out of the main path.
Here’s a little trick I call the "flow test." Walk the path from the stall to the sink and then to the dryer. Does it feel natural? Or are you squeezing through? This simple exercise reveals placement issues that look fine on a blueprint but fail in reality.
The infographic below shows the three main ways to solve these placement challenges.

As you can see, recessed units, slim profiles, and alcove installations are your best friends for hitting compliance targets.
Ensuring Proper Electrical and Structural Support
Beyond height and placement, the dryer has to be installed safely and securely. This is a heavy, high-powered appliance. Cutting corners here can lead to a wobbly unit that pulls off the wall or, even worse, an electrical fire.
Always mount the dryer to wall studs. If that's not possible, use heavy-duty wall anchors rated for the unit's specific weight. All electrical work must adhere to local building codes and safety regulations, like the Australian electrical standards (AS/NZS 3000). While specific to Australia, they’re a great example of the rigorous protocols required for any commercial electrical job.
Bottom line: have a licensed electrician handle the wiring. It guarantees the job is done safely and to code, saving you from major headaches and safety risks down the road.
Going Beyond Compliance: Hygiene in Your Accessible Restroom
Getting the ADA specs right is the first hurdle, but let's be honest—a truly great restroom experience goes way beyond measurements and clearances. A restroom that feels accessible is also one that feels clean, safe, and modern for every single person who uses it. This is where compliance meets the real-world expectations of public health.
An ADA compliant hand dryer is already a huge win for infection control. Its touchless design instantly gets rid of one of the grimiest touchpoints in any restroom. When people don't have to push a button that hundreds of others have touched, you're actively cutting a major route for germ transmission.

This move to touch-free fixtures isn't just a smart idea; it's a massive industry trend. The global hand dryer market, valued around USD 1.09 billion, is expected to more than double to USD 2.37 billion by 2033. What's driving that surge? A huge demand for sensor-based dryers in high-traffic facilities that are serious about hygiene.
HEPA Filters: It’s Not Just About Dry Hands, It’s About Clean Air
Today’s best hand dryers do more than just blast hot air. Many of the top models now come with built-in HEPA filters, and this is a feature that completely changes the game for restroom hygiene.
A HEPA filter is designed to trap a massive percentage of airborne junk—we're talking bacteria, viruses, and all sorts of other microscopic contaminants. As the dryer sucks in restroom air to work, the filter cleans it before blowing it back onto someone's freshly washed hands. This little detail makes the entire hand-drying process more sanitary and even helps improve the overall air quality in the restroom.
When you invest in a dryer with HEPA filtration, you’re sending a clear signal that you care about the health of your occupants. It’s a move that takes your facility from just being compliant to being actively health-conscious.
Don't Forget the Surfaces
A high-tech hand dryer is great for air quality and eliminating a key touchpoint, but a truly hygienic space needs more. The walls, countertops, and fixtures surrounding the dryer are magnets for germs, water spots, and grime. They need consistent, effective cleaning. This is where the simple power of disinfectant wipes becomes an essential tool for janitorial staff and facility managers.
This is where a solid cleaning protocol makes all the difference. For a deeper dive, check out our complete guide on best practices for cleaning the restroom.
A clean restroom signals respect. It’s a direct reflection of your facility’s standards. When you combine the air hygiene from a HEPA-filtered dryer with rigorous surface disinfection, you create a powerful, multi-layered defense against germs.
To pull this off, your cleaning routine has to be both thorough and fast. Your janitorial team needs tools that get the job done quickly without compromising on disinfection. For keeping the surfaces around your new hand dryers spotless, we recommend Wipes.com Disinfectant Wipes. They're a practical, no-fuss solution for daily upkeep.
Here are a few tips to build an effective routine:
- Hit the High-Touch Zones: Make sure your team regularly wipes down the area around the dryer sensor, the wall directly beneath the unit, and any nearby countertops or ledges. This is especially important in gyms, where sweat and germs are prevalent, and in restaurants, where food safety is paramount.
- Set a Clear Schedule: Don’t leave it to chance. Create a simple schedule for daily wipe-downs and more intensive deep cleans. In busy places like gyms or airports, those high-touch surfaces should be hit multiple times a day.
- Equip Your Team for Success: Give your staff the right supplies and train them on how to kill germs effectively without damaging the finishes on your new fixtures. Sales professionals can highlight the ROI of a robust hygiene program, showing how visible cleanliness boosts customer trust and loyalty.
By weaving these hygiene practices into your daily operations, your restroom becomes more than just compliant—it becomes a clean, safe, and genuinely welcoming space. This approach ensures your investment in a quality ADA compliant hand dryer is backed up by a sanitation program that protects every single visitor.
Keeping Up with Compliance: Why Regular Audits Are Non-Negotiable
Getting an ADA compliant hand dryer installed is a great first step, but it’s definitely not the last. The moment that dryer is on the wall, the clock starts ticking. Real-world use, wear and tear, and even subtle changes in the restroom environment can chip away at compliance over time. Staying accessible is an ongoing commitment—one that protects your investment, shields you from liability, and keeps your facility genuinely welcoming.
If you don't have a plan, compliance can unravel without you even noticing. A mounting bracket that’s worked its way loose, a sensor that's gone wonky, or even a trash can someone slid into the wrong spot can make a perfectly compliant unit unusable. A routine inspection schedule isn’t just a "nice to have"; it's a core part of smart facility management.
Moving from Reactive to Proactive Audits
A "set it and forget it" mindset is a recipe for trouble. What you need is a simple, repeatable audit process your team can actually stick to. This doesn't have to be some monumental task. A quick walk-through every quarter with a solid checklist is usually all it takes to spot issues before they blow up into bigger problems or, worse, user complaints.
The goal here is to stop putting out fires and start preventing them. This forward-thinking approach is standard practice in well-run facilities worldwide. In Europe, which holds a massive 35.2% revenue share in the global hand dryer market, strict hygiene and operational standards are the norm. A huge chunk of these dryers—around 45%—are in high-traffic airports and train stations where constant checks are mandatory to keep things running. You can discover more insights about these global market trends and how they’re raising the bar for facility standards everywhere.
That level of diligence isn't just for massive transit hubs; it's something you can scale for any building.
The Go-To Maintenance and Audit Checklist
To make your audits fast and effective, give your maintenance or janitorial team a checklist. A simple tool like this turns a casual glance into a focused inspection, making sure nothing important gets missed.
Here’s a sample checklist you can steal and adapt for your own facility:
Test the Sensor
- Does it fire up instantly when hands are underneath?
- Any hesitation or flickering? That could mean the sensor is failing or there's an electrical hiccup.
- Does it shut off right after hands are pulled away? A dryer that runs on and on is an energy hog and a sign something’s wrong.
Check the Mounting
- Give the dryer a gentle push. Is it rock solid against the wall? Any wobble or give is a red flag that needs fixing, stat.
- Look over the casing for cracks, damage, or signs someone has tried to mess with it.
Verify Clearances
- Is that required 30" x 48" clear floor space in front of the unit completely clear?
- Scan for new obstacles. Trash cans, cleaning carts, or "Wet Floor" signs are common culprits that block access. This is hands down one of the easiest ways a compliant installation becomes non-compliant.
The most frequent compliance failures I see during facility reviews aren't from faulty dryers, but from blocked access. It’s a simple, avoidable error that completely undermines your efforts to be accessible. Regular path audits are your best defense.
Turn Your Team into Compliance Spotters
Your janitorial and maintenance staff are your eyes and ears. They’re in your restrooms every single day, which puts them in the perfect position to be your first line of defense for compliance. But they can only report what they know to look for.
Take a few minutes to train them on the "why" behind the rules. Explain that the 4-inch protrusion rule is there to protect guests with vision impairments and that clear floor space is a must-have for someone in a wheelchair. When your team gets the human impact, they’re much more likely to notice and flag problems.
Give them a dead-simple way to report issues. If someone spots a wobbly dryer or a blocked path, they should know exactly who to tell and be confident it’ll get handled. This builds a culture of shared ownership over accessibility, turning a routine cleaning shift into a crucial part of your long-term compliance strategy. It’s how you ensure every ADA compliant hand dryer you’ve installed continues to do its job for every single visitor, every single day.
Answering Your Top Questions About ADA Hand Dryers
When you're trying to get ADA compliance right, the details matter. Facility managers often run into the same handful of questions when it comes to selecting and installing hand dryers. Let's clear up some of the most common ones I hear.
What Is the 4-Inch Protrusion Rule for Hand Dryers?
This is the big one. The ADA's 4-inch rule, spelled out in Section 307.2 of the standards, is probably the most critical regulation for hand dryers. It states that any object mounted to a wall between 27 and 80 inches off the floor can't stick out more than four inches into a walkway or path of travel.
Why is this so important? This rule is a lifeline for people with visual impairments who use a cane to navigate. A cane sweeps the floor to detect obstacles, but it can’t detect something sticking out at head level. A standard hand dryer that protrudes too far is a serious hazard.
To meet this rule, you either need a slim, low-profile model designed to be under four inches deep, or you have to install a standard-depth unit inside a recessed wall kit.
Can a Surface-Mounted Hand Dryer Be ADA Compliant?
Yes, it absolutely can—but only if its total depth is four inches or less. Manufacturers have gotten really good at designing "slim" and "low-profile" ADA compliant hand dryers specifically for this purpose. They’re a fantastic solution for retrofits where cutting into a wall just isn't an option.
But if you pick a bulkier model that’s deeper than four inches, it simply cannot be surface-mounted and still be compliant. That kind of unit must be recessed into the wall to get rid of that protrusion hazard. Always, always check the official spec sheet for the exact depth before you buy.
A mistake I see all the time is assuming any dryer labeled "compact" is automatically compliant. The only number that matters is the final protrusion from the wall—if it's over four inches, it fails the test for surface mounting.
What Are the Correct Mounting Heights?
Getting the mounting height right is just as crucial as the protrusion rule. It ensures the dryer is actually usable for everyone, including people who use wheelchairs. The measurement that counts is the height from the floor to the dryer's activation sensor or button.
Here are the key heights to remember:
- For a forward approach: The sensor or button can be no higher than 48 inches from the finished floor if there's clear space for a user to roll straight up to it.
- For a side reach: If the clear floor space runs parallel to the wall, the maximum height can be up to 54 inches.
- In family or children's restrooms: It’s a great practice to install at least one dryer at a lower height. A sensor height around 38 inches works well for kids.
The manufacturer's installation guide is your best friend here. Different models have unique specs for sensor placement and airflow, so follow their guide for the most precise measurements. Picking the right model is only half the battle; installing it at the correct height is what makes it truly accessible. For business owners, gym managers, and cleaning professionals, prioritizing a clean, accessible facility sends a powerful message. Consider making disinfectant wipes a core part of your cleaning strategy to elevate hygiene standards and ensure a safer environment for everyone.
Leave a Reply