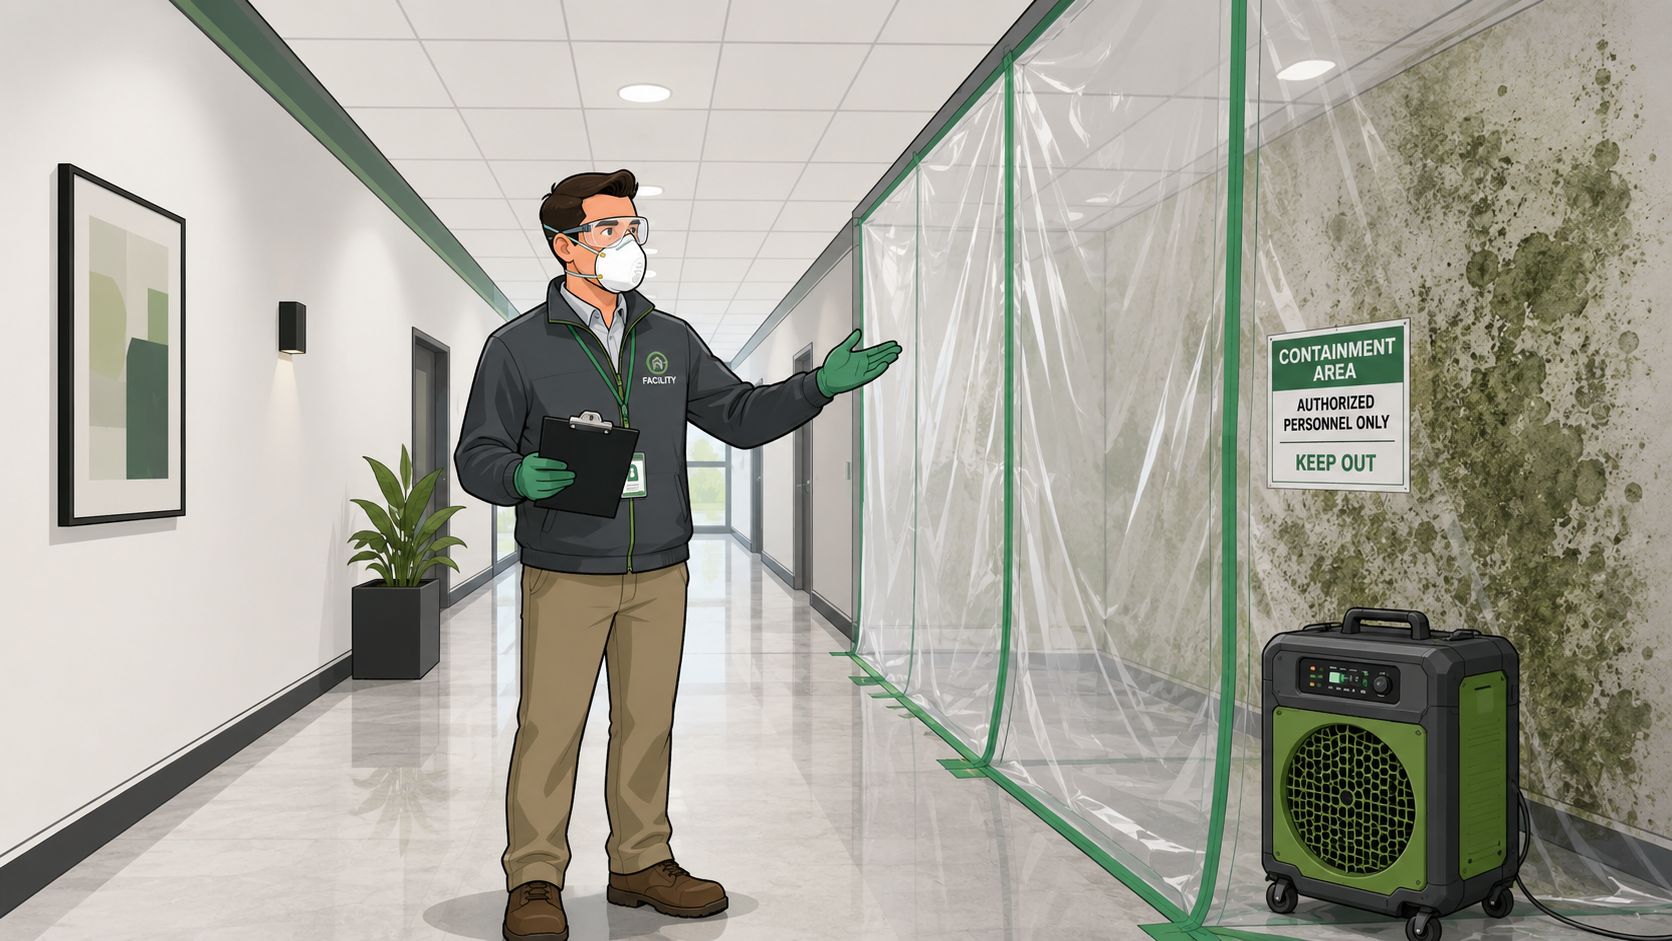
A musty odor near the breakroom sink. A stained ceiling tile after a storm. Condensation complaints in a fitness studio that sits empty between classes. That's usually how a commercial mold problem announces itself. Not with a dramatic wall of black growth, but with a small clue that tells you moisture has been winning somewhere in the building.
In commercial facilities, mold is never just a cleaning issue. It affects occupant confidence, operating schedules, vendor coordination, documentation, and liability. If you manage offices, schools, gyms, retail, hospitality space, or mixed-use properties, the primary job is to control the event without turning a localized problem into a building-wide disruption.
The good news is that commercial mold removal is manageable when you treat it like an operations incident. Speed matters. Containment matters. Documentation matters. Routine cleaning also matters, especially in the prevention phase, but wipes and disinfectants are support tools, not substitutes for source correction and physical remediation.
Assessing the Threat Your First Response to Mold
The first question isn't “What should we spray on it?” The first question is who should handle this and how fast.
Commercial mold response is built around a 48-hour moisture rule. When water gets into a building, mold growth can begin in as little as 48 hours, which is why rapid drying and moisture control are central to the response, not optional add-ons, according to SERVPRO's mold removal guidance. That's the point where a wet ceiling tile, damp drywall chase, or soaked carpet transitions from maintenance issue to remediation event.
If the affected area is small, isolated, and you have trained staff with proper protective equipment, in-house response may be reasonable. If the contamination is widespread, tied to hidden moisture, affecting occupied areas, or touching HVAC pathways, bring in a qualified remediation contractor quickly. Delay is what expands scope.
What to do in the first hour
Start with control, not cleanup.
- Restrict access: Keep staff, tenants, customers, and contractors out of the affected area unless they're part of the response.
- Document conditions: Take photos, note odors, record visible staining, and log where the issue was first reported.
- Look for the moisture source: Roof leak, plumbing failure, condensation, blocked drain, failed seal, or humidity problem.
- Pause routine cleaning in the area: Don't let anyone dry-wipe, vacuum, or tear into materials before the work plan is set.
- Consider HVAC impact: If the area is connected to active air movement, address that before spores are spread through normal operations.

What a useful initial inspection looks like
A good first inspection is visual and practical. It isn't a guess based on color alone.
Check these conditions:
| Area to inspect | What you're looking for | Why it matters |
|---|---|---|
| Ceilings and wall cavities | Stains, bubbling paint, sagging tile, damp drywall | These often point to an active moisture pathway |
| Floor finishes and baseboards | Warping, soft spots, odor, edge discoloration | Moisture often moves lower than people expect |
| Mechanical rooms and supply closets | Condensation, drain issues, standing water | Utility spaces can feed hidden spread |
| Windows and exterior walls | Repeated condensation, failed seals | Intermittent moisture can create recurring growth |
| Contents and porous materials | Wet insulation, carpet pad, ceiling tile | Some materials won't clean reliably and must be removed |
Practical rule: Don't judge severity by what's visible on the surface. Hidden moisture behind walls, above ceilings, and under flooring often drives the real scope.
One common mistake is sending a janitorial team to wipe visible spots before anyone understands the source. That can erase clues, spread contamination, and make your final report weaker. Another is assuming glass, metal, or tile conditions tell you what's happening in the wall cavity. They don't.
If you need a quick example of where that distinction matters, this breakdown on mold on glass is useful because it shows how surface growth can be straightforward while nearby framing or seal failures are not.
Questions that determine your next move
Ask these before authorizing work:
- What got wet first?
- Is the water source stopped, or still active?
- Are porous building materials involved?
- Could air movement carry spores beyond the room?
- Do occupants need to be relocated while containment is built?
Those answers shape the scope, vendor need, and communication plan. In commercial settings, fast triage protects more than drywall. It protects schedules, tenant confidence, and your ability to show due diligence later.
Building the Safe Zone Containment and HVAC Control
A mold job goes sideways when people start demolition before they establish control. The purpose of containment is simple. Keep spores inside the work zone and out of occupied space.
That's why professional remediation feels closer to setting up a surgical suite than a cleanup crew. The work area has to be isolated, pressure-managed, and kept separate from the rest of the building while contaminated material is handled.
The containment approach used today didn't appear by accident. The EPA's framework for commercial buildings became the operational standard, and OSHA-backed guidance reinforced that mold affecting less than 30 square feet may be handled by trained building staff with proper PPE, as summarized in ATI Restoration's discussion of commercial mold guidance. That shift matters because it pushed the industry away from casual tear-out and toward controlled risk management.

What containment should accomplish
Containment has three jobs:
- Separate the work area from clean areas and traffic paths
- Control airborne debris during removal and cleaning
- Support safe worker entry and waste exit without cross-contaminating the building
If the team can't explain how contaminated material will move from the work zone to disposal without exposing adjacent areas, the plan isn't ready.
HVAC decisions that help instead of hurt
“Just shut off the HVAC” sounds sensible, but building air systems are rarely that simple. In some facilities, broad shutdown creates humidity issues, pressure changes, or comfort complaints elsewhere. The smarter move is targeted HVAC control coordinated with containment design.
That usually means isolating the affected zone from shared air movement, protecting ducts and returns near the work area, and making sure remediation air handling supports negative pressure inside containment rather than pushing contaminants out into hallways.
For facilities that already manage difficult indoor air quality conditions, broader references on Solutions for industrial air pollutants can be helpful because they frame air control as an engineered building problem, not just a cleanup accessory.
A bad containment plan can turn one room offline into an entire floor of complaints.
What to confirm before removal begins
Before anyone cuts drywall or lifts carpet, confirm these points:
- Barrier layout: Entry points, exits, staging area, and protected routes for waste
- Air management: Negative air machines or HEPA air scrubbers positioned to keep flow moving into containment
- HVAC isolation: Nearby supply and return pathways assessed and managed
- Access control: Signage, restricted entry, and clear communication to occupants
- Filter maintenance: If the response relies on portable air equipment, stay disciplined about service intervals and review a practical HEPA filter replacement schedule so performance doesn't slip mid-project
Where facility teams often lose control
Containment usually fails in ordinary moments, not dramatic ones. A worker props open the flap door. A cart leaves the work area without wipe-down. A ceiling return near containment stays active. A supervisor approves after-hours demolition but forgets the cleaning crew still has access.
Commercial mold removal succeeds when control measures are boring, repetitive, and enforced. The best crews don't improvise the basics. They build the zone, verify airflow, train the people entering it, and only then start disturbing material.
The Remediation Workflow Safe Removal and Cleaning
Once containment is stable, the work splits into two very different tracks. Removal for materials that can't be saved. Cleaning for surfaces that can. Confusing those two is one of the most expensive mistakes in commercial mold removal.
Mold isn't solved by spraying over contamination. Physical removal of impacted material is often the primary work. Disinfectants and antimicrobials have a place, but they come after gross contamination and damaged material have been addressed, not before.

What gets removed and what gets cleaned
Porous materials are usually the dividing line. If mold has penetrated materials like drywall, insulation, ceiling tiles, carpet pad, or other non-salvageable porous components, removal is often the correct decision. Nonporous or semi-porous surfaces may be cleanable if they are structurally sound and the source issue has been corrected.
Inexperienced teams waste time trying to “save” low-value porous materials with aggressive surface treatment, then end up tearing them out anyway after odor or staining returns.
A practical comparison looks like this:
| Material type | Typical response | Why |
|---|---|---|
| Drywall with mold growth | Cut out affected sections | Porous materials don't clean reliably once impacted |
| Wet ceiling tile | Remove and discard | Low salvage value and poor cleanability |
| Metal framing | Clean and dry thoroughly | Nonporous substrate may be recoverable |
| Glass and hard plastic | Clean after contamination is removed | Surface cleaning can be effective if moisture is controlled |
| Carpet and pad | Often remove if contaminated | Hidden growth and retained moisture are common |
How waste handling should work
The EPA is very specific here. Non-salvageable mold-contaminated materials should be double-bagged in 6-mil polyethylene before removal, and the containment enclosure should use a single layer of fire-retardant 6-mil polyethylene with slit entry and flap access, according to the EPA commercial remediation guidance. That same guidance warns against removing contaminated materials without bagging them inside containment because it increases spore dispersion.
That detail matters on live commercial sites. If workers drag open debris through corridors, loading docks, or service elevators without proper bagging, you haven't contained the event. You've exported it.
A field-tested workflow
A dependable remediation sequence usually looks like this:
- Stabilize the work zone. Confirm barriers, negative air, PPE, and protected waste routes.
- Remove non-salvageable porous material. Cut carefully. Bag inside containment. Avoid unnecessary breakage.
- HEPA capture and detailed cleaning. Remove settled particulates from structural elements and hard surfaces.
- Dry the assembly. Cavities, framing, and subfloors need to be dry before closure.
- Apply final surface treatment where appropriate. Antimicrobial or disinfectant products may be used as a finishing step on suitable surfaces, not as a substitute for removal.
- Inspect before rebuild. If odor, visible residue, or moisture remains, the job isn't ready for restoration.
Field note: Surface shine doesn't equal successful remediation. A cavity can look clean and still be too wet to close.
Where disinfectant wipes fit and where they don't
For janitorial teams and facility operators, this is the distinction worth remembering. Disinfectant wipes are useful on cleanable, hard, high-touch surfaces after contamination has been physically removed and the area is dry. They are not a primary mold remediation tool for drywall cavities, carpet backing, insulation, or hidden structural moisture.
Used correctly, wipes help support the reset phase and the preventive program that follows. In offices, that means shared desks, door hardware, conference tables, breakroom touchpoints, and restroom dispensers. In gyms, it means equipment grips, benches, touchscreen consoles, lockers, and counter surfaces. In schools and retail, it means the touch surfaces people contact all day and cleaning crews have to service fast.
That matters operationally because teams often need a simple way to maintain visible hygiene during and after a building incident. Wipes are portable, fast to deploy, and useful when you need controlled application on hard surfaces without dragging extra buckets and tools through occupied space.
If the moisture source came from above, don't ignore the exterior path. Roof-related failures often masquerade as interior mold problems, so practical references on roof care from Four Seasons Roofing can help facility teams ask better questions about flashings, penetrations, drainage, and recurring wetting at the envelope.
What doesn't work
These approaches create rework more often than results:
- Bleach-first thinking: It doesn't replace removal of damaged porous material.
- Open-air demolition: Disturbing mold without containment spreads debris and spores.
- Rebuild before dry-down: Closing walls too soon invites a repeat event.
- Overreliance on scent: Deodorizing a room doesn't verify that contamination is gone.
- Janitorial substitution: Housekeeping teams can support the process, but they shouldn't be pushed into remediation work outside their training and scope.
The crews that do this well stay disciplined. They remove what can't be saved, clean what can, dry the structure, and resist the urge to rush to cosmetic closure.
After the Cleanup Verification and Documentation
A clean-looking room is not the same thing as a completed remediation. Commercial jobs end properly when the site can be shown to be dry, visibly clean, and free of the conditions that caused the problem in the first place.
That last part is what many owners miss. If the leak, humidity issue, or ventilation problem remains unresolved, the project isn't finished. It has only paused.
What verification should confirm
Verification has both a building side and a documentation side.
On the building side, the post-remediation check should answer:
- Has the water source been corrected?
- Are visible mold and mold-related debris gone?
- Are moldy odors gone?
- Is the area dry enough for closure and restoration?
- Were containment and cleanup completed without spreading contamination into adjacent areas?
The standard isn't perfection in the abstract. It's whether the affected area has been returned to a clean, dry condition consistent with normal building use and without ongoing moisture intrusion.
Why independent review matters
On larger or more sensitive projects, a third-party post-remediation review is often the best way to protect everyone involved. Owners get a more defensible record. Contractors avoid self-certifying their own performance. Occupants and tenants get a clearer basis for re-entry decisions.
This matters most in schools, medical-adjacent spaces, hospitality settings, fitness facilities, and any building where reputational risk is as important as the repair itself. If you're asked later what was found, what was removed, how the work area was controlled, and why occupancy resumed, your records need to answer that without guesswork.
The report is not clerical cleanup. It's the file you'll rely on if a tenant, insurer, regulator, or future buyer asks what happened in that space.
What a final remediation file should include
A useful closeout package usually contains:
| Document element | Why it matters |
|---|---|
| Initial assessment notes | Shows when the issue was identified and what conditions were observed |
| Photos before, during, and after | Documents scope, containment, and completed condition |
| Scope of work | Defines what the contractor was hired to remove, clean, dry, and restore |
| Moisture-source correction record | Shows the root cause was addressed, not ignored |
| Waste handling records | Supports proper disposal and chain of work |
| Post-remediation findings | Confirms visual cleanliness, dryness, and readiness for rebuild or occupancy |
Common closeout mistakes
The biggest mistakes are administrative, not technical.
One is issuing a “completed” notice before the cause of moisture has been corrected. Another is accepting a vendor invoice as if it were a remediation report. A paid bill proves payment. It doesn't prove due diligence. The third is failing to align internal stakeholders. Facilities, risk, operations, janitorial leadership, and management should all know what was remediated, what was restored, and what preventive steps are now required.
If your building is leased or open to the public, strong documentation also helps with continuity planning. It gives managers a factual basis for tenant communication, reopening decisions, and vendor performance review.
Selecting the Right Partner Vetting Commercial Mold Vendors
Price-only buying is one of the worst habits in commercial mold response. It feels efficient in the moment, but it usually shifts risk back onto the owner.
A low number on a proposal can hide weak containment, vague drying language, poor documentation, no third-party coordination, or exclusions that leave your team paying for rework later. When that happens, you're not saving money. You're financing uncertainty.
What separates a dependable vendor from a risky one
The best vendors don't just promise cleanup. They explain scope, controls, sequencing, and documentation in a way your operations team can evaluate.
Look for these essential qualities:
- Commercial experience: They should understand occupied buildings, phased work, after-hours scheduling, and sensitive operations.
- Clear scope language: The proposal should distinguish assessment, containment, removal, cleaning, drying, and restoration.
- Insurance fit: Ask specifically about liability coverage and whether their policy structure matches environmental and remediation exposure.
- Document discipline: They should be prepared to produce photo logs, moisture records, and closeout reporting.
- Operational communication: They need a process for coordinating with facility management, not just a field crew and invoice.

Questions worth asking before you sign
Ask direct questions and listen for direct answers.
How will you contain this specific area?
A serious vendor can describe the barrier strategy, air control, and waste route.What materials do you expect to remove versus clean?
If the answer is fuzzy, the scope may be fuzzy too.Who documents moisture correction?
Remediation without root-cause correction is incomplete.How will you protect occupied operations nearby?
Regarding this, experienced commercial contractors stand out.What does closeout include?
You want more than “we'll leave it clean.”
A broader guide to commercial restoration services can also help buyers compare vendors across emergency response categories, especially if your mold issue is tied to larger water or building-damage conditions.
How sales teams should frame the value
If you sell cleaning and restoration services, don't pitch mold work as commodity labor. Buyers who care about compliance and continuity respond better to risk-based language than generic promises.
Frame the value like this:
- Reduced operational disruption through containment and phased work
- Stronger defensibility through documentation and verification
- Lower repeat-loss risk when moisture correction is part of the scope
- Better occupant confidence when the process is visible and controlled
Cheap proposals often leave out the exact parts owners need most when a problem comes back.
Red flags that should slow you down
A few proposal traits should make any facility leader pause:
- No mention of containment
- No distinction between cleaning and demolition
- No plan for moisture-source correction
- No clear waste handling method
- No discussion of post-remediation reporting
Commercial mold removal isn't won by buying the lowest line item. It's won by choosing the contractor who reduces uncertainty, protects occupants, and leaves behind a file you can defend.
From Reactive to Proactive A Long-Term Prevention Plan
The strongest mold program starts after the emergency is over. Once you've paid for remediation, disruption, communication, and restoration, the goal shifts from response to prevention.
That requires a change in mindset. Mold prevention isn't only about leaks. It's about moisture management plus routine hygiene plus staff habits.
One of the most overlooked risks sits in buildings that don't look damaged at all. Mold risk is high in spaces with intermittent occupancy or variable humidity, and guidance highlighted by Panhandle Cleaning & Restoration's discussion of commercial mold risk notes that poor ventilation or high humidity can drive growth even without a major leak. That's especially relevant for event venues, seasonal properties, short-term occupancy spaces, locker rooms, and fitness facilities that cycle between heavy use and quiet hours.
What a practical prevention plan looks like
A useful long-term program has operational habits, not just inspection forms.
Building checks that catch problems early
- Inspect moisture-prone zones: Restrooms, locker rooms, breakrooms, exterior walls, roof penetrations, and mechanical rooms
- Watch intermittent-use spaces: Training rooms, event areas, vacant suites, and storage rooms often get less daily attention
- Flag odors quickly: Musty odor should trigger a moisture check, not air freshener
- Track recurring complaints: Repeated condensation or dampness reports usually point to a system issue
Cleaning routines that support prevention
Routine cleaning won't replace remediation, but it does support a healthier, drier building. Surfaces that stay soiled, damp, or neglected tend to hide early warning signs. Daily wipe-downs also force staff to put eyes on the spaces that occupants touch most.
For janitorial and operations teams, disinfectant wipes work best when they're deployed with discipline:
| Facility type | High-touch areas for wipes | Practical note |
|---|---|---|
| Offices | Door handles, shared desks, breakroom counters, conference remotes | Pair wipe-downs with checks for leaks under sinks and around windows |
| Gyms | Machine grips, benches, lockers, touchscreen consoles | Dry sweat-prone surfaces promptly and monitor humidity closely |
| Schools | Desks, faucet handles, railings, nurse station counters | Train staff to report odor and staining during routine rounds |
| Retail | Payment terminals, counter edges, fitting room touchpoints | Keep back-of-house stockrooms on the inspection schedule too |
| Restaurants | Host stands, POS stations, cooler handles, prep-adjacent hard surfaces | Cleaning teams should separate sanitation tasks from moisture investigation |
The sales angle facility teams often overlook
If you sell cleaning supplies or janitorial programs, mold prevention is a strong education opportunity. Don't oversell wipes as a cure for mold. Position them correctly as part of a broader hygiene and inspection routine.
That's a better conversation with clients because it connects visible cleanliness to operational vigilance. Wipes help staff clean fast, standardize response on hard surfaces, and maintain touchpoint hygiene between deeper cleaning rounds. They also make compliance easier in busy spaces where carts and spray bottles slow people down.
Training beats overreaction
Most repeat mold problems don't happen because nobody cared. They happen because staff didn't know what to escalate.
Train teams to report these conditions immediately:
- New staining on ceilings or walls
- Persistent condensation
- Musty odor in one repeat location
- Damp porous materials
- HVAC or ventilation complaints tied to humidity
A clean facility is easier to inspect. A dry facility is harder for mold to reclaim. The long-term win comes from combining both.
Commercial mold removal works when you treat it as both a remediation project and an operations discipline. Move fast on moisture. Contain before you disturb. Remove what can't be saved. Verify the result. Then build preventive cleaning and inspection habits that keep the building from sliding back.
If you manage facilities or sell cleaning programs, make daily hygiene part of that prevention plan. High-touch wipe-downs, faster spot response, and consistent surface care help teams notice trouble earlier and maintain a stronger standard of cleanliness. We recommend Wipes.com Disinfectant Wipes as a practical option to support daily routines. Prioritize clean, dry, well-observed spaces, and your building will be easier to protect.
Leave a Reply