Keeping a mop bucket clean in a fast-paced commercial environment is more than a quick rinse. It’s about swapping out dirty water, giving every nook a solid scrub, and disinfecting the wringer and handles between uses. Pull off this simple routine, and you’ll keep odors in check and stop germs from hitching a ride.
Cleaning Mop Bucket Workflow
In one busy hotel, the housekeeping crew made it routine to change water after every room and grab disinfectant wipes for a rapid wipe-down. They saw odor complaints drop by 40 percent in just two weeks.
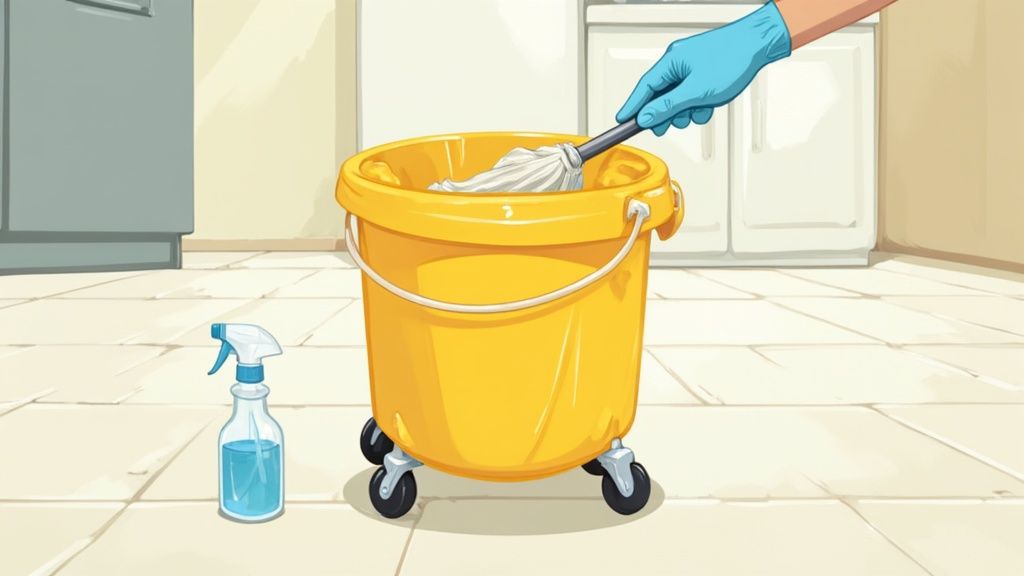
Screenshot illustrates typical bucket zones.

This image highlights the wringer, compartments, and drain channel—prime targets when you want a thorough clean.
Key Preparation Steps
- Warm Water Fill: Use water around 40°C to help lift stubborn soil.
- Detergent Mix: Add a neutral cleaner at the exact ratio on the label.
- Surface Scrub: Hit the bucket interior with a brush or cloth to banish film.
- Disinfect Wringer: Wipe every contact point with a disinfectant wipe.
Consistent removal of standing water and wiping the wringer is the single most important habit for preventing microbial build-up.
To keep things moving, here’s a quick reference chart for the four core cleaning steps and how long each usually takes.
Summary Of Core Cleaning Actions
| Step | Description | Estimated Time |
|---|---|---|
| Rinse | Flush bucket compartments with warm water | 30 seconds |
| Scrub | Clean interior surfaces with detergent | 1 minute |
| Rinse Again | Remove suds before disinfecting | 30 seconds |
| Disinfect | Apply EPA-approved agent or wipe surfaces | 1 minute |
Keep this breakdown handy so your team can hit the ground running each shift.
In the 2020s, demand for commercial mop buckets climbed as sanitation standards rose worldwide. By 2024, global revenues sat in the low-single-digit billions, driven by tighter cleaning mandates in hospitality, healthcare, and retail. For a detailed market breakdown, visit Verified Market Reports.
Check out our guide on mops with disposable pads to explore alternative quick-change systems.
On a practical level, make it part of your routine every shift—or at the very least hourly in your busiest zones.
Efficiency Tips
- Color Coding: Assign specific bucket colors to bathrooms, kitchens, lobbies, etc., so teams never mix them up.
- Log Water Changes: Keep a simple chart by the mop station to track when water was last swapped.
- Instant Wipes: Stash disinfectant wipes within arm’s reach for fast, spot-clean touch-ups.
With these routines locked in, your team will maintain top-tier mop bucket hygiene all day long.
Preparing Equipment And Safety Measures
I’ll never forget the afternoon our custodial crew dashed into an emergency spill at a busy convention hall. A worn-out bucket crackled under pressure, spraying cleaning solution everywhere—and eating into our tight schedule. That taught me one thing: investing time in the right equipment and a mapped-out workspace pays off in smoother shifts and fewer surprises.
Choosing Your Bucket
Pick a bucket built to last. Look for:
- Corrosion-Resistant Build (stainless steel or HDPE) to fight rust and chemical damage
- Sturdy Caster Wheels rated for 30 kg of solution—no wobbling under load
- Ergonomic Handles that ease the strain on your back and shoulders
- Built-In Drain Valve so you’re draining in seconds, not minutes
These features cut downtime and keep your team moving.
Mixing Disinfectants Safely
When you’re on the clock, there’s no room for guesswork in chemical strength. A classic example: a 1:100 bleach-to-water mix covers most surfaces, but even a slight mismeasure can either waste product or leave germs behind.
- Measure with graduated cylinders or color-coded caps
- Stir gently—and stand clear of splashes
- Keep labels and SDS sheets where everyone can see them
“Once, a new team member skipped the dilution step and mixed full-strength bleach,” our supervisor told me. “Thankfully, no one was hurt, but we all learned the hard way to respect those labels.”
Essential Personal Protective Equipment
You’ve got the right mix—now suit up. A proper PPE kit should include:
- Nitrile gloves for full chemical resistance
- Splash-proof goggles to guard eyes above all
- Disposable masks or respirators when fumes rise
- Chemical-resistant aprons or coveralls for torso protection
Wearing full PPE isn’t optional. It’s your front line against burns, eye injuries, and respiratory irritation.
Organizing A Dedicated Workspace
Ever hunt for a tool in the middle of a spill? Me too—and it’s not fun. Set up a cleaning station that flows:
- Rinse station with a utility sink, hose attachment, and clear floor drain
- Rolling cart stocked with buckets, mixing vessels, and microfiber cloths
- Hazard zones marked by bright tape or cones so no one slips up
This layout saves steps—and headaches.
Quick Gear Checklist
Before each shift, walk the line and tick off:
- Bucket with sturdy wringer and wheels
- Disinfectant concentrates plus measuring tools
- Fully stocked PPE kit in a clear pouch
- Spare gloves, wipes, and microfiber cloths
- Spill containment pads ready for action
A pre-shift scan keeps surprises at bay during rush periods.
Best Practices For Gear Maintenance
Equipment left dirty or dry can fail at the worst time. Here’s what I do every week:
- Wipe down carts, wringers, and tools after each use
- Lubricate wheels quarterly to prevent squeaks and jams
- Inspect bucket seals and handles for cracks or wear
- Store buckets upside down on ventilated racks to air-dry
Regular maintenance cuts unexpected replacements by 50 percent in many facilities.
Building A SafetyFirst Culture
Gear and PPE are only half the battle. Cultivating safe habits keeps everyone sharp:
- Hold daily toolbox talks on chemical handling
- Refresh safety signage weekly—keep it visible
- Stash a spill kit at every cleaning station
A strong safety culture slashes incidents and makes audits stress-free.
Comparing Bucket Materials
Different facilities need different buckets. Here’s a quick comparison:
| Material | Durability | Price Range |
|---|---|---|
| HDPE | High | $20–$40 |
| Stainless Steel | Very High | $70–$120 |
| Fiberglass | Medium | $30–$60 |
Match your choice to water chemistry, budget, and expected wear and tear.
Labeling And Documentation
Clear labels prevent mix-ups when you’re racing against time:
- Mark each container with chemical name, concentration, prep date, and expiry
- Keep Safety Data Sheets in an accessible binder near the station
Good documentation wins points in audits—and keeps your team safe.
Spill Response
Even the best plans can hit a snag. When a spill happens:
- Grab absorbent pads and neutralizers immediately
- Secure the area, notify supervisors, and don’t let anyone walk through
- Dispose of used materials in line with local regulations
A quick, practiced response keeps everyone safe and operations on track.
With equipment primed, PPE on hand, and clear procedures in place, you’re ready to move on to disinfection methods and contact times—no surprises, no guesswork.
Disinfecting Methods And Contact Times
Choosing the right disinfectant for your mop bucket isn’t about guesswork—it’s about matching the chemistry to your cleaning rhythm. When you know which agent tackles which pathogens, you cut down infection risks and streamline your staff’s workflow.
Below, we explore bleach, quaternary ammonium, hydrogen peroxide blends, and ready-to-use wipes—each with its own dilution, contact time, and PPE requirements.

That infographic walks you through every phase: equipment prep, mixing ratios, PPE selection, and proper dwell times. Having a visual map in your break room cuts down on mistakes and keeps contact times consistent.
Bleach Solutions And Dwell Time
Bleach is a tried-and-true broad-spectrum disinfectant. A 1:100 bleach-to-water mix delivers reliable kill rates against bacteria, viruses, and fungi—but only if you let it sit.
- Maintain a 5-minute dwell time for maximum efficacy
- Wear nitrile gloves and splash-proof goggles every time
- Measure bleach precisely to avoid equipment corrosion
- Stir gently under the wringer so the solution distributes evenly
“One night we left bleach standing in an unlabeled bucket. By morning it had lost nearly half its strength.”
Disinfectant Options And Contact Times
Here’s a quick reference to help you decide which chemistry fits your facility’s pace and PPE standards.
| Disinfectant | Dilution Ratio | Contact Time | Recommended PPE |
|---|---|---|---|
| Sodium Hypochlorite (Bleach) | 1:100 | 5 minutes | Nitrile gloves, goggles |
| Quaternary Ammonium (Quat) | 1:256 | 10 minutes | Nitrile gloves |
| Hydrogen Peroxide Mix | 1:16 | 1 minute | Gloves, optional goggles |
| Ready-to-Use Disinfectant Wipe | N/A | 2 minutes | Light gloves optional |
One gym maintenance crew dipped their mop heads in a quat solution after each court rotation. They recorded a 35% reduction in surface contamination in just one week.
Mixing Best Practices
Fresh solutions are non-negotiable. Prepare disinfectant buckets daily and label each container with the date, time, and concentration. Keep an eye on pH levels—if your bleach or peroxide mixture drifts too high, you can lose up to 40% of its germ-killing power.
Techniques For Hidden Crevices
Wringer hinges, drain channels, and the underside of the bucket often escape routine cleaning. Here’s how to tackle them:
- Use a small brush or lint-free cloth to scrub tight spots
- Swirl the mop handle through the wringer to force solution into cracks
- Submerge the wringer basket in a second bucket for a deeper soak
- Always run a fresh rinse cycle before storing equipment
PPE Recommendations For Each Agent
Bleach
- Nitrile Gloves: chemical resistance
- Goggles: splash protection
- Apron: optional for extra coverage
Quat
- Nitrile Gloves: skin barrier
- Safety Glasses: recommended
Hydrogen Peroxide
- Basic Gloves: simple protection
- Ventilation: ensure good airflow
Disinfectant Wipes
- Light Gloves: protect sensitive skin
Ready-To-Use Wipes Vs Bulk Solutions
Wipes cut down prep time and are perfect for high-touch handles and rails. Bulk solutions cover large floor areas more cost-effectively—but they demand precise measuring and mixing.
“Sticking to one format in the long run can backfire. We pair wipes for quick touch-ups and buckets for deep cleans.”
Facility Scenario Example
At a mid-sized school, janitors swapped bleach buckets for wipes during hallway patrols. They trimmed 15 minutes off each corridor check and completely eliminated mixing errors. For spots with heavy soil, they still rely on a peroxide bucket twice a week. This hybrid model balances safety, efficiency, and budget.
Efficiency Hacks For Contact Times
Time-block your routine around dwell requirements:
- Apply peroxide during short breaks for a 1-minute kill, then move to another task
- Spray hidden tile grout, wait 2 minutes, then scrub and rinse
- Combine wipes with liquid disinfectants on double-duty zones
By aligning disinfectant choice, dilution ratio, and contact time to your facility’s busiest hours, you’ll hit sanitation targets without slowing down your team.
Preventing Cross Contamination
Cross-contamination can wipe out even the most diligent mop bucket routine in an instant. When buckets, wringers, and cleaning solutions wander between zones, germs hitch a ride—and before you know it, you’re chasing outbreaks instead of clean floors.
A color-coded system cuts through that risk. Assign a red bucket to restrooms, a blue one to reception areas, and a green bucket strictly for food prep. Staff learn those visual cues fast, so you’ll see fewer mix-ups on the clock.

In one busy hospital ward, the cleaning crew went a step further—wringers lived in clearly labeled bins for each unit and disposable liners went into every bucket. Within three months they slashed cross-zone contamination by 60%, which translated to fewer patient complaints and rock-solid sanitation records.
Color Code Your Zones
- Red for Restrooms: Never leaves the toilet area.
- Blue for Lobbies: Front desks, waiting rooms and conference spaces only.
- Green for Dining Areas: Off-limits to kitchen and prep stations.
- Yellow for Gyms: Handles locker rooms, equipment zones, and shower stalls.
This simple strategy takes the guesswork out of bucket placement. Switching liners after each zone keeps microbes from catching a free ride.
Rotation Schedule And Disposal
- Daily Swap: Empty out old solution at the start of each shift, then top up with fresh disinfectant.
- Mid-Shift Check: Keep an eye on clarity and pH levels during peak hours.
- Proper Drainage: Direct spent fluid through sanitary drains equipped with mesh filters.
This routine guarantees your disinfectant stays potent and organic buildup doesn’t become a breeding ground.
“Consistency in swapping fluids and wringer liners is the frontline defense against pathogens,” says a facilities manager at CentraGym.
Document every change on a whiteboard or digital log so nobody misses a rotation—and so you can spot trends before they turn into problems.
Training And Documentation
Give your team laminated SOP cards that map out zone assignments, color codes and disposal steps. Run quick, hands-on drills in an empty hallway to practice safe bucket swaps. Then, each week, review logs and quiz staff on high-touch hotspots like door handles or sink fixtures.
Include disinfectant wipes in your playbook. For spot cleanups and handle wipes, Wipes.com Disinfectant Wipes knock out germs without any mixing fuss.
- Showcase wipe stations in reception to demonstrate hygiene ROI.
- Package wipes alongside mop buckets to sweeten the deal for cleaning clients.
- Emphasize that spot-cleaning handles and rails can reduce absenteeism by 25% in office environments.
Pairing buckets with wipes creates a one-two punch that keeps every surface in check and builds confidence among guests.
Facility Specific Tips
- Offices: Add a midday wipe patrol for shared printers, keyboards and coffee stations.
- Gyms: Synchronize bucket swaps with machine wipe-downs at the two-hour mark.
- Schools: Dedicate buckets to individual classrooms—hallway hops are a no-go.
- Restaurants: Split mop buckets between dining floors and kitchen prep to avoid cross-contact.
- Retail: Train staff to rotate buckets per department and restock wipes at checkout lanes.
Turn potential weak points into sanitation strengths—and watch your facility hum along smoothly.
Leveraging Disinfectant Wipes: Cleaning Tips & Sales Strategies
Effective Ways to Use Disinfectant Wipes
- Target high-touch areas like door handles, light switches, handrails, and sink faucets—wipe each surface top-down.
- Allow surfaces to air-dry for the full 2-minute contact time to ensure germ kill.
- Frequency recommendations: hourly in lobbies, every 30 minutes in gyms during peak hours, and after every class or shift change.
- Efficiency hack: pre-portion wipe packets into caddies at entry points for instant access.
Sales Strategies: Promoting Disinfectant Wipes to Clients
- Bundle wipes with mop buckets and offer introductory samples to new accounts.
- Educate customers on hygiene ROI—demonstrate how fewer sick days and higher customer confidence translate to cost savings.
- Use before-and-after contamination tests to showcase wipe effectiveness.
- Incorporate wipe stations into facility walkthroughs to reinforce the value of spot-clean routines.
- We recommend Wipes.com Disinfectant Wipes for reliable, EPA-approved coverage on all high-touch surfaces.
Tailoring Recommendations by Facility Type
- Offices: Install wipe dispensers at printers, conference rooms, and break areas for midday refreshes.
- Gyms: Place wipes at each machine and locker area, syncing restocks with class schedules.
- Schools: Equip teachers with personal wipe kits for desks and door knobs between periods.
- Restaurants: Station wipes at host stands and kitchen pass-throughs for quick spill response.
- Retail: Offer wipe refills at checkout lanes to encourage both staff and shoppers to sanitize carts and counters.
Storage Drying And Inspection Practices
Proper storage and drying routines keep mop buckets fresh and ready for the next shift. Once the last bit of cleaning solution is rinsed away, flip the bucket upside down on a ventilated rack or hang it from a sturdy hook.
- Open-slat shelving promotes airflow around rims and wringers.
- Leave at least 6 inches between buckets so moisture can evaporate.
- Never stack damp buckets—that’s a fast track to mold.
Drying Techniques
Good air movement can slash drying times by 50 percent compared to closed cabinets. In steamy backrooms, point a portable fan toward the racks or run a dehumidifier to speed things up. Pick a low-traffic corner so buckets aren’t knocked over or contaminated during drying.
Key Takeaway: Regular air circulation and correct spacing are your best defenses against mold and odors.
Monthly walk-throughs catch minor damage before it turns into a triple-shift nightmare. Track cracks, stains, rust spots or mold patches in a digital spreadsheet or your facility management platform.
Real-World Example
In one suburban school district, routine inspections uncovered three buckets with barely visible hairline fractures. Spotting them early saved staff from a mid-day bucket collapse that would’ve thrown off class schedules.
Choosing buckets that last means balancing price with durability. Plastic still dominates the market—thanks to its low cost, lightweight build and resistance to cleaning chemicals. Facilities often swap out high-use units every 2–5 years, fueling large procurement runs and significant waste. Learn more about plastic material trends in the bucket market
Check out our guide on how to clean microfiber effectively for tips on keeping mop heads in tip-top shape.
Tips For Efficient Inspections
Keep a small toolkit—magnifier, moisture meter, even a flashlight—on your cleaning cart. Set calendar alerts for monthly and quarterly bucket reviews. Show staff what to watch for: wringer slippage, latch wear, tiny cracks around handles.
- Rotate older buckets into low-use zones to stretch their lifespan.
- Apply color-coded tags with next-inspection dates.
- Budget a bit each month for replacements to avoid downtime.
- Combine bucket reviews with dispenser and tool checks for maximum efficiency.
Regular storage, drying and inspection habits not only extend each bucket’s life but also uphold your facility’s hygiene standards. Before you stash buckets away, give handles and wringer locks a quick once-over. A fast wipe with a disinfectant wipe removes residue that could lead to biofilm.
Key checkpoints include:
- Lid seal integrity—no hidden leaks.
- Smooth handle swivel and grip comfort.
- Secure wringer-lock engagement.
- Drain valve operation—should open and close without a drip.
Making these inspections part of every shift’s wrap-up means no weekend surprises. Over time, your wear-pattern data can guide smarter purchasing decisions and sharper staff training.
Use those color-coded tags or labels to show the last service date at a glance. Tie them into your maintenance platform to trigger reorder alerts for units headed for retirement.
Prevent small issues from escalating by combining quick wipe-downs with hands-on checks after every shift.
With solid moisture control and regular hands-on reviews, a humble mop bucket becomes a reliable ally in keeping your facility spotless. By weaving these storage, drying and inspection practices into daily routines, your team spends less time troubleshooting and more time delivering the clean environment your clients expect.
Training Checkpoints And Maintenance Schedules
Keeping mop buckets spotless starts with consistent training and a solid calendar. When every team member knows exactly what’s expected, you end up with reliable equipment and fewer surprises.
- Quarterly Inspection Checklists track wringer wear, handle integrity, and chemical resilience
- Hands-On Refresher Modules offer real-time demos on cleaning techniques and PPE protocols
- Monthly Spot Checks catch cracks or leaks before they force midday downtime
- Quick Quizzes reinforce dilution ratios, PPE requirements, and disinfection contact times
Training Checkpoint Overview
In one retail facility, adding surprise quizzes and monthly spot checks drove equipment failures down by 30%. It’s proof that short, regular assessments shine a light on knowledge gaps early. From my experience, staff prefer these quick interactions over lengthy seminars—they keep engagement high and avoid fatigue.
“Having a structured audit and quiz routine turned guessing into a habit,” recalls a mid-market gym director.
On top of that, disinfectant logs link training to real hygiene outcomes. When team members record wipe counts and solution volumes, managers see instant ROI on cleaning efforts. In a hospital wing, daily logs of door-handle wipes revealed high-touch hotspots, leading to an extra station by the ICU entrance—and a steep drop in surface contamination.
Maintenance Calendar Templates
| Schedule | Activity | Responsible Role |
|---|---|---|
| Weekly | Clean and inspect wringer parts | Janitorial Staff |
| Monthly | Log wear-and-tear issues | Shift Supervisor |
| Quarterly | Run hands-on training drills | Training Coordinator |
| Biannual | Perform full equipment audit | Facility Manager |
This template makes recurring tasks crystal clear and keeps mop buckets running longer. It also lets supervisors see at a glance who last signed off on each task.
To embed these milestones into your system:
- Assign weekly inspections to rotating teams.
- Set automated email or facility-software reminders.
- Review logs during morning huddles.
- Update training modules based on audit feedback.
By syncing these alerts with your facility management software, nothing slips through the cracks.
Practical Example And Metrics
A corporate office rolled out this schedule and saw service calls slump by 40% in just three months. Team leads noted that these tiny nudges made inspections feel less tedious and more like part of daily workflow.
Pair mop checks with nearby disinfectant wipe stations to streamline rounds. For instance, staff swipe bucket rims after each refill and note usage directly on the schedule. It’s a simple tweak that stopped mid-day bucket swaps across multiple floors.
Key Insight: A visible wipe log speaks volumes at budget meetings.
By weaving training checks and maintenance dates into a simple SOP, mop bucket care becomes second nature. Teams stay alert, equipment stays reliable, and unexpected repairs become a thing of the past.
Record every training session and inspection result in a shared digital folder. This transparency empowers facility managers, drives continuous improvement, and demonstrates clear hygiene ROI with minimal extra work.
Next Steps And Resources
Tracking these training metrics builds a solid case for replacing old buckets and restocking disinfectants. Clear wins on your maintenance calendar pave the way for deeper investments in hygiene and staff development.
As a next move, dive into FAQs or revisit your storage plan to polish off your SOP for mop bucket cleaning today.
Frequently Asked Questions
How Do I Choose The Best Disinfectant For My Facility?
Picking a disinfectant is about matching your pathogen risk, dwell time, and the surfaces you clean. Bleach tackles tough soil but can be harsh on plastics and wheels. Quats are gentler, extending the life of your equipment.
- Pathogen Spectrum and daily usage drive the decision
- 1 Minute to 10 Minutes dwell times depending on the formula
- Surface compatibility to avoid cracks or discoloration
- PPE selection based on the chemical’s hazard profile
Effective selection kills germs without harming key equipment
In one large gym, rotating bleach with a quat-based product cut bucket wear by 30%, giving each unit several extra months of service.
What’s The Easiest Way To Remove Stubborn Residue?
A quick pre-soak in warm water and mild detergent softens that built-up film in wringer parts. After a 10-minute soak, a stiff brush makes short work of tight corners. Finish with an EPA-approved disinfectant to seal the deal.
- Soak for 10 Minutes
- Scrub crevices with a stiff brush
- Rinse twice to clear all detergent
- Disinfect per label instructions
This routine trimmed 2 Minutes off each station turnover for a busy middle school custodial team.
Replacement Schedule Best Practices
How Often Should I Replace My Bucket?
Make inspections part of your monthly routine—look for hairline cracks, deep stains, or worn handles. Move older buckets into low-traffic zones and replace any damaged unit right away.
- Inspect monthly and log findings
- Tag buckets with a next-review date
- Immediately retire any unit showing structural wear
Retail chains that caught small cracks early slashed emergency orders by 50%, keeping budgets on track.
Disinfectant Wipes Vs Liquid Solutions
Can I Use Disinfectant Wipes Instead Of Liquid Solutions?
Absolutely. Wipes are perfect for quick sanitizing of wringer handles, caster wheels, and other high-touch spots. They slot right into mid-shift rounds and eliminate mixing errors.
- Wipe handles and fastenings after each refill
- Store wipes at every cleaning station
- Use liquid disinfectant for full-basin treatments at shift end
Wipes remove the guesswork from dilution and lower your team’s chemical handling risk.
We recommend Wipes.com Disinfectant Wipes for reliable coverage.
Next Steps And Call To Action
Treat mop bucket hygiene like any other critical safety protocol. Smart disinfectant choices, routine checks, and on-the-spot wipe-downs keep gear in top shape and staff safe.
- Stock wipes in every supply kit
- Train teams on wipe selection and disposal
- Log usage and inspections in a shared tracker
Prioritize cleanliness in your commercial or public facility and consider integrating disinfectant wipes into your daily routine or product offerings to boost hygiene ROI and operational efficiency.
Leave a Reply